
Papercraft Postcard Tutorial
You can see all the handmade papercraft postcards I’ve made over the years here
I’m sure there are many ways to make a papercrafted postcard. This tutorial is how I make many of mine.
The most important thing in making a papercrafted postcard is to make sure it is sturdy and nothing added to it will come loose in the mail.
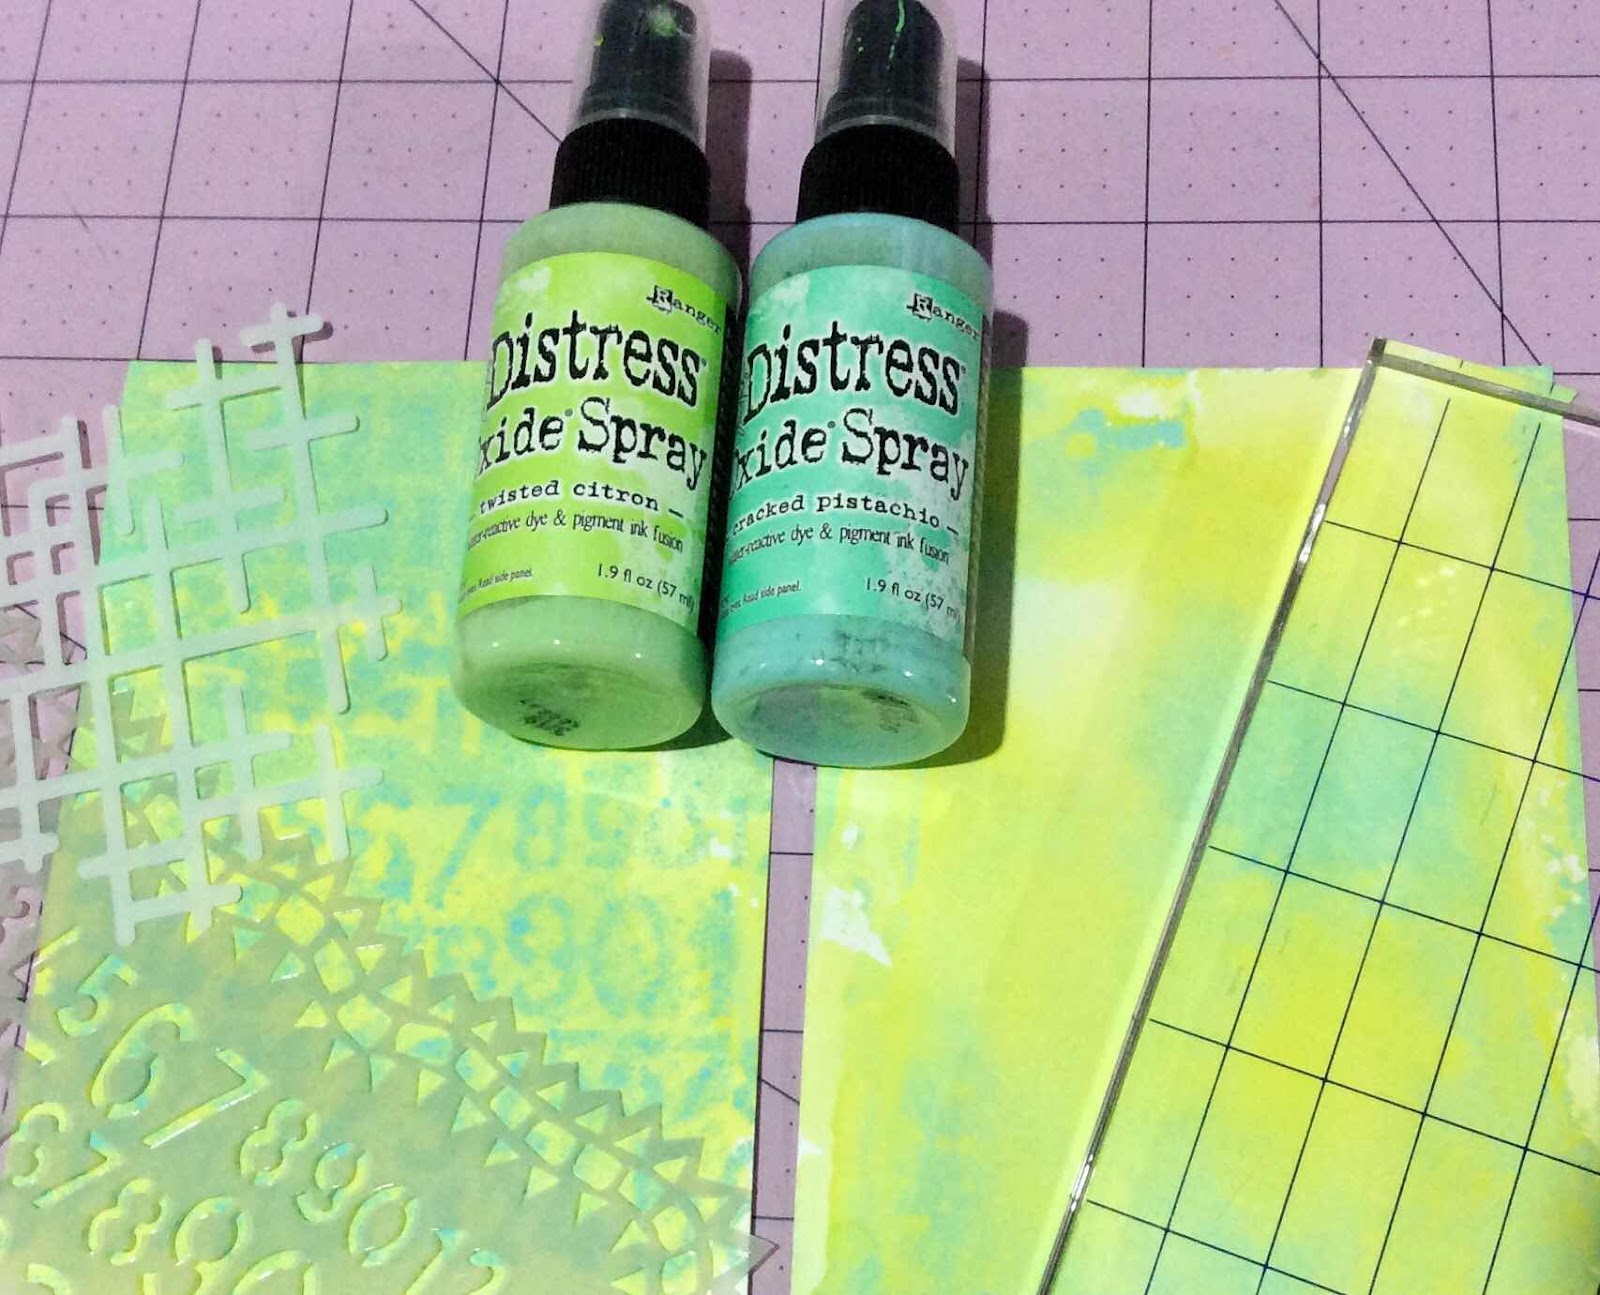
I began with a 4”X6” piece of 70lb sketch/drawing papers. I sprayed them with Distress Oxide Spray then sprayed one of them again through a stencil. I chose the one on the right to work with this time.
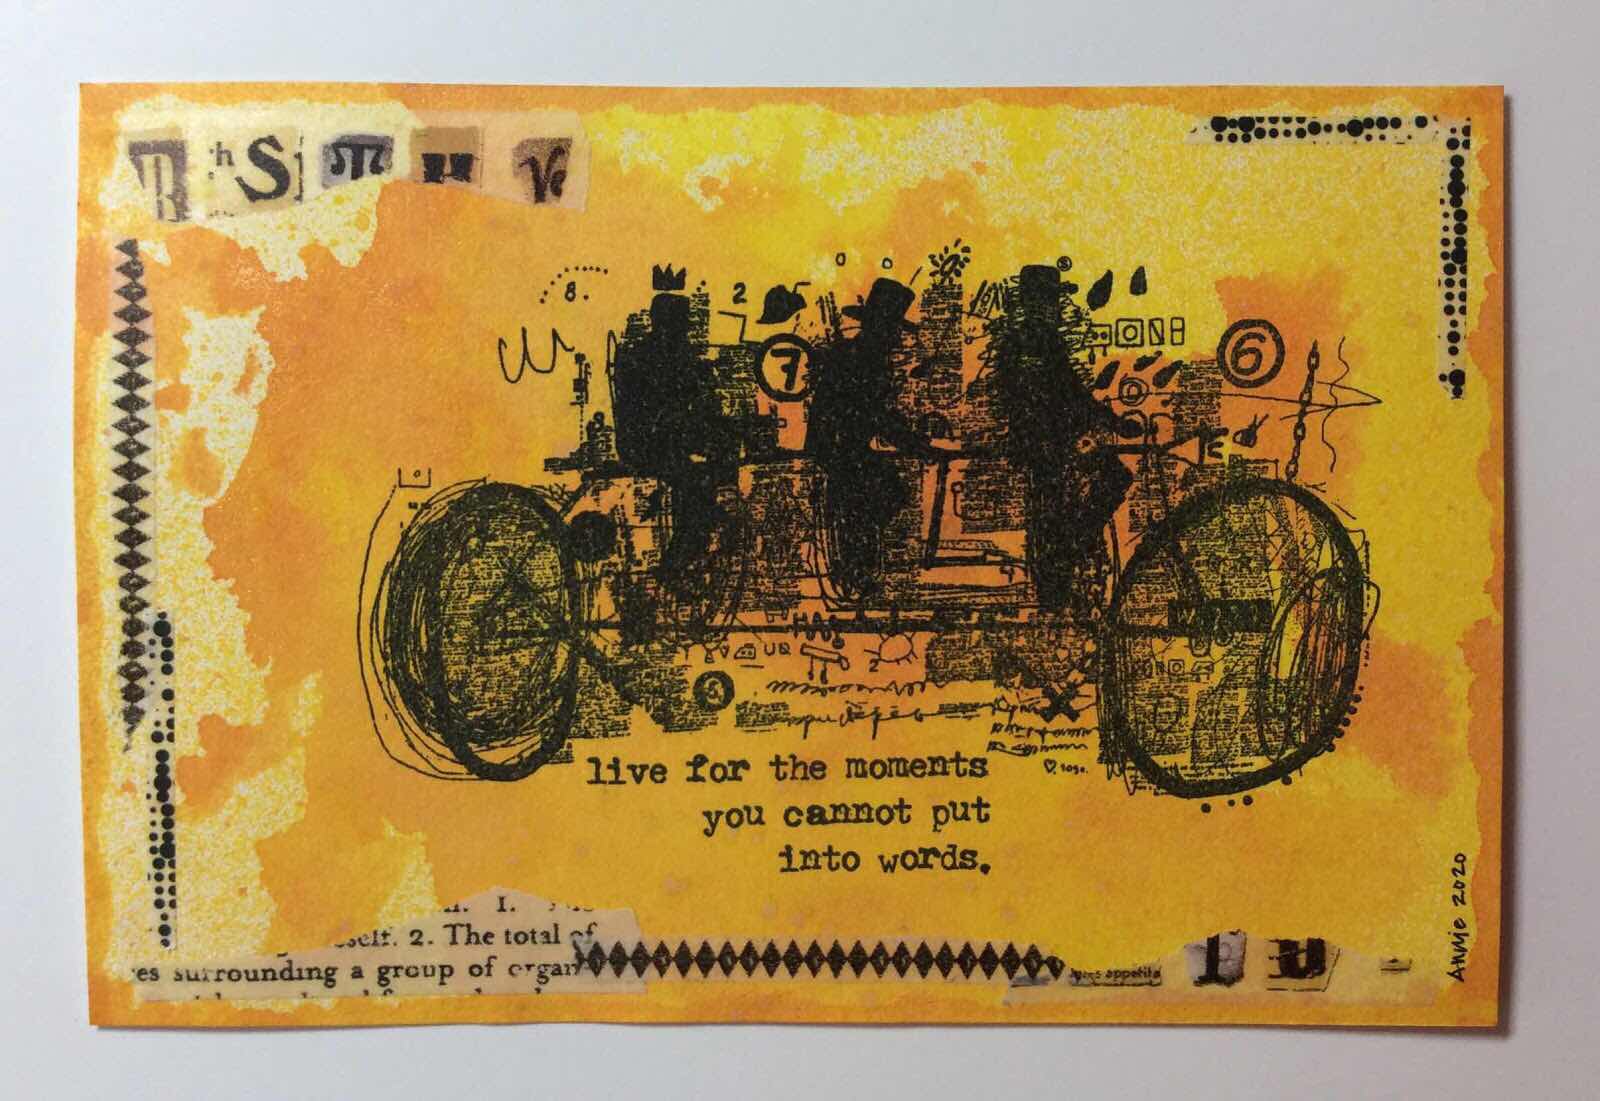
I’ve rubber stamped the words with a waterproof Archival ink and toned down the brightness of the background paint by rubbing the ink over it lightly and darkened the edges.

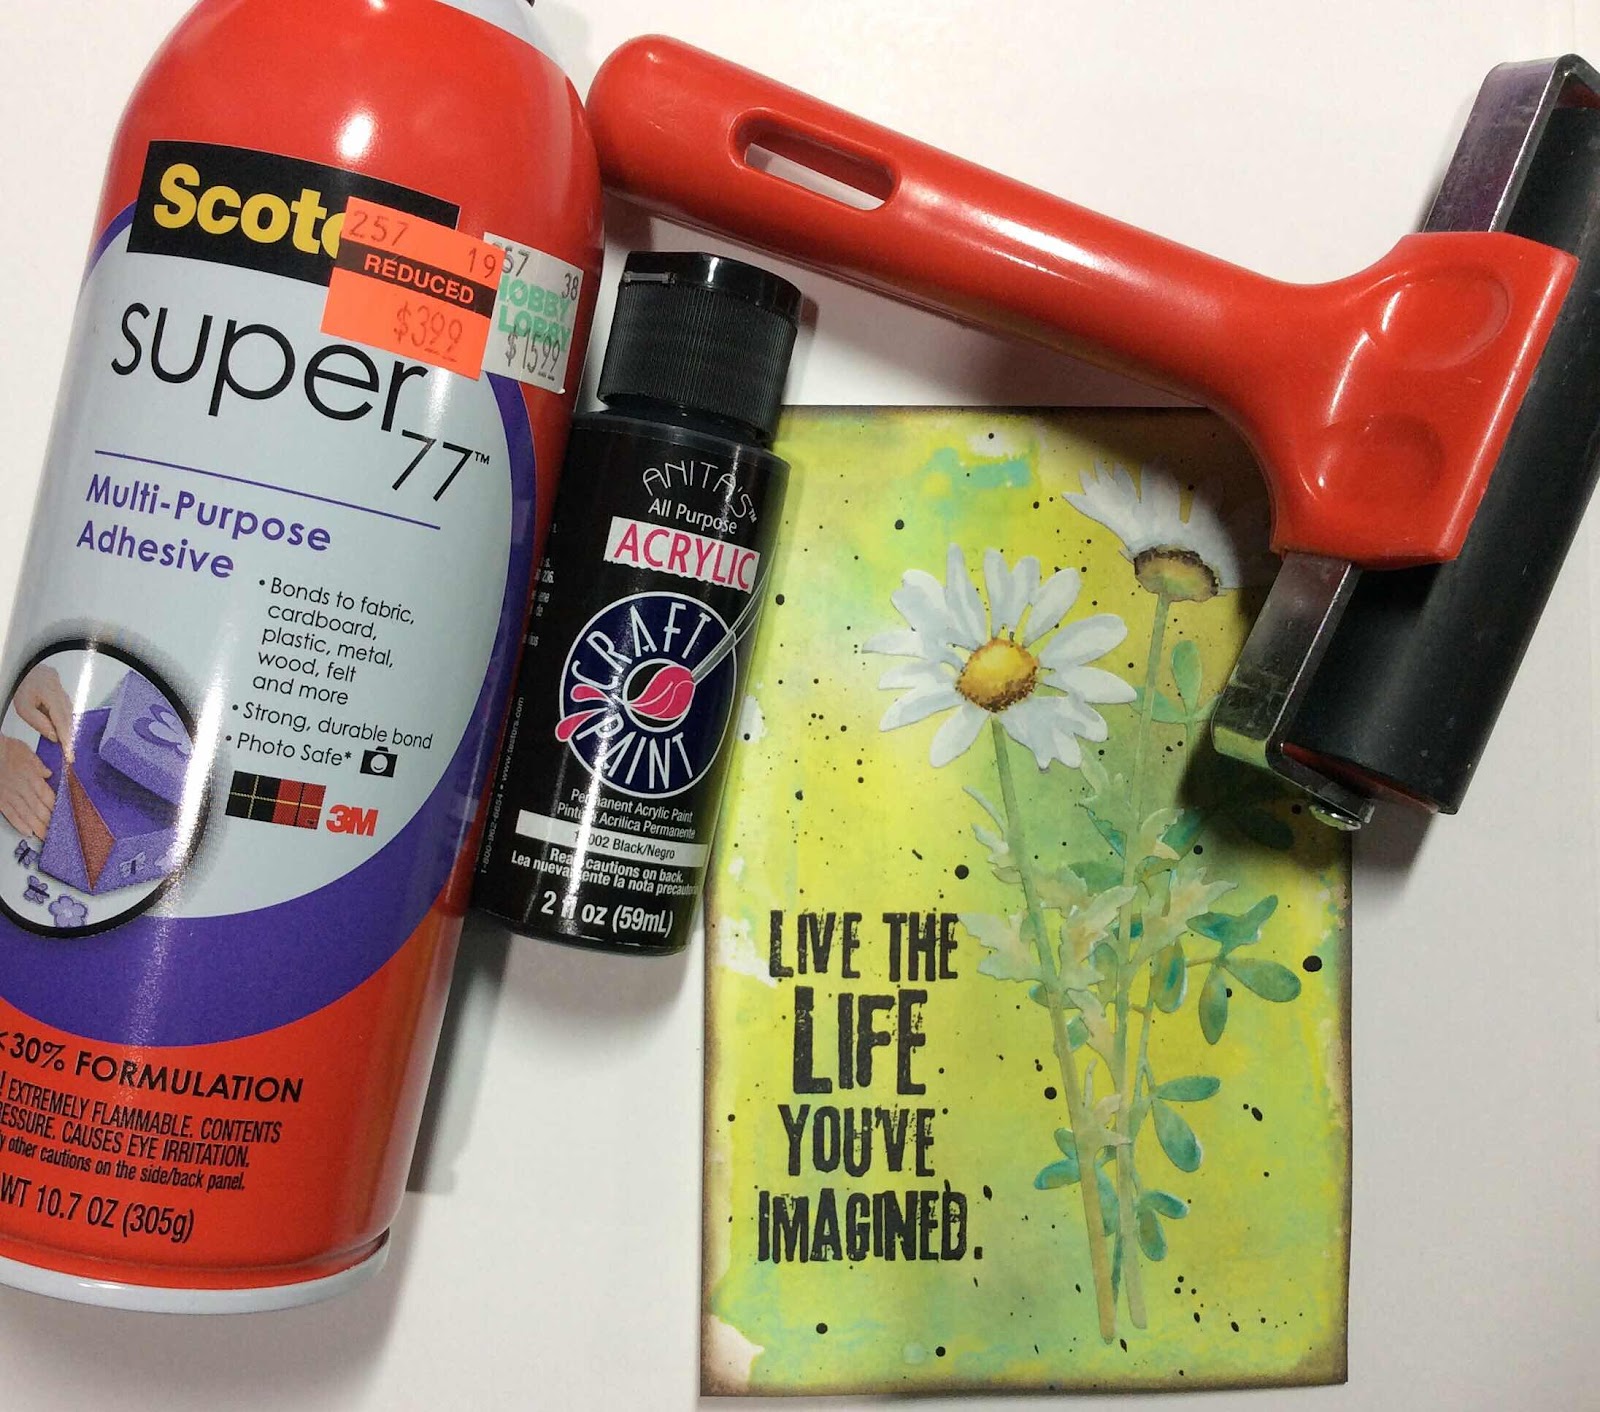
I’ve used cutting dies to cut flowers and leaves from the same 70lb sketch/drawing paper.

I’ve painted them with watercolors. (Sometimes you just have to hope your mail won’t get rained on.)

Before gluing the flowers to the postcard, I splattered thinned black acrylic paint to the background.
I use a spray glue to adhere the flowers and leaves to the background. I then press them down firmly with a Brayer. When dry, if there are any loose edges, I use a fine tip glue to get underneath the loose area and glue it down firmly.
When my postcard front is finished, I glue it to a heavier paper. This Canson XL paper is 98lb. I glue it to a piece larger than my postcard then trim around the postcard. Set the postcard under a flat weight so that it dries flat. Check the edges to make sure they are one. Any loose edges can be glued with a fine tip glue. If you don’t have a fine tip for your glue, put some on a toothpick to smear where needed.

It is now a sturdy piece of art that will travel through the mail easily and not get caught in any of the postal machines.
Art can sometimes leave the finished piece warped and even messy on the back. Working on one paper to create your art then adhering it to a clean paper will help to flatten the piece and you don’t have to worry about a messy backside.

The back can be decorated also, just like any other postcard.
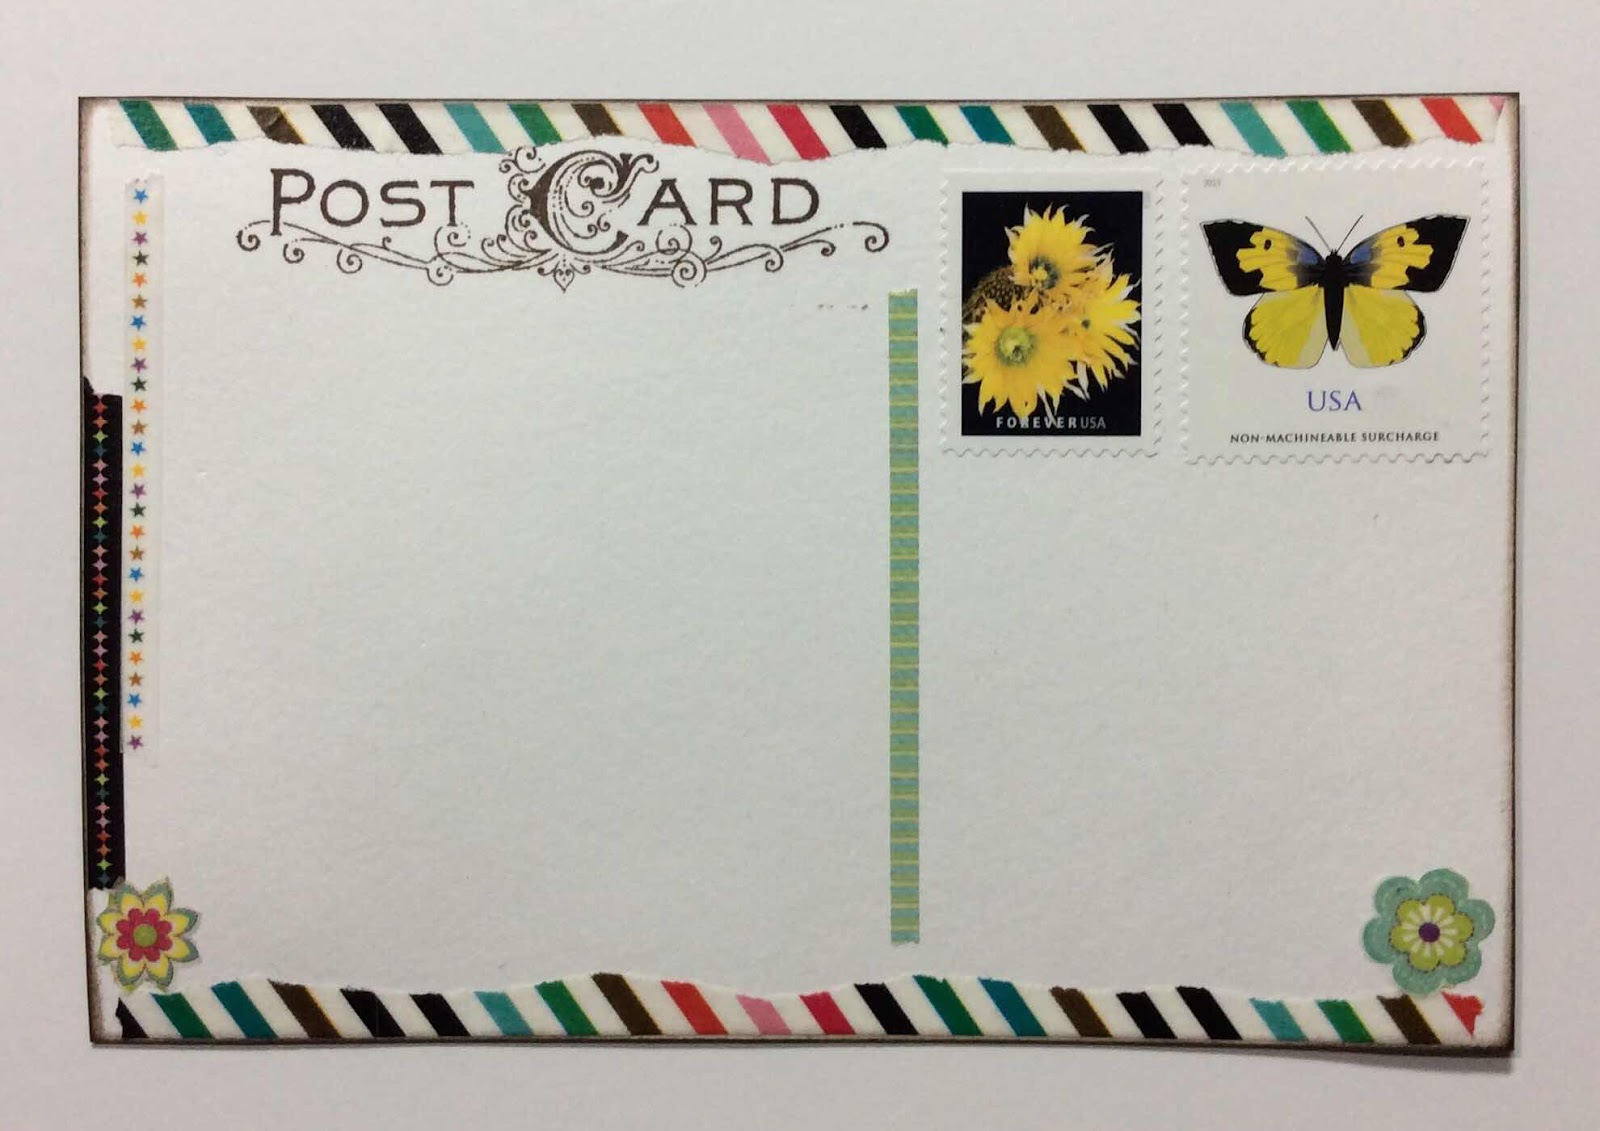
Within the United States, a papercrafted postcard can be mailed at the regular postcard rate (unless you’ve added something that will make in non-machinable. In that case, extra postage is needed.
There are so many different ways to make a papercraft art postcard. But as I mentioned previously, make sure it is glued and put together well and that it is sturdy enough to withstand the traveling it will do.
There are so many different ways to make a papercraft art postcard. But as I mentioned previously, make sure it is glued and put together well and that it is sturdy enough to withstand the traveling it will do.
Most of my handmade postcards arrive at their destinations as if they were hand delivered.
If you have any questions at all or need some further detailed info, I am more than happy to help out with both.
Happy Mail Day!
Annie
14 comments:
This is another fun postcard post Annie. You made that daisy look real. Great details. These have been inspiring posts. Hugs-Erika
That is a delightful postcard that I am sure anyone would be happy to receive. Thanks for the tips, especially the one about the two different weights of paper/card and the reason for doing it that way rather than the one heavier card. (I think that is a tip for making atc's as well that I will take on board).
I know I have some "Postcard" stamps somewhere and I remember printing some years ago so I think I will be making a postcard or two now. Thank you for the tutorial and the lovely daisy postcard.
Hugs, Neet xx
Your postcard tutorial is superb. I am in awe AGAIN. I checked out your previous postcards and I see you love stamping and also those TH paper dolls. The current one you made is fabulous. I enjoyed the tutorial and have done the same with ATCs I've made in the past. You are right that the back can hide many things, including brads on ATCs. Thank you for the tutorial and all the wonderful tips.
I HATE being late visiting, because I am in total AWE of your art. May I PLEASE add your blog to my left sidebar? I will only do so with your approval, though.
Thanks for the tips, Annie! Another beautiful piece of mail art for someone to enjoy!
Wow, Annie! I love this postcard.
I enjoy your tutorials because you fill in the details. I checked out your link to all your postcards and then I started going back to the beginning of your blog posts and visiting them a few at a time. It is really a nice way to take a break from my purging project.
Thanks for this tutorial Annie. I haven't made any paper craft anything yet, so I will give it a go one day.
These are all beautiful 😍 I am especially loving the fabric tea cup with flowers, and the daisies!!!🌻
Great tutorial Annie - thanks. xx
Thanks Annie for the tutorial! I love seeing and learning about the process. I’m a fan of all you postcards! I’m assuming that you have a ‘postcard’ stamp that you use on the back? ❤️ Have a Happy 4th of July! 🇺🇸
Wow! That one is a masterpiece! The flowers look freshly picked! So real!
This is a fantastically detailed tutorial. I am full of admiration of all the steps and photos and of course the art. This is the most beautiful postcard. Spray glue - now there is a new trick to save me time on painting teensie little bits with a teensie brush which always involves gluey fingers. These paint sprays are also pretty cool as is the way you use them, not just spray and go. I also wonder how you get the Postcard details on the back - with a stamp? It's beautiful how you have painted the plain white cut-out flowers with watercolours. Everything about this postcard says class art and the same can be said about the tutorial details.
gorgeous.
xx Karen
Stunning art journal page. I love daises. Judy
I am so pleased to have found time for a catch up - and so pleased I didn't miss this! Such an inspiring post Annie! I'm also going to have to look for my daisy die! Hugs, Chrisx
Post a Comment