Thursday, July 15, 2021

Challenging Art Journal

I used this particular Dylusions journal for 2 years of calendar journaling.  I thought I would use it again so I ordered another.  Then I changed my system ... again.  So I have the journal.


I’m going to try it as an art journal (it’s original intended use).  The challenge with it is that I can’t just tear out bad pages.  The pages are stitched.  This is why I like a spiral bound journal.  I can discard bad art pages.  
So I began altering the cover.  I found some text gift wrap tissue to glue over the existing cover.  (Sorry Dyan Revealey)


Then I stopped.  I realized I didn’t want to put the time in to put art on the cover if the inside pages might not work out.  My personal challenge with this is all double page art spreads.  There will be 24 page spreads.  They all have to be keepers.  That’s the scary part for me.  My art pages are not always keepers.  They don’t need to be perfect, just keepable.

One down, 23 to go!


The inside covers need to be used and they are not designed.  They are an off-white color.  First challenge was to figure out how to blend it with the existing color and design.  I used Distress Spray Stains.  Good enough (keepable).  So I did some stamping and stenciling.

Next I wanted to use this guy.  I stamped him on the rough side of tracing paper.  Then cut him out.  I like the transparency of the tracing paper when it is glued down.  I used spray glue.


I then added some ephemera.  These pieces are all from a Tim Holtz spiral bound stickers booklet.  The stickers are quite thick.  I wanted them quite thin so I peeled the design layer away from the sticker layer.


And a little more ephemera.


I wanted some words but didn’t know what.  I searched the internet for man quotes or sayings.
I finally came upon this quote by Luvvie Ajayi and knew right away it was the one.  It has meaning for me.  The words in black are die cut and in white they are handwritten.


I now have my first keepable page spread!  I’m so happy.  But will I be able to do this 23 more times???  I will certainly try!


I’m linking this mixed media art page to Creative Artiste Mixed Media Challenge Blog

Tuesday, July 13, 2021

Altered Junk Mail and Craft Bags

I’ve had a bit of play with these junk mail return envelopes.


I watched a couple of YouTube videos then dove right in.

I was about to write a letter to my pen pal so I decided to present it a bit unusually.  

You seal the envelope, cut it to the size,  then trim the open corners.  Fold down one of the top flaps.  You then have a pocket.


Cover the various parts that show with decorative papers and embellish as desired.  I tucked my letter inside the pocket then put it all in a regular envelope for mailing.


I next made tags for birthday gifts.  They are made the same way as the letter pocket.


These were fun to make.  They are kind of tedious to make but it’s so surprising to see a big transformation from a junk mail envelope.


I had some fun altering boring craft gift bags.  First I slapped some Gesso on the bag fronts.


Next I chose some ephemera pieces to glue on collage style.  These are stamped and/or photo copied onto tracing paper.  I like the transparent look that tracing paper provides.  I glued all the pieces onto the bag, added some stamping and finished the bag with a die cut greeting. 


The second bag is made similar.  I began by gluing a piece of decorative paper over the Gesso.  Then added a bit more Gesso over the paper design to mute it somewhat.  This bag includes some washi tapes and a small talk sticker.


The backside of the bags looked so plain.  I made tiny tags to hang there.  


The tags are decorated on both sides so if they get flipped, they are still fun looking.


These are not very large bags.  About 8” tall and 5.5” wide.  I have a lot of them to use up.


I don’t really have many occasions when I actually give a gift (other than these two people).  So I don’t know how many bags I will get to alter.  These bags were returned so that I’d fill them again next year.  Ha!  Maybe I’ll try some Christmas bags next.  I hope to improve on my altering designs.

Thursday, July 8, 2021

Vintage Art Tag

The theme for the Tag Tuesday challenge blog is VINTAGE.


Vintage is easy when any of the Tim Holtz paper dolls are involved.

I started this tag by die cutting the tag shape from digital printable paper I purchased from Etsy.  I stenciled a brick wall with Transparent Texture paste tinted with Distress Oxide Spray Antique Linen.  It didn’t show as well as I hoped it would so I lightly blended over the bricks with Archival ink Potting Soil.  That was more the look I was after.


I then die cut another tag shape from a sturdier paper, 98lb Canson Mix Media to sandwich the printed papers onto.  I then added my ephemera pieces and inked around the outside edges.


I didn’t need to do much on the back as the paper was doing all the work for me.  I just added some text  with a favorite ‘Curiosity’ stamp and the date.  I also stamped the same text on the seam binding.


Vintage and grunge are a favorite style of tag for me.
This tag challenge runs through Monday the 12th of July.  Come join in the fun.

Tuesday, July 6, 2021

78,489 Daisies

Daisies are in bloom...right?


I don’t keep up with the blooming schedule of all flowers after Daffodils, Tulips and Iris’.  A daisy is blooming on my art journal page.  I assume there must be 78,489 blooming daisies in a specified area.  What else would those numbers mean?


My page began with a book page glued down.  That did not glue down well so I tore out the loose parts.  I then sprayed some Distress Spray Stain colors on the page.  That looked bad so I Gessoed over that mess. That looked better so I continued on and inked large numbers from a stencil.

Then I added more numbers.  A little text stamping and modeling paste through a stencil.


There was no plan, just see what comes next.  Some grunge circles, rubber stamping, ink with a stencil and little bits of book page.


I went looking for more ephemera to make to add to the page and a die cut daisy painted with Tombow markers.


I added black paint splatters before gluing on the daisy and exhibit pieces.


It was time to STOP!


It was probably time to stop sooner, but I struggle with that part every time.

I’m linking my art journal page to Creative Artiste Challenge Blog 73rd challenge.  The theme is always Anything Mixed Media.  

Thursday, July 1, 2021

Papercraft Postcard Tutorial

Papercraft Postcard Tutorial

You can see all the handmade papercraft postcards I’ve made over the years here

I’m sure there are many ways to make a papercrafted postcard.  This tutorial is how I make many of mine.


The most important thing in making a papercrafted postcard is to make sure it is sturdy and nothing added to it will come loose in the mail.

I began with a 4”X6” piece of 70lb sketch/drawing papers.  I sprayed them with Distress Oxide Spray then sprayed one of them again through a stencil.  I chose the one on the right to work with this time.


I’ve rubber stamped the words with a waterproof Archival ink and toned down the brightness of the background paint by rubbing the ink over it lightly and darkened the edges.


I’ve used cutting dies to cut flowers and leaves from the same 70lb sketch/drawing paper.


I’ve painted them with watercolors.  (Sometimes you just have to hope your mail won’t get rained on.)


Before gluing the flowers to the postcard, I splattered thinned black acrylic paint to the background.
I use a spray glue to adhere the flowers and leaves to the background.  I then press them down firmly with a Brayer.  When dry, if there are any loose edges, I use a fine tip glue to get underneath the loose area and glue it down firmly.


When my postcard front is finished, I glue it to a heavier paper.  This Canson XL paper is 98lb.  I glue it to a piece larger than my postcard then trim around the postcard.  Set the postcard under a flat weight so that it dries flat.  Check the edges to make sure they are one.  Any loose edges can be glued with a fine tip glue.  If you don’t have a fine tip for your glue, put some on a toothpick to smear where needed.


It is now a sturdy piece of art that will travel through the mail easily and not get caught in any of the postal machines.

Art can sometimes leave the finished piece warped and even messy on the back.  Working on one paper to create your art then adhering it to a clean paper will help to flatten the piece and you don’t have to worry about a messy backside.


The back can be decorated also, just like any other postcard.


Within the United States, a papercrafted postcard can be mailed at the regular postcard rate (unless you’ve added something that will make in non-machinable.  In that case, extra postage is needed.

There are so many different ways to make a papercraft art postcard.  But as I mentioned previously, make sure it is glued and put together well and that it is sturdy enough to withstand the traveling it will do.  

Most of my handmade postcards arrive at their destinations as if they were hand delivered.

If you have any questions at all or need some further detailed info, I am more than happy to help out with both.

Happy Mail Day!
Annie

Fabric Postcard Tutorial

Updated Fabric Postcard Tutorial

You can see all the fabric postcards I’ve made over the years in my Flickr album here.

There are many ways to make a fabric postcard.  I’ve made this updated tutorial to show how I make them.  They are a lot simpler to make than you might think.


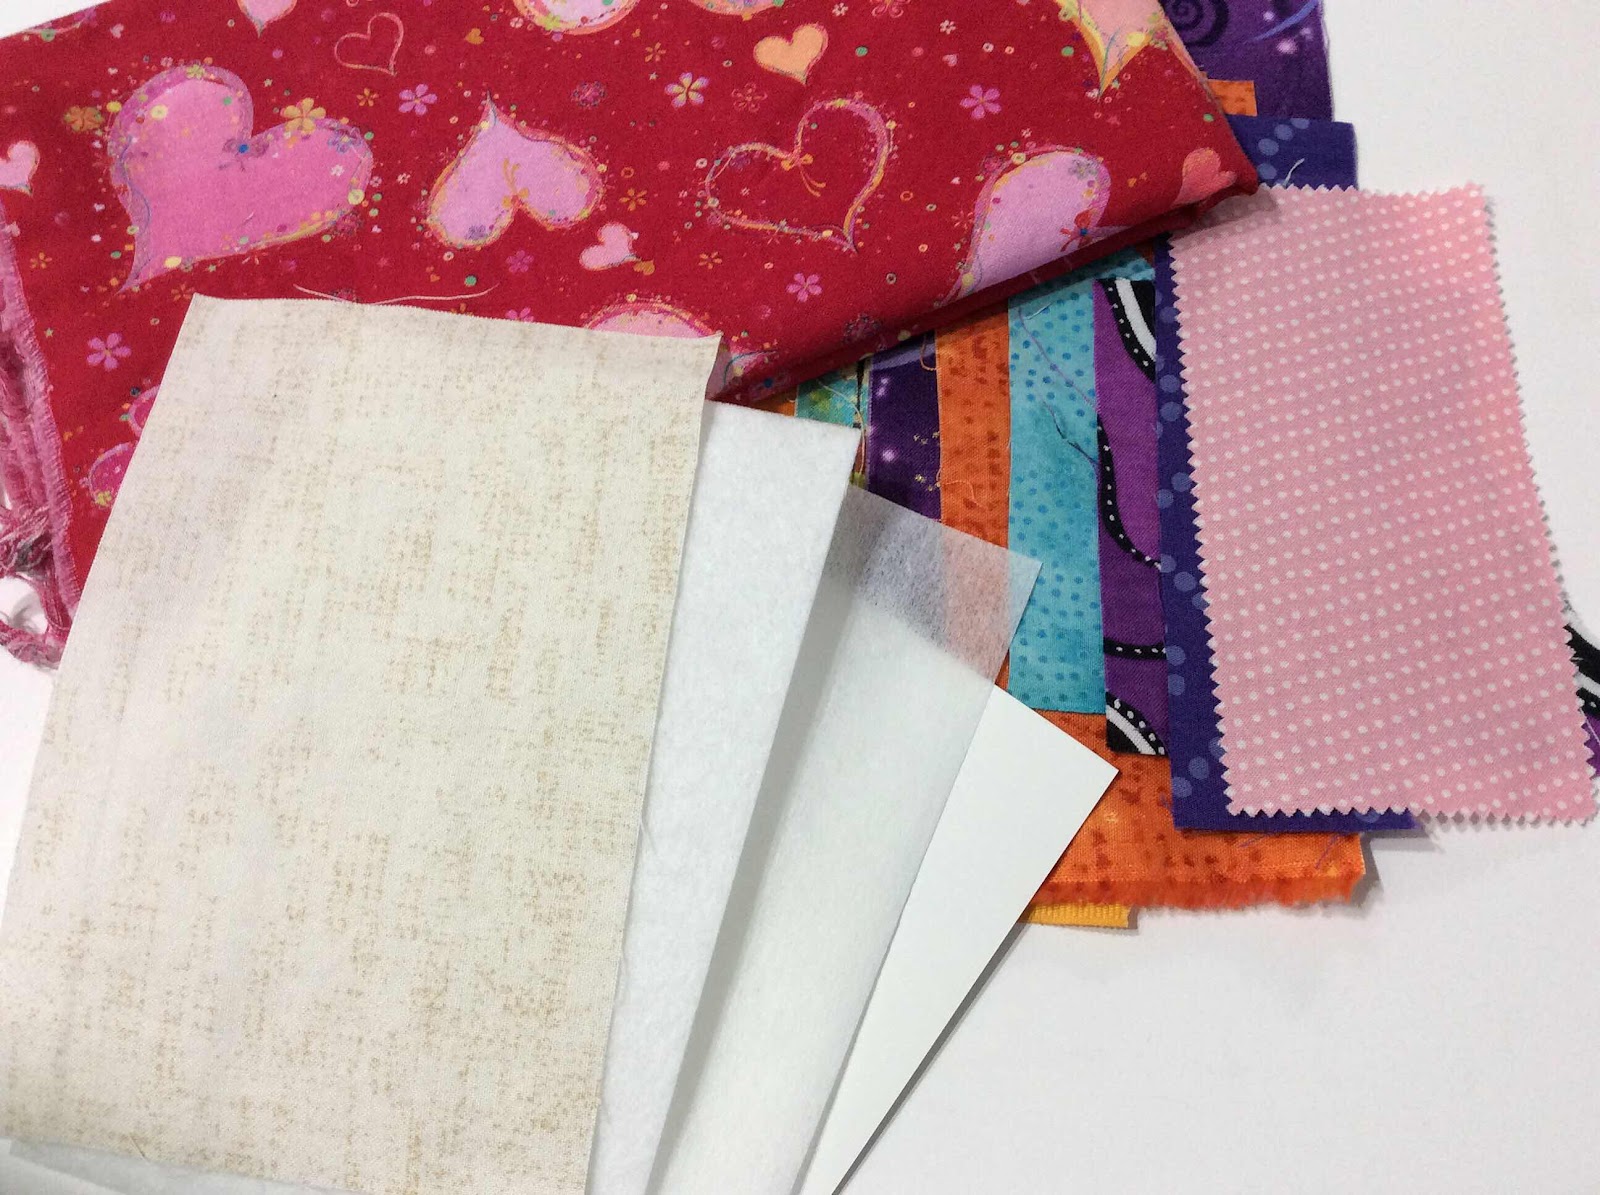
The supplies you will need are as follows:
4”X6” front base fabric
Fabric scraps for your postcard front design
4”X6” piece of stiff Peltex
4”X6” light to medium wight fusible interfacing
4”X6” piece of paper or cardstock (not too thin) for the address and message side
You can also use a tightly woven fabric for your message side, but I find it easier and more fun to use paper that can be decorated also.


You will also need a bit of Transfer Webbing if you decide on a pictorial design.  There are a variety of transfer webbing available, I use the light weight Wonder Under.


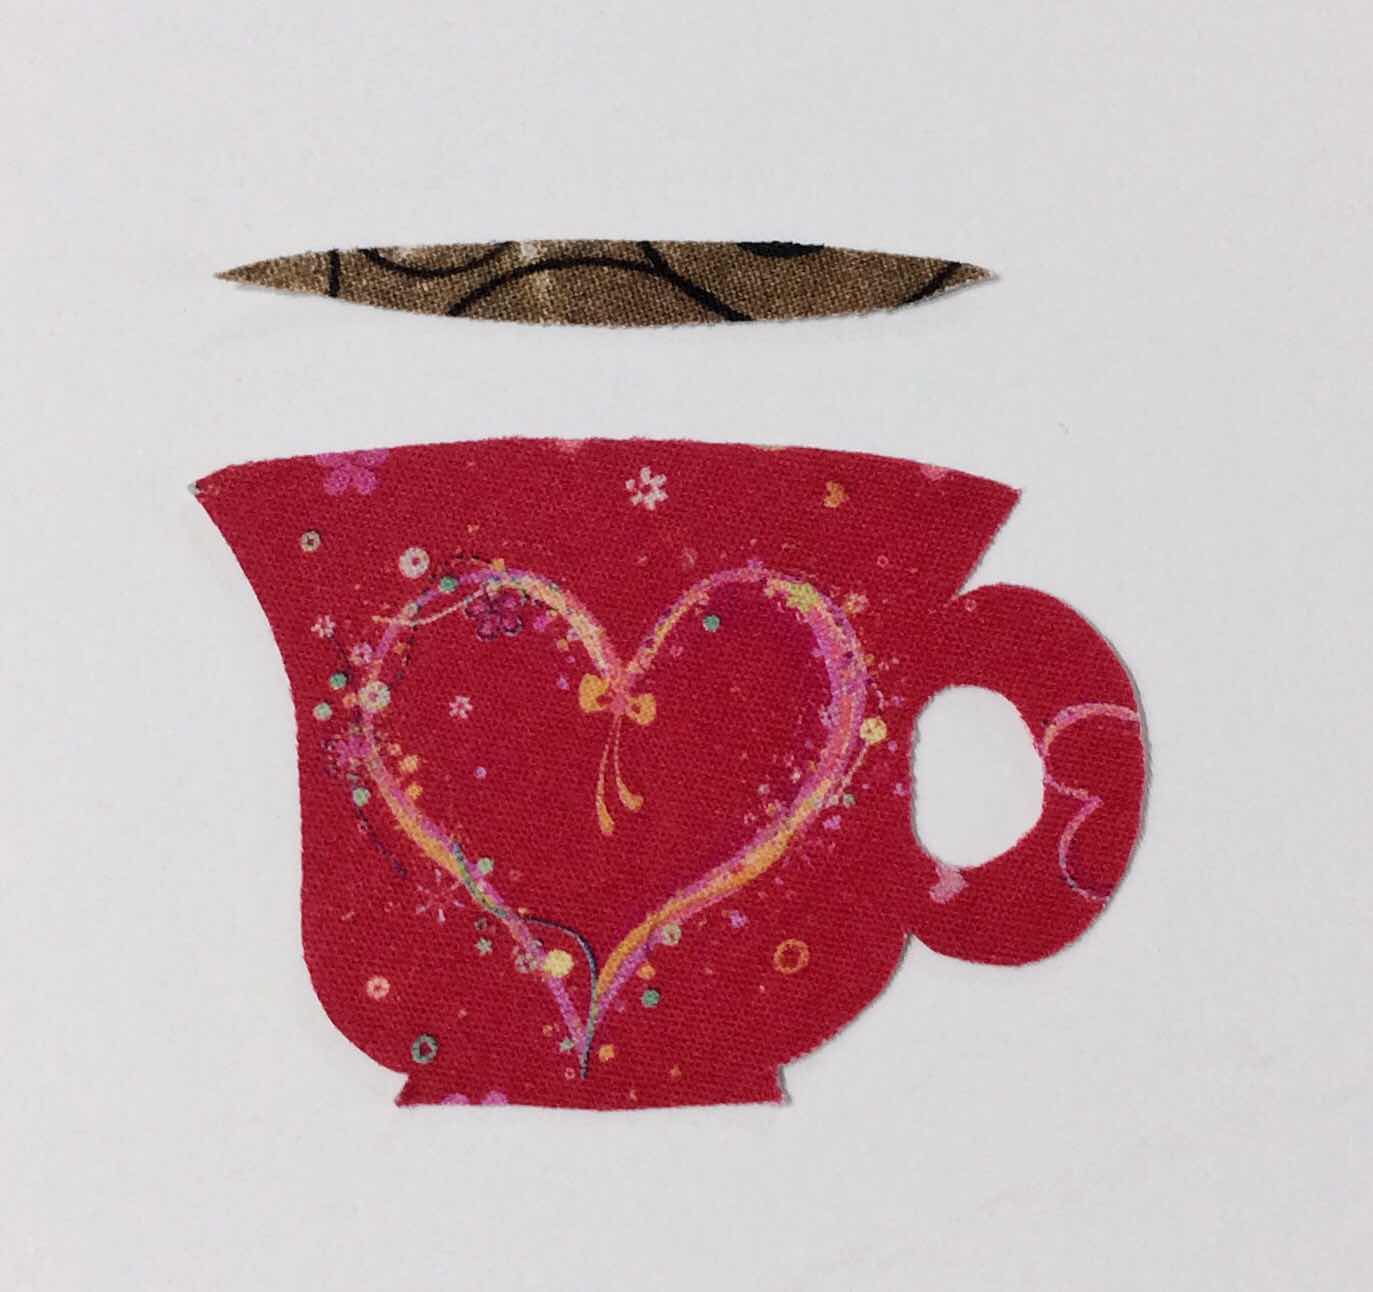
Trace your design on the paper side of the transfer webbing.  Loosely cut outside your traced lines.
(Your design will be backwards from the way you trace it, so be sure to trace any alphabets backwards to begin with.)


Fuse your traced designs to your fabric choices.


Then cut them out on the lines.  Allow the pieces to cool until they will release from the paper easily.


I press my design base fabric to the Peltex.  It is not fused, but the layers will stay together better until you begin sewing on them.

Trim the interfacing a smidge before fusing it to one side of your paper.  You don’t want any hanging over, it will fuse to your ironing surface.  Set the paper message side aside until needed.


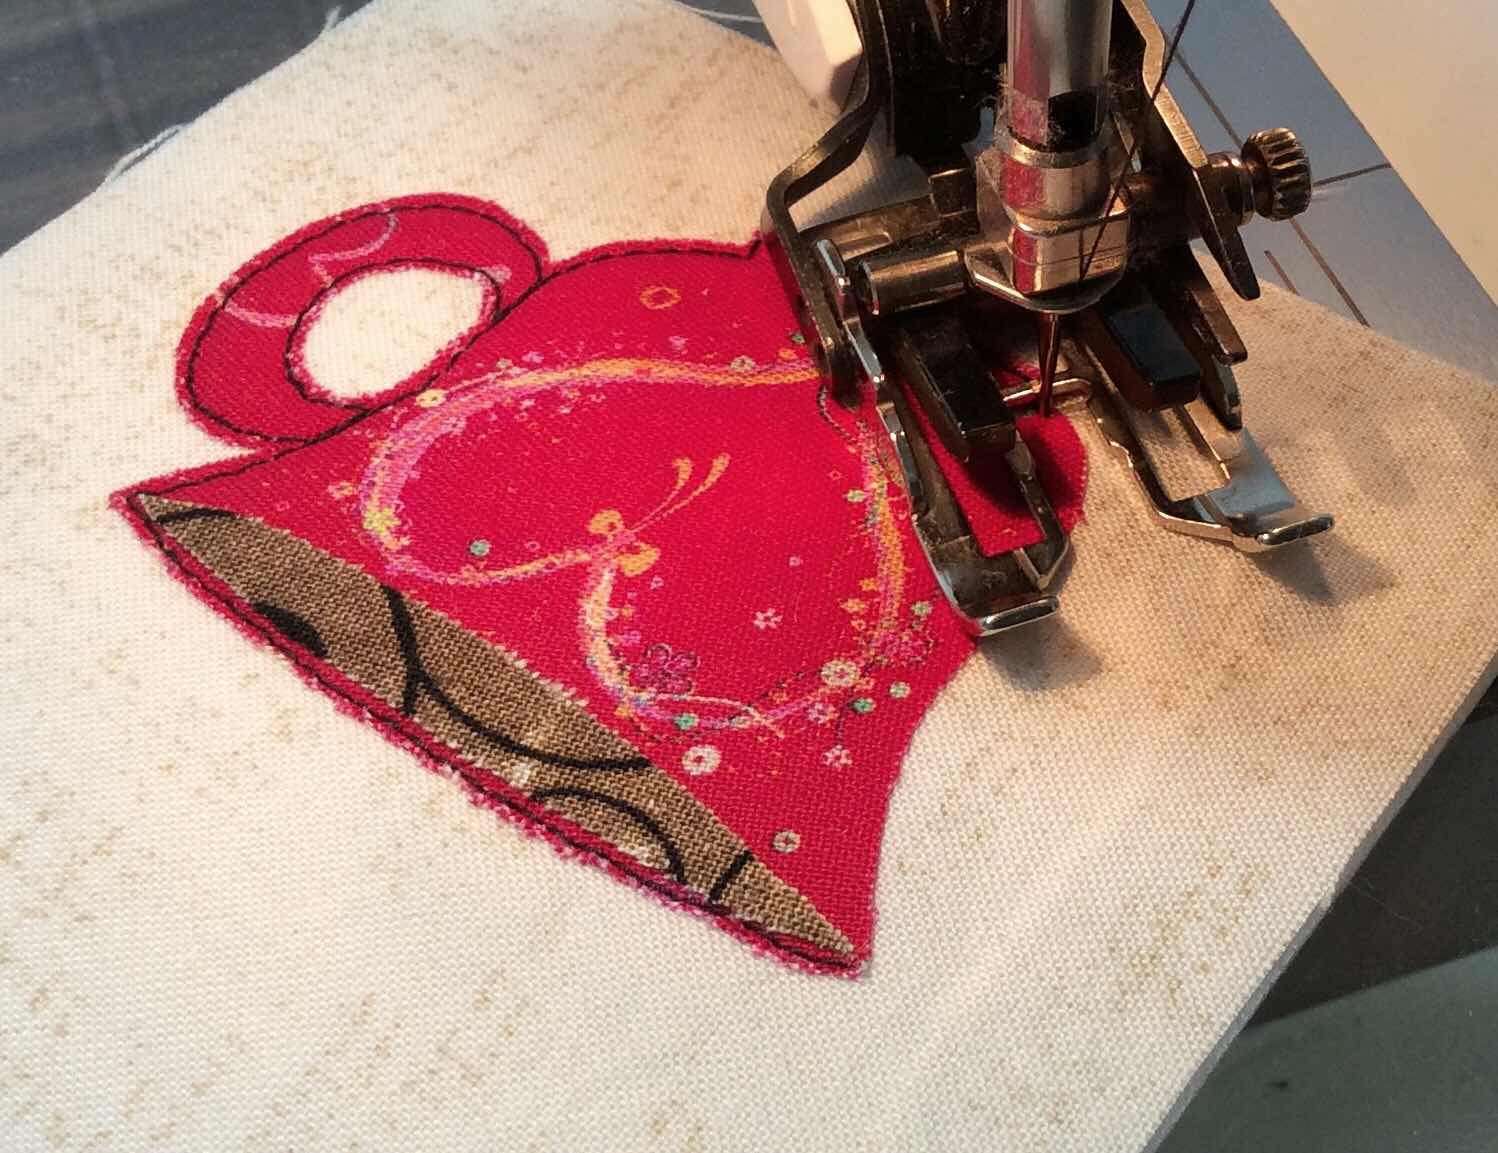
With the paper removed from the back of your cutout pieces, arrange them on the base fabric and Peltex where you want them and fuse them to the base fabric.
Be sure to leave 3/8” around all sides as that is the space the binding will cover.


Now you will stitch around your design as desired.  You can fuse all of your design at once or you can fuse the pieces as you are ready to sew them.


This method is raw edge appliqué.  It is my favorite to use on postcards.  Pull your thread tails to the back on the Peltex side and tie them off.


My next pieces on this postcard I fused the webbing to the back of fabric scraps, then cut them with a cutting die through a cutting machine.  


When the papers were ready to release, I fused the flowers where I wanted them on the base fabric.  I then stitched the stems and the flowers.

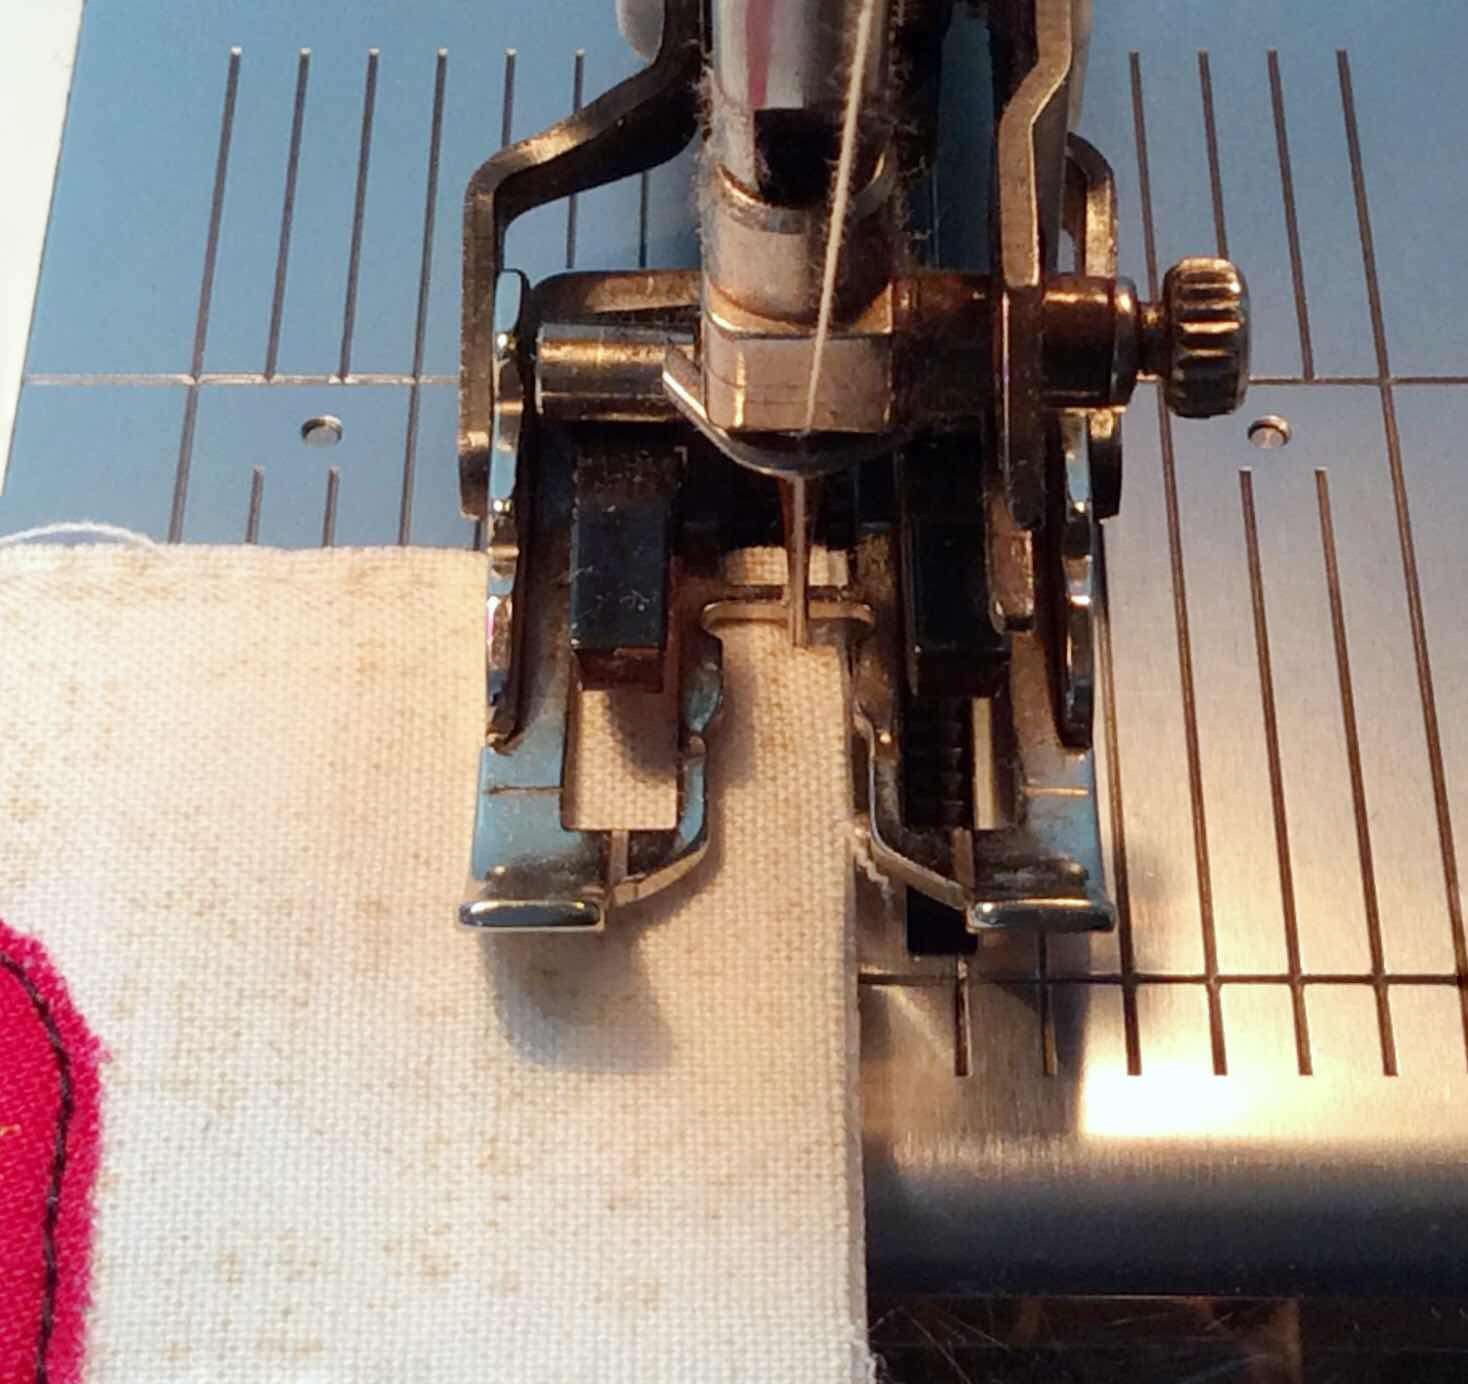
Once you are finished with your postcard design, align the front and back and stitch them together roughly around the very outside edge.  This will hold the loose fabric edges in place while adding the binding.  It will be covered later by the binding.


Most people will just zigzag (satin stitch) around the outside of their postcard to finish it.  You can do that now, or follow my binding method that I show following.
I like my binding method as it finishes the edges as well as giving the design a framing.

Choose your binding fabric and cut a 3/4” strip long enough for all four sides of your postcard.


Press this strip in half lengthwise.


I measure and cut the side lengths first then the top and bottom.  I do this no matter whether my postcard is landscape or portrait mode.


With a glue stick, run the glue along the edge of the paper side of the postcard.  You don’t need a lot of glue, just enough to hold the binding until you sew it down permanently.


Lay that paper side down on one side of the binding.  Just a tad away from the fold.  Each end of the binding should meet each edge of the postcard.


Now run the glue along the front edge of the postcard.


With your fingers, wrap and press the binding to the front.


Repeat these binding steps for the other side and then the top and bottom.

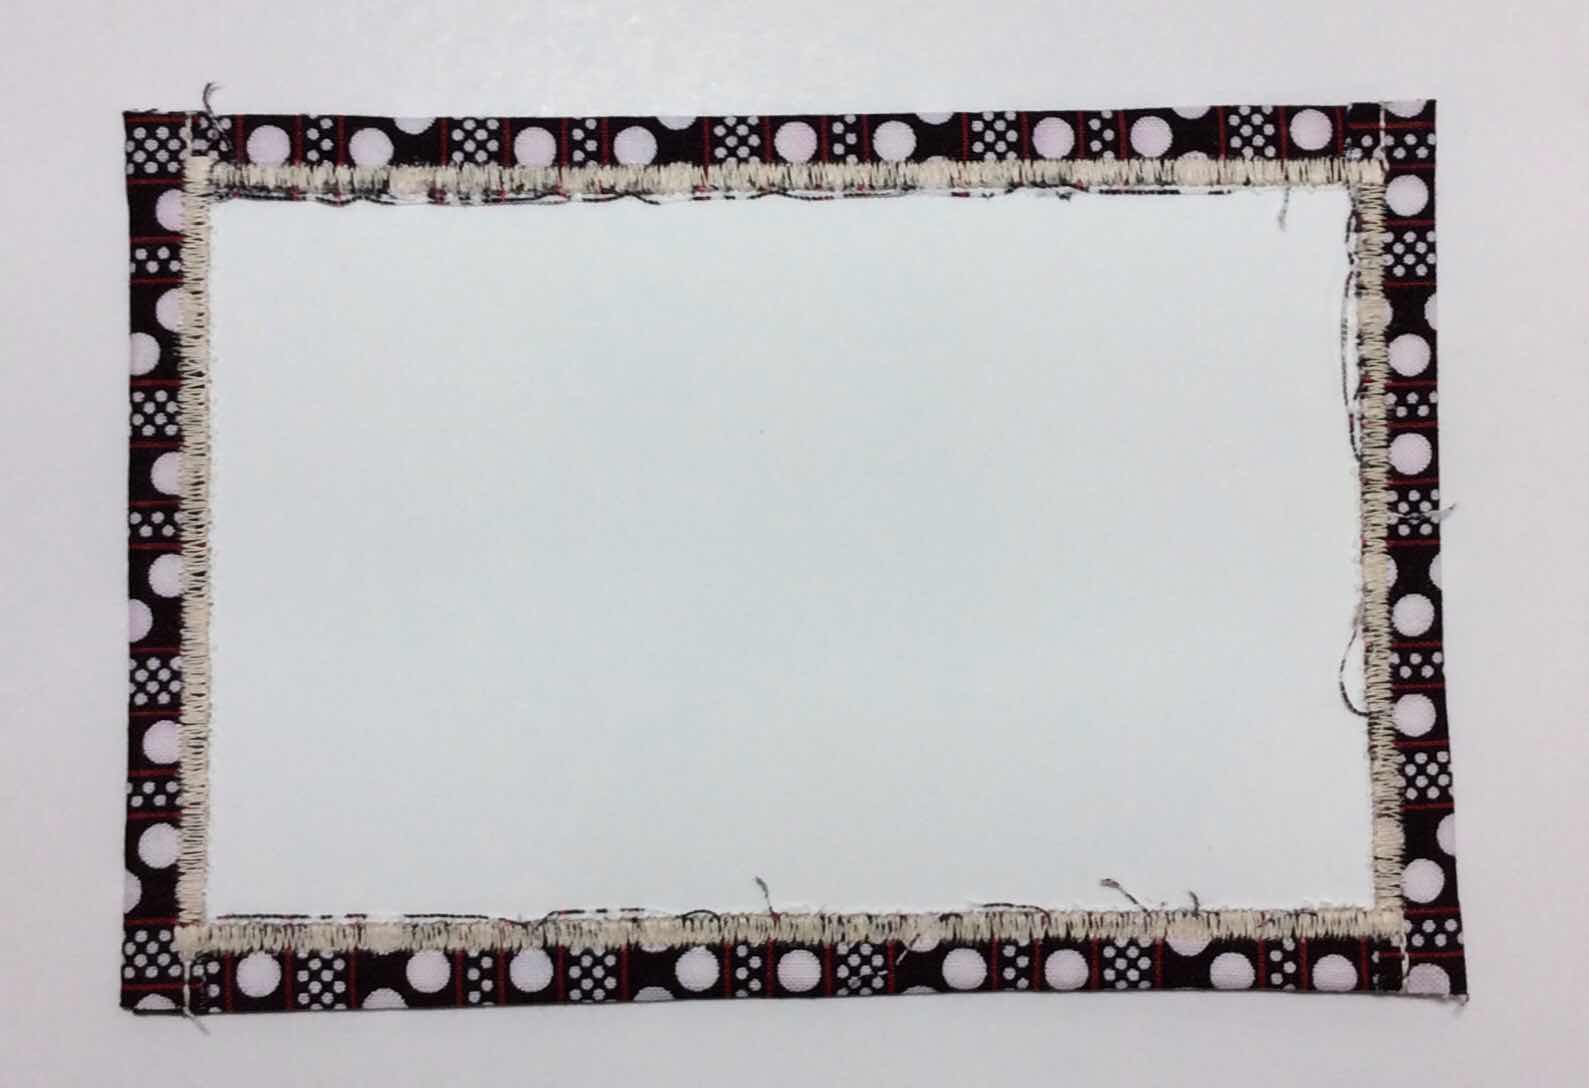
Your front will look like this.


The back will look like this.


Choose a thread color to stitch your binding.  I have started choosing a color that blends with my base fabric...but not always.  It is a personal choice.

I’m sure you are thinking the glue will gum up your needle, but it will not.  I sew through this glue and paper and then with the same needle I will sew a quilt.

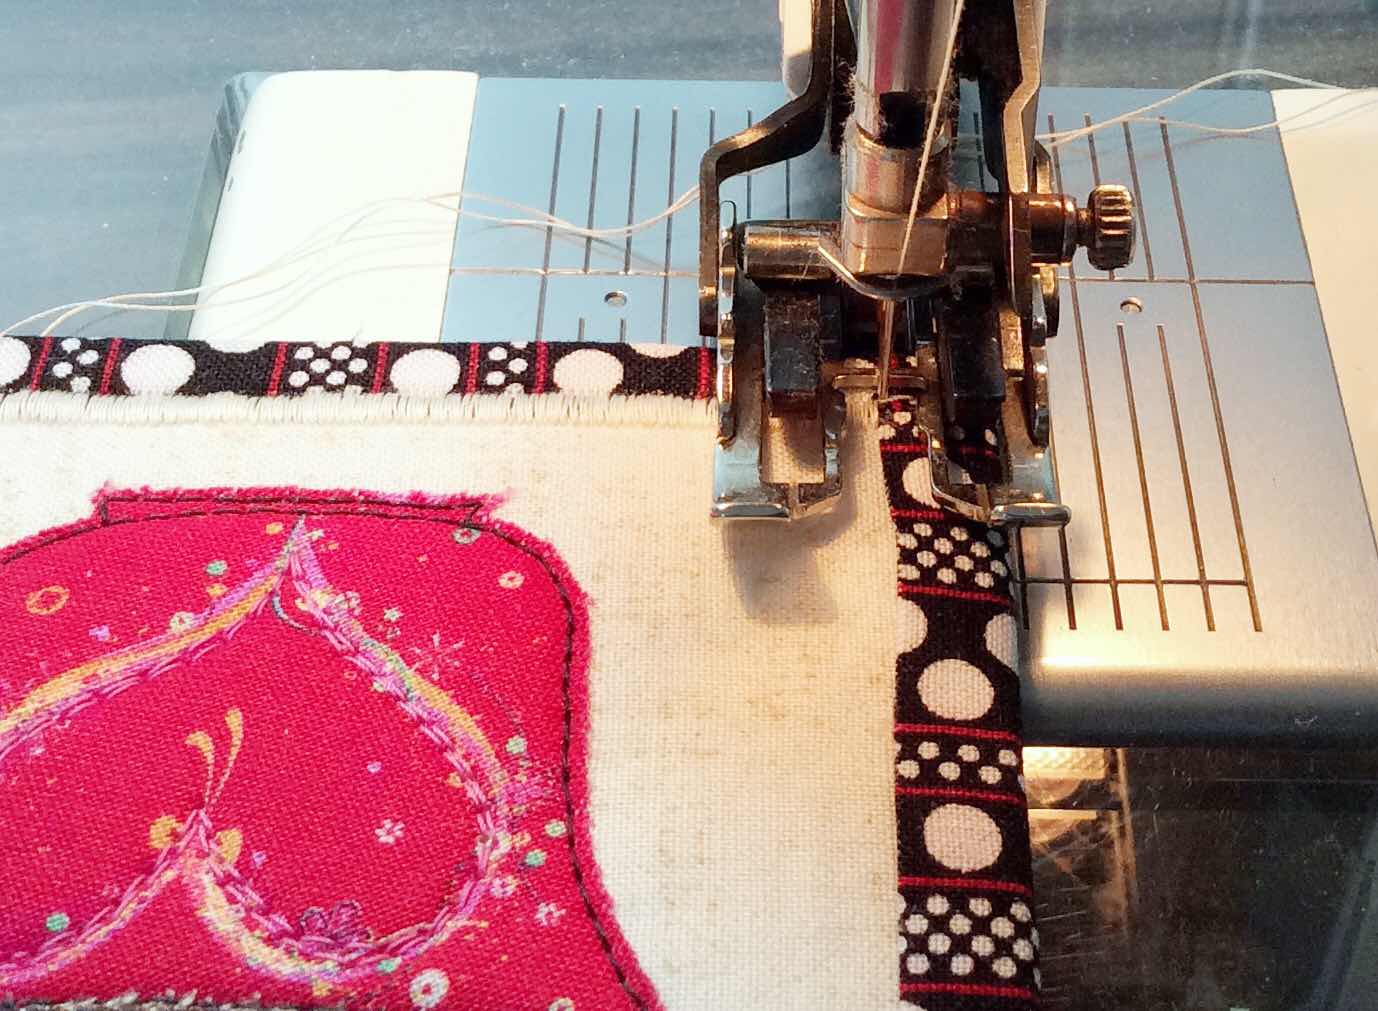
Begin with a straight stitch sewing backwards on the overlapping binding to just off the edge then forward to the inside edge of the binding.  With your needle up, switch to a zigzag satin stitch.  I choose a medium stitch width and a length that makes the stitches sit nearly side by side.  Use a scrap of the Peltex to decide on your satin stitch length.  No two machines are alike.

Pull your thread tails forward and slightly to the left so that they will get caught inside the satin stitching.


 This now is the reason I fuse interfacing to the back of the paper backing.  The satin stitch will perforate the paper.  The interfacing assures you that your backing will continue to remain connected to the postcard.


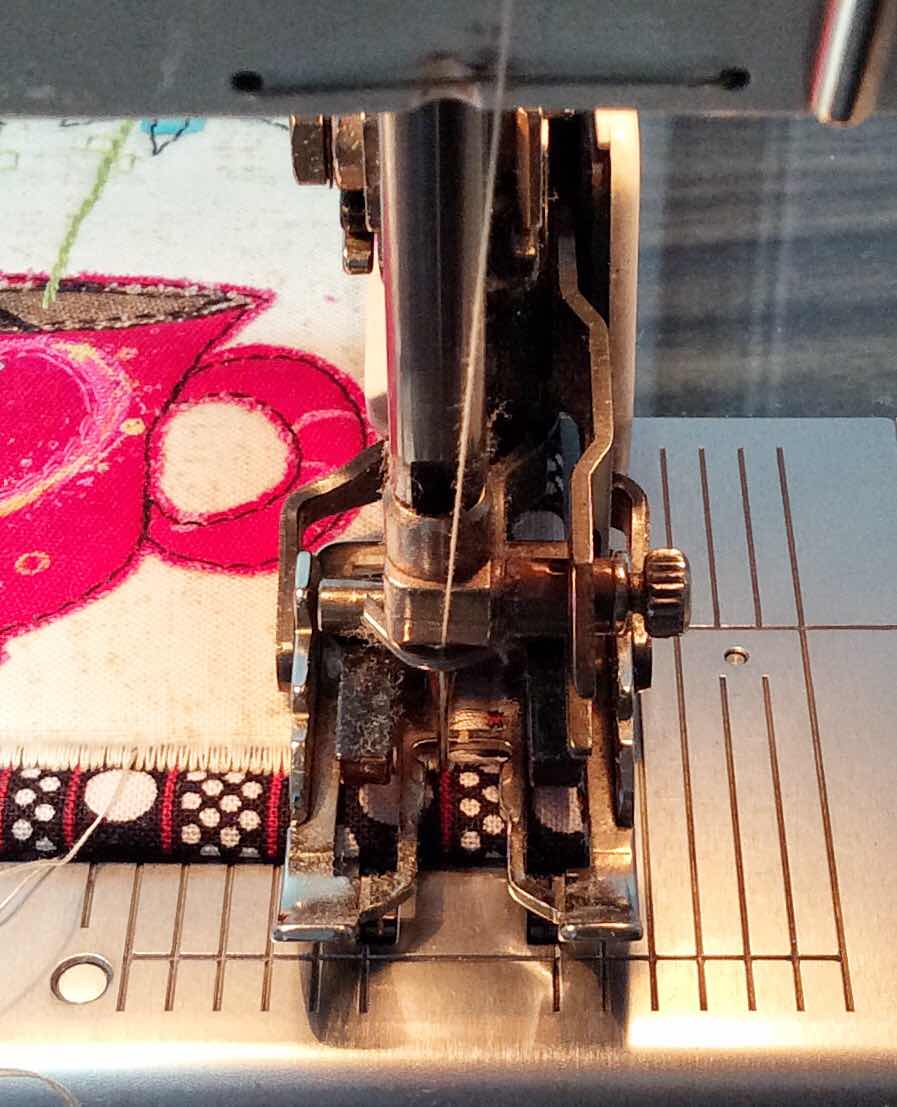
Secret to your binding looking straight:  Rather than following the inside edge of the binding that you are sewing down, find a spot on the outside edge of the postcard to follow.  This will keep your binding looking straight.  Sometimes the satin stitch will catch a lot of the binding and sometimes just a bit of it.  But if you use the outside edge as a guide, the binding will look even and straight all the way around.


Once you catch the thread tails in the satin stitch, hold them straight across the edge of the binding.
Satin stitch for a couple of inches, stop with your needle down on the inside, lift your presser foot and move the thread tails to the right side out of the way to trim later.


Continue stitching across to where the binding meets again.  Switch to a straight stitch and stitch to just off the edge then backwards to where you stopped where the bindings meet.


Turn your postcard, set your machine to the zigzag again.


Align your needle at the back edge of your previous satin stitch to stitch over the top of it.  Don’t forget to find your outside edge guide to follow as you stitch.  Sew the remaining sides in this same way.


When you reach the beginning, satin stitch to the outside edge of your first satin stitching.


One last time, turn your postcard, change your stitch to a straight stitch, align your needle just inside the first row of satin stitching, change the needle length on your machine to a very close stitch length and stitch several stitches along the edge.  This will keep your stitches from coming loose.


Trim all the thread tails from the front and back close to the stitching.


The back sometimes looks like this.  That means there is a little bit more binding to the back than to the front.  It’s difficult to get it exact, but it does happen occasionally.

  
With very pointed tip scissors, pull up on the thread ravels and trim them close to the backing.


All nice and neat now.  Sometimes there is a thread or so on the front that might also need trimming.


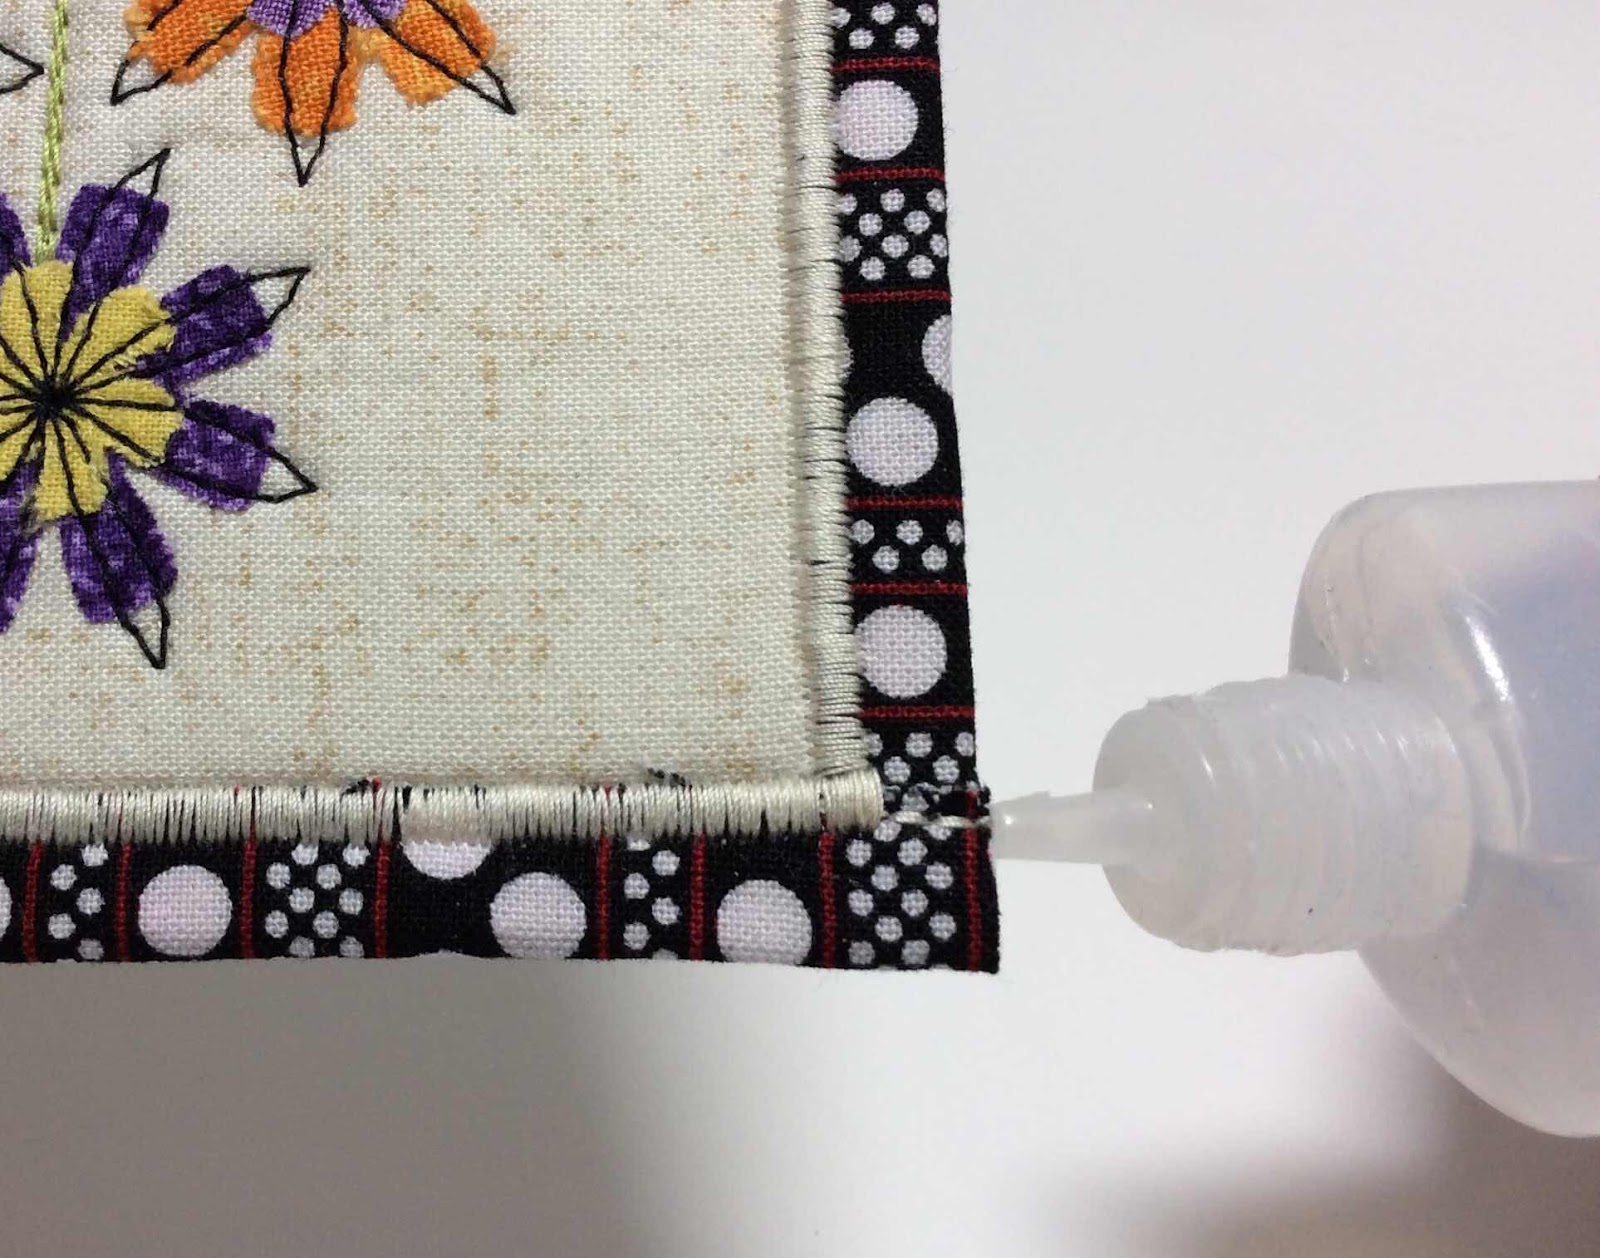
I use Fray Check for the postcard corners, but a thin, very small amount of glue can work also.
And actually, you really don’t need to do this last step if you don’t want to.


I will put a very tiny amount of Fray Check on the binding ends to keep them from raveling.  Put a bit on then wipe it with your finger.  You don’t want too much, it will make the corners hard.


And, DONE!


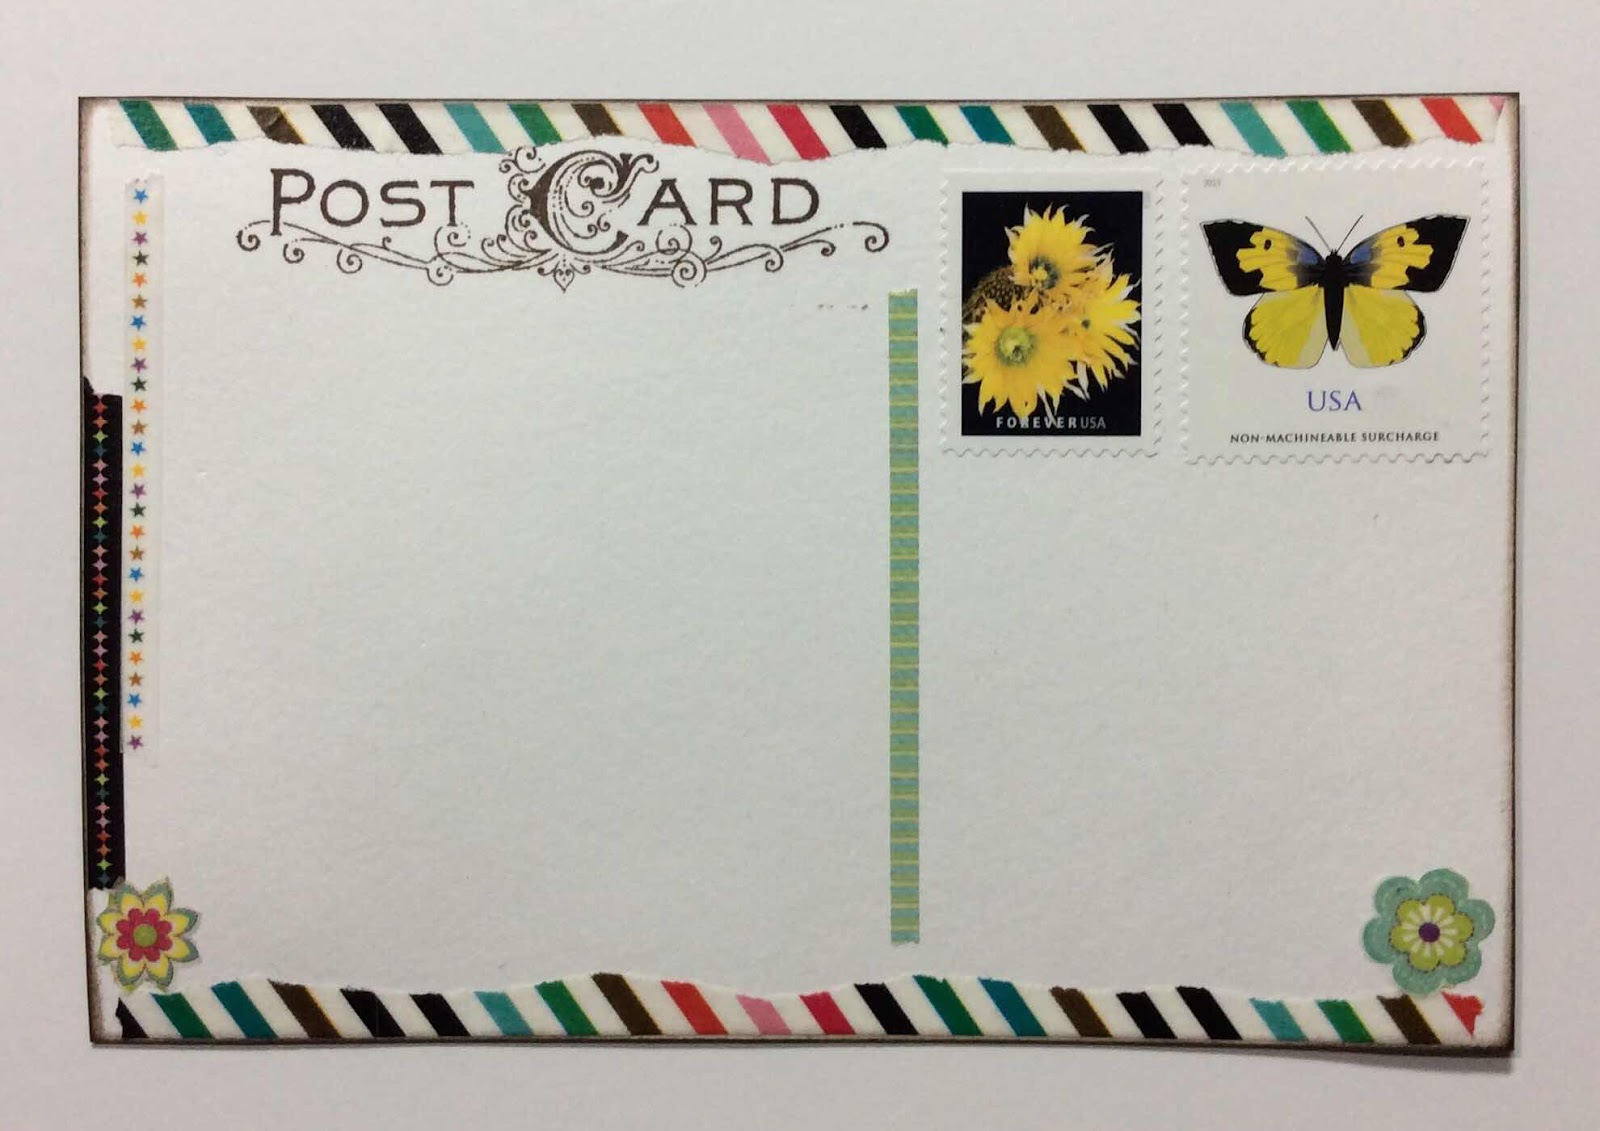
With a paper backing, adding some extra fun on the address side of the card is simple.


Fabric postcards can be mailed at the rate of a first class stamp (not a postcard stamp).  If extra doodads are added to the design, an additional 20cent stamp is required for non-machinable.

Most of my postcards arrive to their destination as if they were hand delivered.  Other times they occasionally arrive with the usual postal marks.

I am more than happy to answer any questions you may still have or help out with any fine tuning details you have questions about.

Happy Mail Day!
Annie