Saturday, September 1, 2012

from...
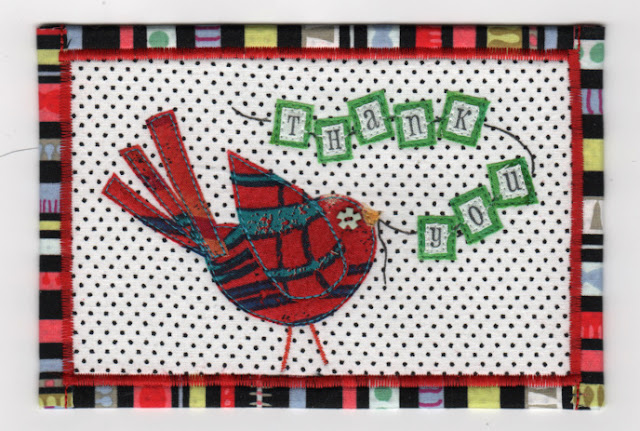
a Thank You Note   
comes...
 Inspiration 
 
I usually start a project, large or small, with either a finished visual idea in my noggin or I start with just a beginning idea.  But never with anything set in stone, because I just never know how it will progress from my original idea.  Such was this project.
 
I received this thank you note from Caroll, West Michigan Quilter , after sending her a fabric postcard.

Blossoms and Buds by Cheri Blum
 
I think it's a pretty still life picture.  I copied this card to fabric at a postcard size.
 
I had some flowers of my own to put into the bottles, then I highlighted the flower centers, the stems and glass jars with thread.
 
The flowers are from Lisa's Altered Art 
 
While I stitched away on this postcard, I contemplated whether I would send this altered Cheri Blum back to Caroll or make it a new offering to my followers.  I don't know why, but when I finished stitching, this little piece of altered art didn't have a postcard personality.  It took on a doorknob quilt personality. 
 
 
What I learned while playing with this piece...  those printed flower inchies from Lisa's Altered Art didn't come out quite as bright as I would like them to have, so I wondered "what would happen if" I colored them a bit with my Prismacolor colored pencils.
 
 
It did the trick, brightened them right up.  These pencils colored on the Magic Fabric so nicely.
 
I'm sure these pencils will not be washable.  If I wash this little quilt and if the pencil washes out, I don't really care.  I can color them again or not. 
 
I think this little quilt has an old antiquish look with modern flowers bringing it into the twenty-first century rather than out to the yard sale table.  I like it. 
 
 
I love how these little doorknob quilts can add a bit of life to an ordinary setting.
 
Keep an eye out for inspiration...
Annie


Sunday, August 19, 2012

                                              You 
Delightfully Wonderful
       Enablers,
              You 

When I asked you, my followers, to help feed my addiction to making and mailing fabric postcards, you were more than willing to be enablers!  I chuckled then feeling so happy to have new recipients for my cards.  And I chuckle now from the sheer joy it brings me to create these cards for you.  So, to you, I say ...


The first two cards I offered to share brought back some wonderful responses in regard to why you would have liked to receive that particular card.  One response triggered some thoughts for me that I wanted to design a card specifically for her based on what she had said in her comment and afterwards in our short correspondence.

This postcard was made for Marlene of stitchinbythelake. I so enjoyed creating this one and I miss having this card around to look at.

There are a couple of other responders requiring special cards that I haven't gotten to yet.  Some provoke an idea a lot quicker than others.

And a couple of followers have consented to swap/trade with me.  One being Leah of quilteddelights .  I got trapped in a bluebird stage and this bluebird flew to Leah's house.


The postcard Leah made for me is this beautifully designed and stitched scene that I call By the Sea.  I just want to unfold my beach chair and umbrella and sit a while here.  Thanks so much, Leah!


I found Penny of Zuni Mountains Quilter on flickr admiring my Always Look Your Blooming Best postcard.  After a bit of correspondence with Penny, this is the postcard I made specifically for her. 


The immediate meaning was how short on time so many of us live with.  But as I was creating the card, the amount of "time" involved within our lives began to play into the design more and more.  I titled it, "Have Time?"  But now I think it should have been "The Time of Our Life".  I'm pretty sure Penny will connect with every meaning this card presents...and then some.

I'm working on a quilt that is taking some time and I really want to get back totally involved with it, but postcards keep invading my mind making my fingers itch to bring them to life.  I just can't help but stitch them up.  I maybe need a 12-Step Program here!

In a few days my sweet cousin is having a birthday. 

I'm really having fun with my swirls!

And now, here's one that came to mind without a specific recipient in mind.  Which means that it's up for grabs by you.  Does this one appeal to you?

Names that I've come up with for this one are rather morbid...like, My Days Are Numbered and Life Is Short.  Pretty sad, and I'm really stumped, so what name would you give it?  (You don't have to name it to be chosen to receive it)

I so love you all, my followers...my enablers.  (smiles from me!)
Annie


Sunday, August 12, 2012

Doorknob Quilts

When the birthday girl doesn't need or want anything, that's when a handmade gift is most appreciated.  Well, that's what I think anyway.  But I had no clue what to make.

As I have previously mentioned, I recently discovered a wonderful artist blogging as bohemiannie! art .  Annie is also on flickr .  I find Annie's work is immensely inspiring to me.  In a recent blog post Annie talked about her "doorknob quilts".  Well, I had lots of questions about those.  Although I had an idea what they were, I wanted to be sure.

I also knew right away that's what the birthday gift would be. 

 So while I worked on my doorknob quilt, I was taken back a couple few years when I was making these small wall art pieces that could have been considered doorknob (or any knob) art.  However, they were constructed similar to my fabric postcards.  They were always intended for specific recipients too. 

This one has always been my favorite.  Made for a friend who is 100% capable of saying this to anyone who provokes her.
(I found this saying on a piece of art in a magazine ad somewhere)
(Photo by Natasha Reed .  I have her permission to use her photo)

This one next was for another friend (that's her in the photo).  She was willing to look silly and pose with Charlie for me.  She had no clue what I was going to do with her photo.

 
This one next is so me.  But I made it for someone who is just like me.
(The child image is from Lisa's Altered Art )

But I think now I'm ready for small soft hanging doorknob (or any knob) quilts.  And the birthday gift is now finished.  I hung it on a chair (they can hang anywhere) for photos.

(My design is inspired by Roben-MarieSmith's art work)


I haven't done free motion quilting in years (because I seriously don't like doing fmq).  But I wanted a bit of a sloppy sketchy over watercolor look with the thread and figured I was enough out of practice to get that look.


I think the sloppy look came pretty easily!  But I was actually trying not to be too sloppy.  Although I hate fmq, I'm having fun with this style...so I hope I don't get too good at the fmq that I loose the "sloppy" look.  Good grief, who says that!


I wanted a very dainty "sketchy" sort of bow to tie the hanger to the quilt, so I used four strands of thread through stacked buttons.  I like that!


Sadly, this style of work is not really the birthday girl's style.  I still hope she likes it anyway.  She's been liking some of the strange stuff I've been doing lately, so we'll see.


That Tweeter is my fave little birdie.

Tweet,
Annie


Sunday, August 5, 2012

Clean and Clear Images 
with Rubber Stamps on Fabric

I've seen several pretty adorable projects that include some pretty messy rubber stamping of words.  I think it can really down-grade the quality of an otherwise beautifully stitched project.

Therefore, I feel compelled to provide a tutorial to hopefully help the less experienced fabric rubber stampers to retain the quality of their sewing skills by enhancing a project with clean and clear rubber stamping.  Whether it be with lettering or just an image or both.

It's really a very simple process.

So, get out your stamps and pads.

Be sure to stamp on a firm surface.  I use a cutting mat.  Also stamp the project before layering and quilting.
"Messy" is easy to accomplish.....look familiar?
Ok, my 'messy' is a bit over kill. It's harder to 'messy' on purpose than by accident.
'Messy' is caused by pressing your stamp into the ink pad too far or at an angle which gets ink on the rubber edges.


'Messy' is also caused by then pressing the stamp onto the fabric with too much pressure or at an angle or by rocking the stamp, transferring the ink on the rubber edges onto the fabric.

The secret cure is too carefully ink only the raised rubber image evenly.  While inking the stamp, should ink get on the edges, have a small rag handy and just wipe off the edge before stamping the fabric. 

When pressing the stamp to the fabric, don't use an over amount of pressure, and be sure to distribute the pressure over the entire image to be sure to imprint the entire image.


that's it!


Simple!

TIP: 
Store ink pads positioned upside down.  This keeps the ink at the top of the pad where you want it and it's much easier to ink a stamp.


Happy clean stamping!
Annie


...and this Scrappy Swirl was mailed to Carol of Just Let Me Quilt

Saturday, July 28, 2012

Postcard Production

My larger projects are all in the gathering the fabrics and supplies stages or just plain taking too long, so I've been in the postcard production mode. Ideas for them are coming to mind faster than I can create them.  But I love that cause I hate it when I run out of postcard ideas.

First off, where did the cards go from my last post? 


This Scrappy Swirl was mailed to my dear friend Carol, (mamacjt) as another thank you for sharing this fat eighth collection with me.  She said she wasn't tired of receiving my postcards. :-)
...and she loves button embellies!


The Bluebirds have also flown the coop.


Bluebird Postale  will be winging his way to Pamela Nees of Stitches In My Lap


Bluebird in the Garden will be winging his way to Caroll, West Michigan Quilter


Now, of course, Jacque (aka Snoodles) of Lily Pad Quilting has been playing along with my postcard giveaway, but I knew I was going to have to have a particular card design for her.  So I made Froggie.
Are you familiar with her little green mischievous assistant, Padsworth?

I sometimes make a card that I just can't send away.  So it looks like this Red Daisy card is for me.
Another style of art that I absolutely love and am quite fascinated with is Steampunk.  I'm trying to figure out ways to add a bit a steampunk to my postcards.  This is my first step start.  I went out into Man's workshop to scrounge around for the flower center.  The best I could surface with was this washer.  But, it's a start!  I've been to the craft store jewelry departments since and now have a supply of flower centers.

I have a couple of cards waiting to be mailed for private swaps, so can't show those yet.

As it turns out, I did not mail out this Scrappy Swirl after all.
So, if you'd like it to come to you, let me know!

Wishing us all a good mail day!
Annie

Sunday, July 22, 2012

Modern Plaid Bright
Pillow #7
I've finally jumped the half way mark on my personal pillow challenge!  happy, happy!


I just can't do a plain ole scrappy squares anymore.  Even though it looks bright enough and I figure the quilting will add texture and dimension...

...adding these 1/4" sashings just brings these fabrics and the design to life, for me!

Comments were made on the last pillow of this design about the number of seams there must be...yeah, lots!


But they're sewn in strips.  It's not like actually having to sew all those 1" seams!...these pillows would not exist if I'd had to sew that many little tiny seams.

I'll be revisiting this pillow soon because I don't like the finished style that I "thought" was going to look really fun.  But I don't think it works.  So, first chance I get that I'm bored and don't know what to sew next, I'll be taking this one apart and redesigning it to the standard simple pillow I like.

This pillow is also an added project to this fat eighth fabric collection challenge that can be seen here as a flickr set.

While working on this pillow, I stumbled onto the blog of bohemiannie art  She was making the most unique baby shower invitations I've ever seen.  And their scrappyness was so inspiring to me, I had to immediately make a couple of postcards after I finished the pillow piecing.


I got so side tracked with postcards and inspiration, that when I got back to finishing the pillow, I totally forgot to add some batting and quilt it!  But it was going to look ok anyway.  I'll be able to add the quilting when I take it apart.

The two postcards above are going out in the mail soon.  Do I hear disappointment that you don't have a chance at them?!  Not to fret, I have a couple of bluebirds you might like.

Bluebird Postale

Bluebird in the Garden

If you aren't familiar with how my postcard giveaway works, you can read about it in this post .

While I wait to hear from you, I have more postcards I want to make.  More happy, happy!

Annie

Saturday, July 7, 2012

The simple how-to of my
Modern Plaid
Pillow #6


I used a charm pack and cut the 5" squares into 2-1/2" squares, arranged them and stitched them all together.


This was my simple original plan for this pillow, but it turned out so blah looking that I had to come up with a plan B.  I cut some brighter strips of red, white and blue.  These strips are 3/4".


Next cut each row of blocks in half (1" from the sewn seam) and sew a 3/4" strip between the blocks.  I did this one row at a time.


I liked how it was progressing.


I continued and did the same pattern in the other direction.


Now it had the visual impact I was hoping for!


So simple, isn't it!  I'm so anxious to do this modern plaid in some brightly colored fabrics.

Have fun,
Annie

Thursday, July 5, 2012

Modern Plaid
A Pillow for July
Pillow #6


I won this Prairie Paisley II charm pack from Just Carol's blog last April.


How perfect for a July pillow is what I thought.  That's such a cute little tag Carol made to add to the charm pack.

I am really happy with the outcome of pillow #6
The back is from scraps and I feel just so clever for hiding the zipper in the design in the back. (2nd red stripe from the left).
   When I started this project, I actually thought it would be pretty easy to choose a pattern or design, stitch it up and love it.  It hasn't turned out to be that easy.  So when one turns out well in the end, it makes me really happy.


I want to make another pillow with this design in a different color...that's how happy I am with it!  Off to decide on what next color!  :-)

Annie

Tuesday, June 26, 2012

Patriotic Celebration

I haven't ever sewn anything patriotic other than a potholder ... until now.  And I think I have learned why.  Nothing really grabs my attention and makes me feel like I've just got to sew that.  And red white and blue aren't my favorite combination for sewing. 

I noticed a couple of weeks or so ago on flickr where my friend, Carol (mamacjt) suggested a patriotic themed mug rug swap.  That threw me immediately into a patriotic sewing mood.  But I didn't want to sew for a swap.  But I felt like I wanted to sew ... something.

I thought of fireworks and how I love them, and wondered if I could make one with fabric and thread.
29" X 33-1/2"

I haven't decided if I was very successful or not.  I do think it's kind of fun though.  The gold tinsel thread really helps to define this patriotic burst a lot.  Without the glitz it was pretty darn boring.


  It's been a whole lota years since I've sewn with metallic thread and we won't discuss the grief it doled out to me here and there.  The point is I won in the end.

Happy 4th of July, America!
Annie