
A couple and a half years ago I figured out a way to make a zip pouch from a paper product...that would hold up under lots of use and not tear. Yes, it’s vinyl coated, but sewing perforates the paper and the vinyl leaving them susceptible to tearing. Read on to find my secret ingredient for durability.
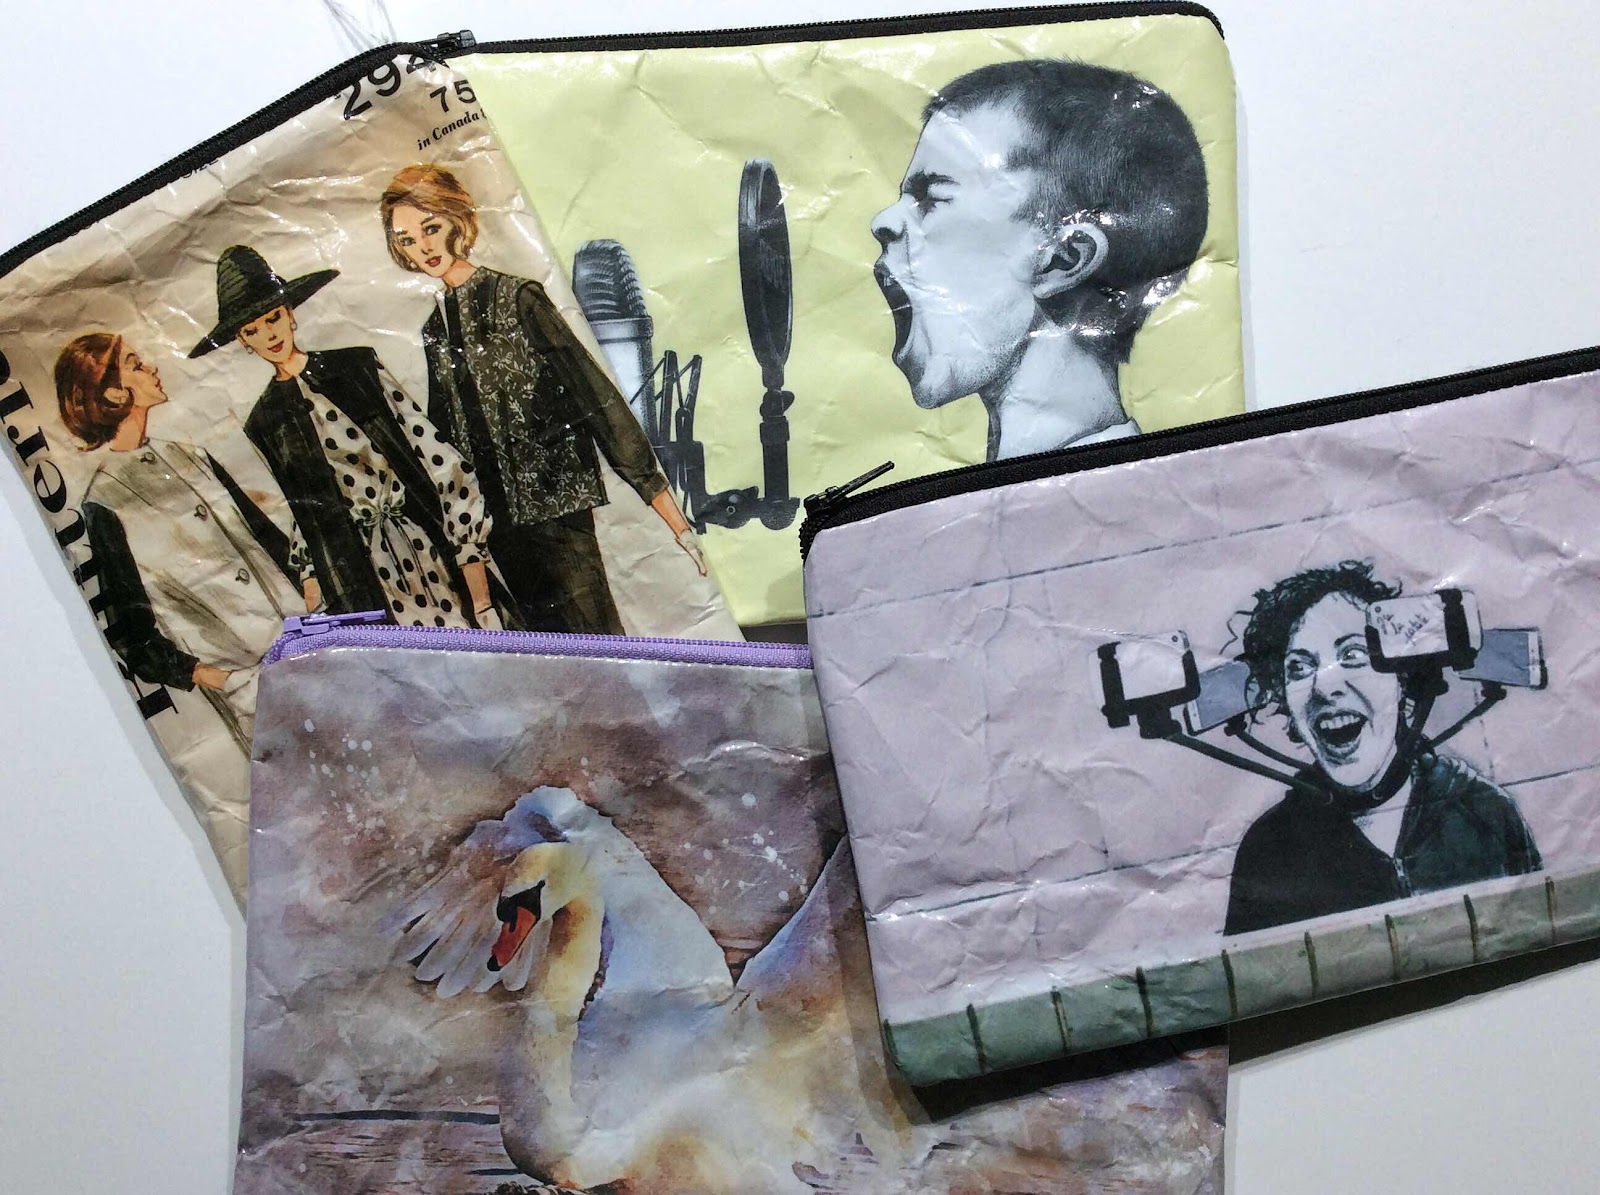
I wanted to make a basic zip pouch using an image that I liked, without being limited to fabric prints. Or candy wrappers, pet food bags, etc.

I’ve used royalty free images from the internet as well as my own photos and sometimes my own artwork.
This tutorial of my process shows how I make them for anyone not familiar with making a basic zip pouch.
For those that know how to make a zip pouch, I have only a single ingredient to add to the process.
—- TUTORIAL —-
Find an image or photo you like and print it to a size you want. Also find an image or design for the backside of your pouch. Pixabay has been an excellent source for royalty free image use.

Trim your pouch front image keeping in mind that you will sew a 1/4” seam allowance. Then trim the pouch back image to the same size. The 1/8” white borders that you see will not show when sewn.

Other supplies you will need are iron-on vinyl, a zipper (longer than your paper image), a lining fabric and muslin (the secret ingredient).
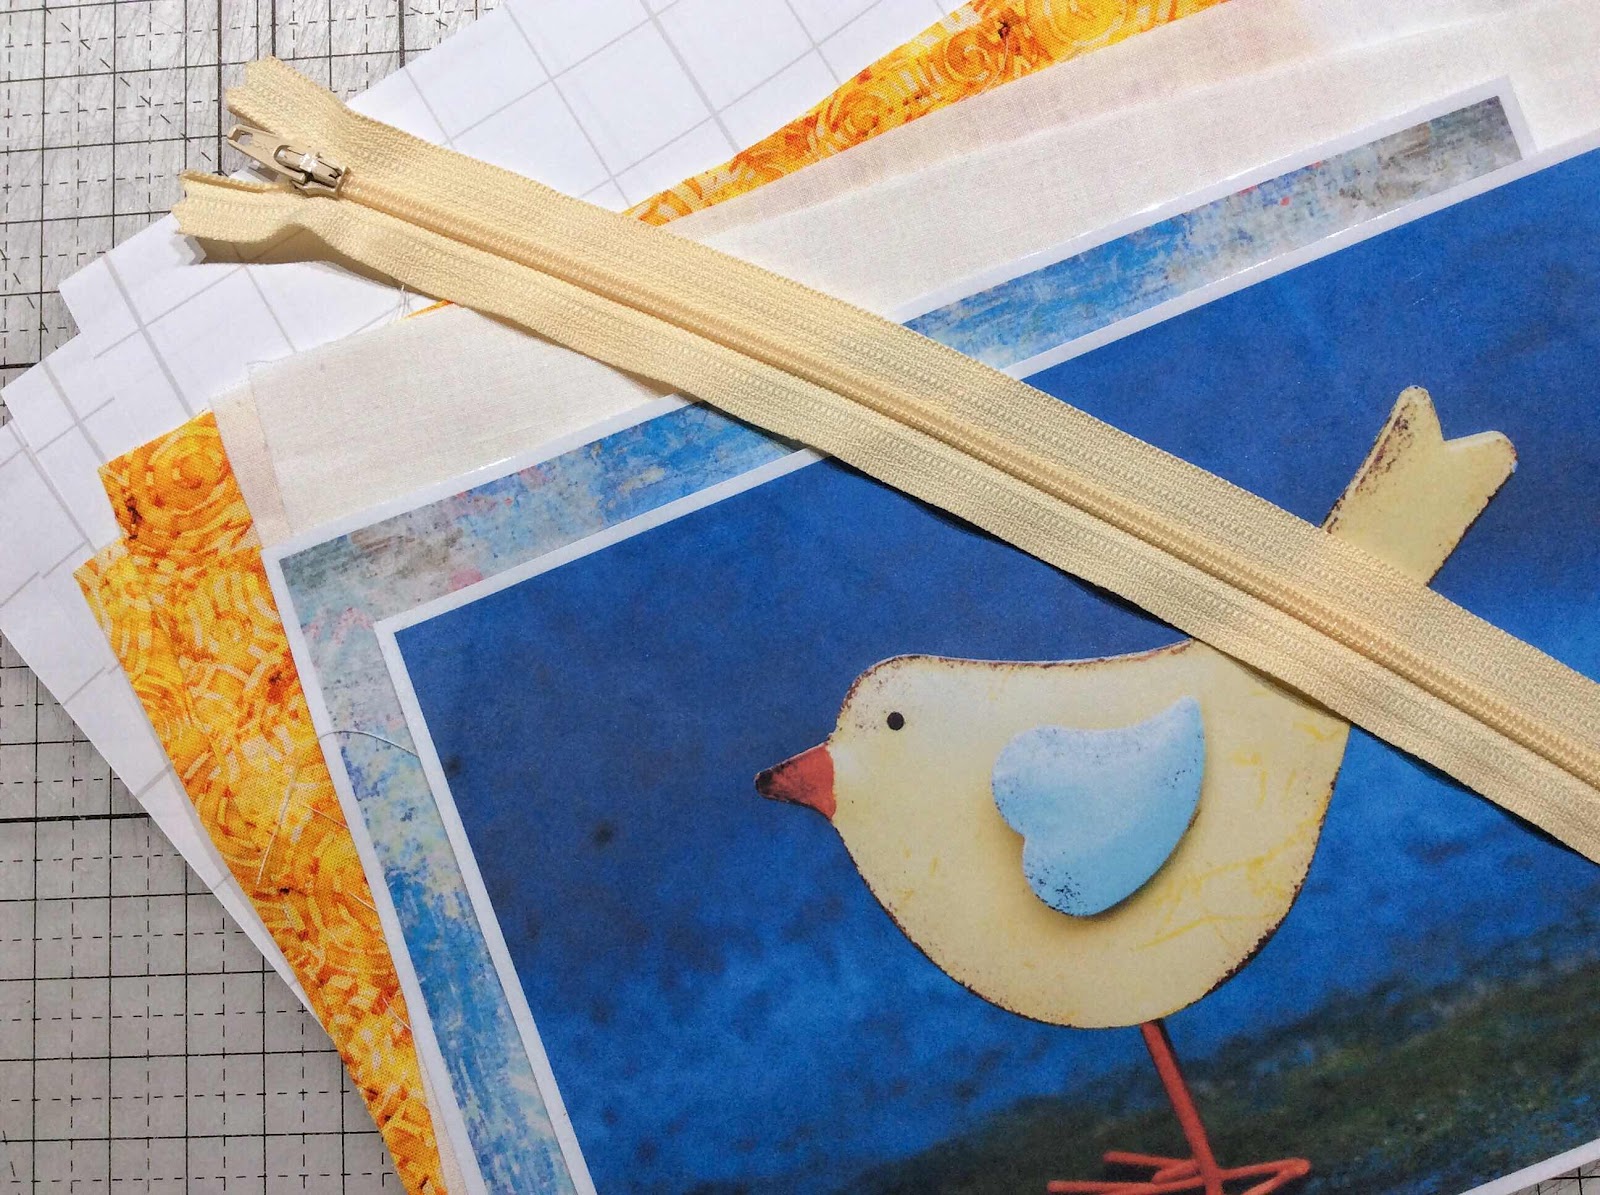
I use this iron-on vinyl product.
It can also be purchased as a small roll. I started out with the rolls but I had such fun making tons of these that I needed the bolt of it. This was my second bolt!

Cut 4 pieces of vinyl that are larger than your trimmed images. You will seal the paper between two pieces of vinyl. Be sure to smooth out bubbles before heat fusing. Stick the vinyl to both sides of the paper. Then trim off the excess.
The vinyl directions only tell you how to adhere it to fabric. You’ll need to test. I set my iron at the center of the heat dial. (On my iron that is the cool end of wool/silk). No steam. I hold the iron in place for 8 seconds until image is completely fused. I use the backing paper from the vinyl to place between the vinyl image and my iron. What a mess if you forget that!!!
The vinyl directions only tell you how to adhere it to fabric. You’ll need to test. I set my iron at the center of the heat dial. (On my iron that is the cool end of wool/silk). No steam. I hold the iron in place for 8 seconds until image is completely fused. I use the backing paper from the vinyl to place between the vinyl image and my iron. What a mess if you forget that!!!
Heat fuse BOTH sides separately. Let the first side cool before fusing the reverse side.

Cut 2 pieces of muslin larger than the images. Sew the images to the muslin at the edges. You will need a walking foot or a teflon coated presser foot for this step. After stitching, trim the excess muslin to the edges of the image.
Cut 2 pieces of muslin larger than the images. Sew the images to the muslin at the edges. You will need a walking foot or a teflon coated presser foot for this step. After stitching, trim the excess muslin to the edges of the image.
It is the muslin that will hold the stitches and needle perforations in place so that the pouch won’t tear.


I want the lining to nest inside the pouch, so I cut the lining the same size as the pouch image and then trim off 1/4” on one side and 1/8” off the bottom of the lining pieces.

Sew one side of the zipper to one lining piece as shown.

Place the pouch back image over the zipper and lining and stitch in place.
If you trimmed your lining, center the vinyl image over the lining.


It will look like this from the lining side.

Repeat those steps for the other side of the zipper making sure the linings are on one side of the zipper (the underside of the zipper) and the vinyl images on the other (the outside of the zipper).

At this point your pouch looks like this.
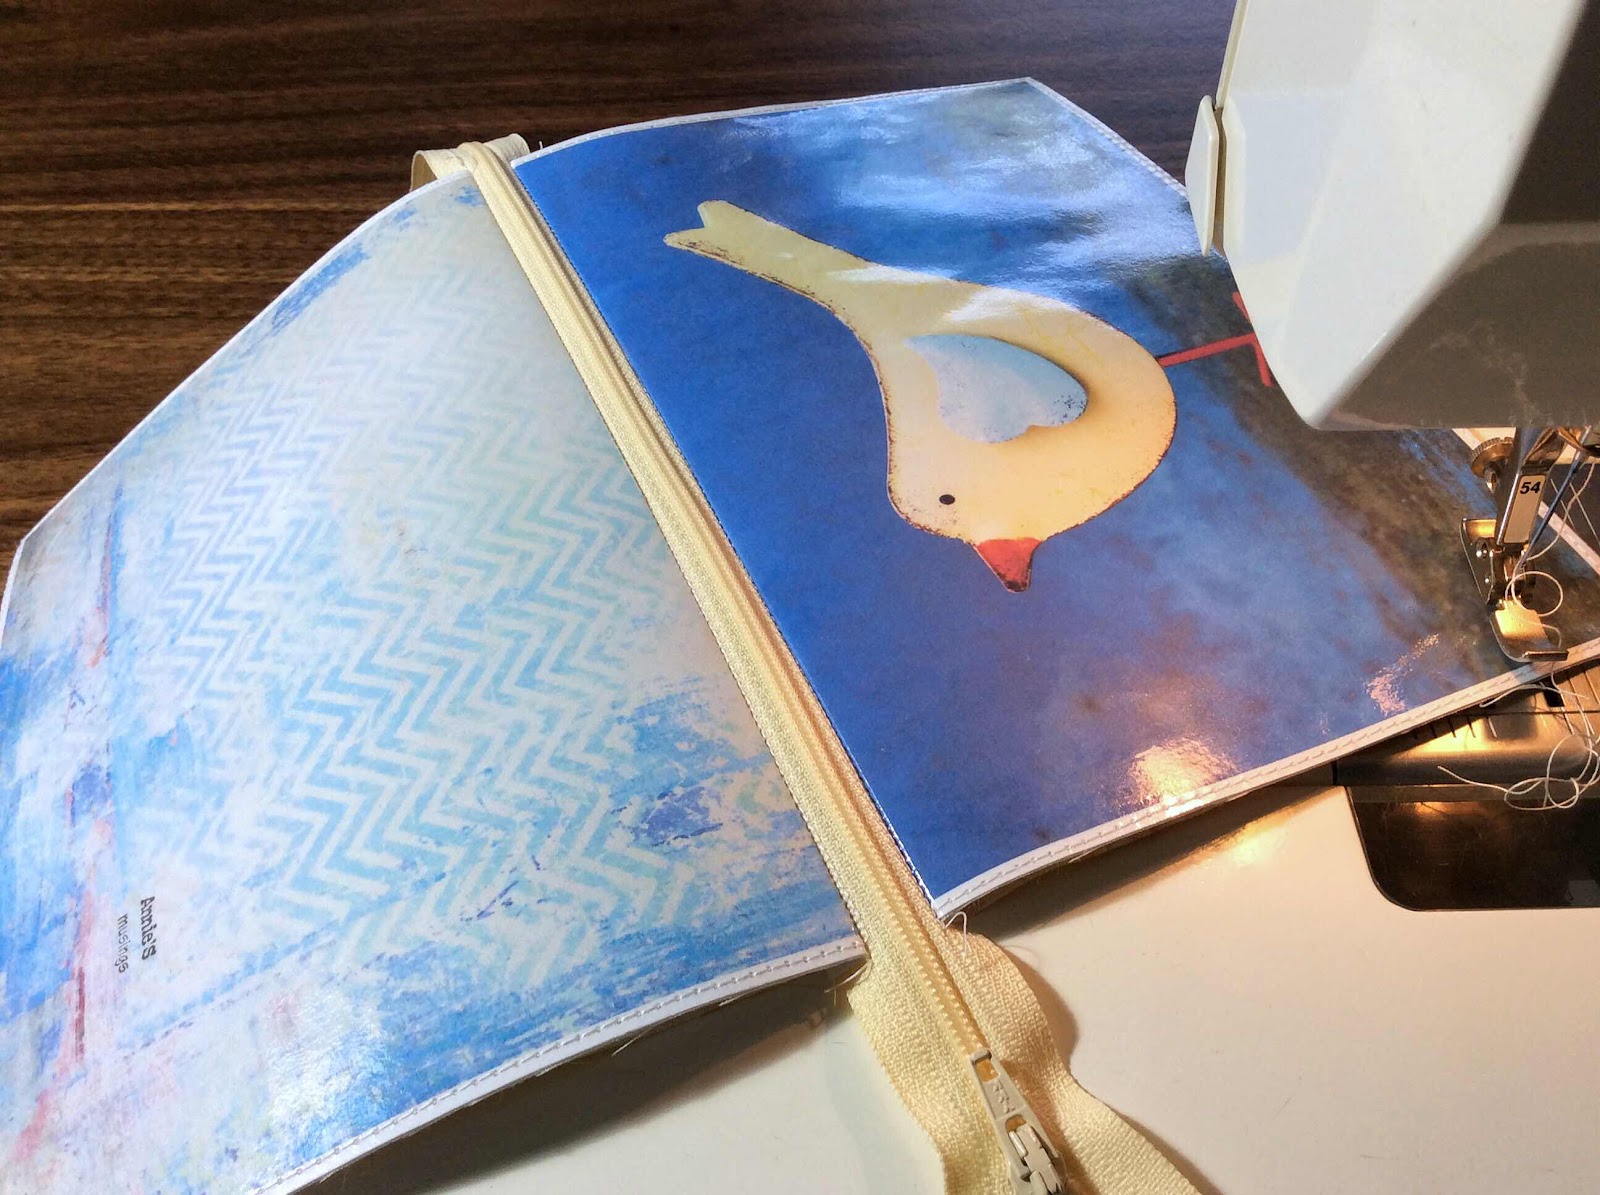

Open the zipper at least half way or you won’t be able to turn your pouch after sewing the sides and one end together.

Clip your lining pieces together and your vinyl pieces together. Push the zipper teeth to the lining side. Stitch all the way around (being careful over the zipper teeth) leaving an opening at the bottom of the lining for turning the pouch right side out.
Clip your lining pieces together and your vinyl pieces together. Push the zipper teeth to the lining side. Stitch all the way around (being careful over the zipper teeth) leaving an opening at the bottom of the lining for turning the pouch right side out.


Trim off the excess zipper at both ends. Also trim all the corners.
I even trim the tiny sharp corners at each end of the zipper on both sides.


Now the fun part! Turn your pouch right side out. This is when the paper gets magically crinkled.
Now the fun part! Turn your pouch right side out. This is when the paper gets magically crinkled.
Be careful at the corners. They will not be a sharp corner, they will be rounded. They will kind of have a mind of their own. But they can be carefully manipulated.

Stitch the bottom lining opening closed. I use the zipper foot to get close to the edge. You can also slip stitch it by hand if you prefer.

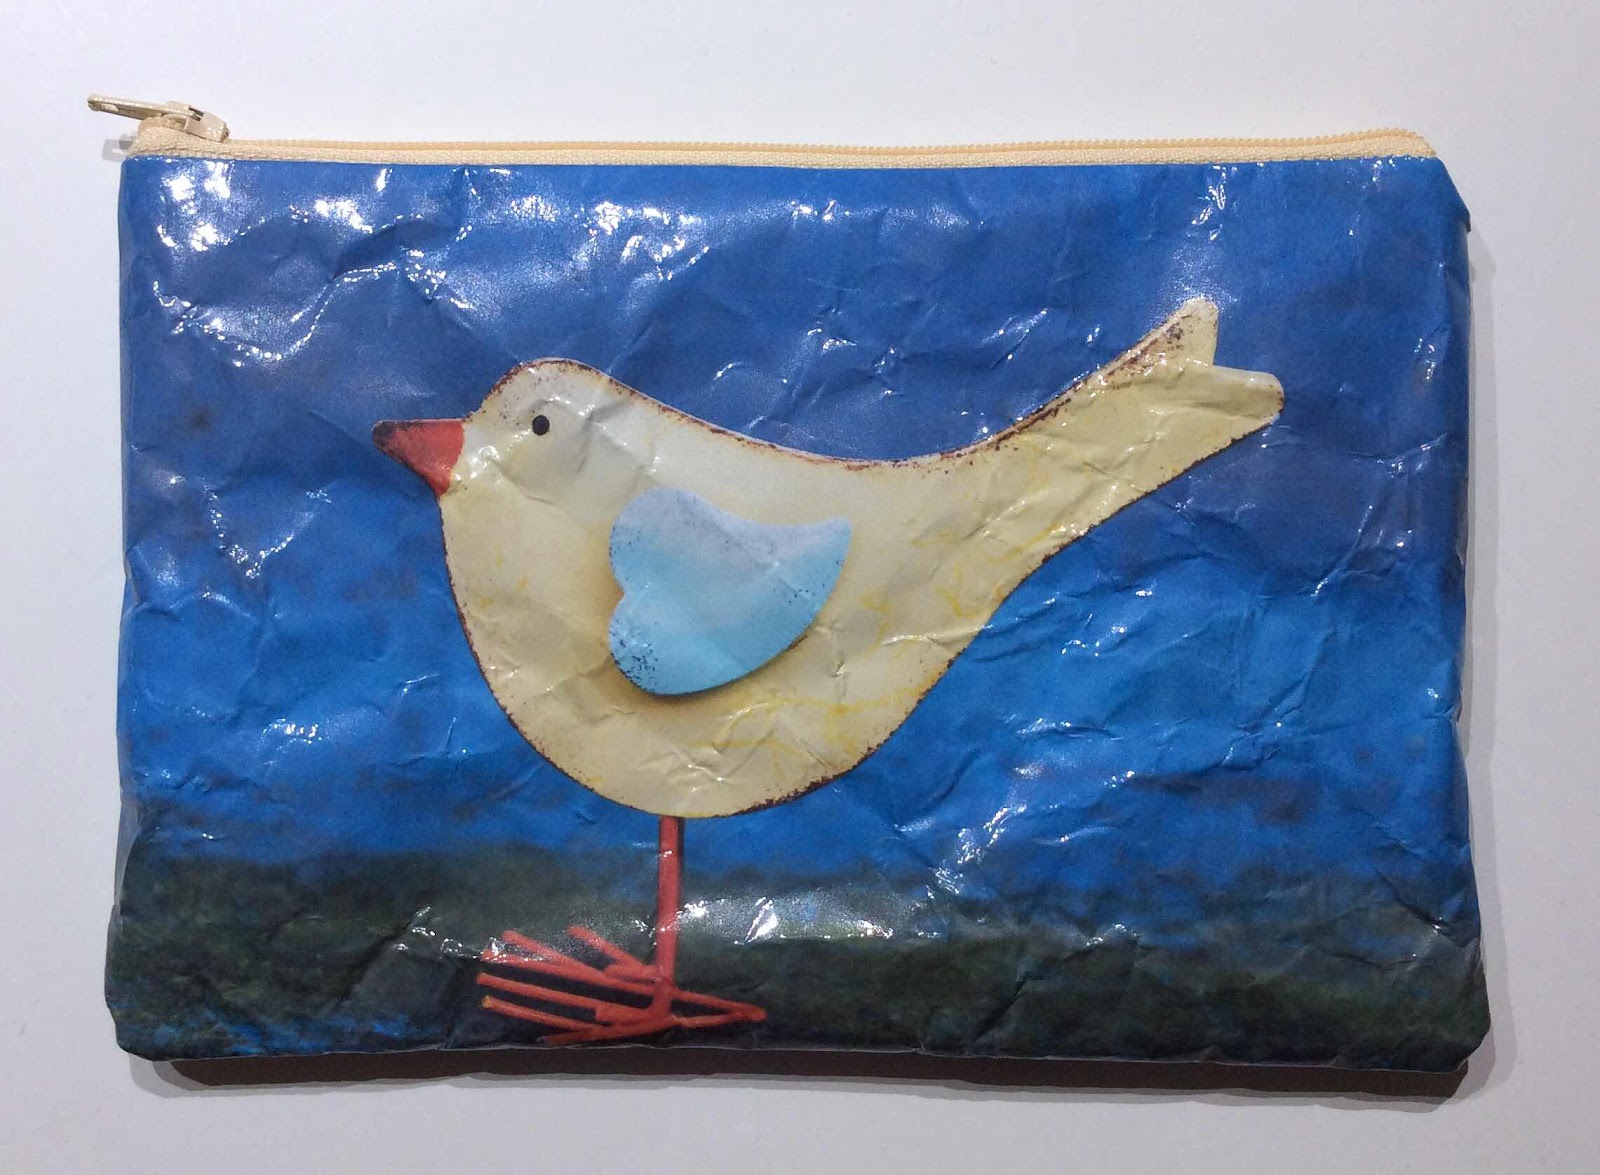
Your pouch is finished!

They are quick and fun to make. I became addicted and made nearly 100 of them!

When I give these as a gift, I include simple instructions.

Ink jet ink is water soluble. If the pouch is left in water, the water will slowly seep through the needle holes and the ink will run, ruining the design. Permanent ink will not run. But if soaked, the pouch will take days and days and days to dry out. I tossed one that I made from an old pattern instruction sheet into a wash load to test the ink. The pouch was fine but it took forever to dry out.
If you have any questions, don’t hesitate to contact me, I’m more than happy to help.
8 comments:
This is a great idea! I've made lots of pouches from candy bags, but never from paper. How fun is this. Thank you for letting us know what your "secret ingredient" is! :D
Great tutorial! Thank you
The pouch will be a replacement for zip plastic bags I use to keep a small bottle of hand sanitizer in my purse.
Thank you Annie for this wonderful tutorial. Love your using an image as opposed to the candy wrappers. Creative Bliss Dear.
Oh my goodness, Annie, this is a fabulous tutorial, with so much detail, both how to make an actual pouch and the crinkly special process. It must have taken ages to take the photos and write the words. I am going to save it. It's a marvellous idea for Christmas presents. Who doesn't need a little artistic pouch for anything and everything. I love all your pouches but especially like the little bird pouch which I think is your own art, am I right?
Love from Sheila
I love this, Annie! I never tried it with paper, but I did make some bags using the iron on vinyl and food bags (some people make bags from candy bags like M & M's, but I don't eat that stuff, so used bags other food came in). I don't have an ink jet printer though, so maybe I will try using a magazine image instead. Thanks for the tutorial!
I love your pouches and your tutorials are always the best. You cover everything in your directions so that others can achieve good results. I am always amazed at the variety of things you make and how perfectly wonderful they turn out to be.
Not sure how I missed this tutorial. I wish I sewed real projects like that. I loved the dress pattern cover the best.
So freaking cool. I kind of want to make some too! Adding them to my someday wishlist of projects... although that list is like 100 miles long. Your tutorial is so clear and easy to follow. Especially with the photos. Thanks Annie 💓
Post a Comment