Saturday, April 24, 2021

Twinchies Art Journal Page

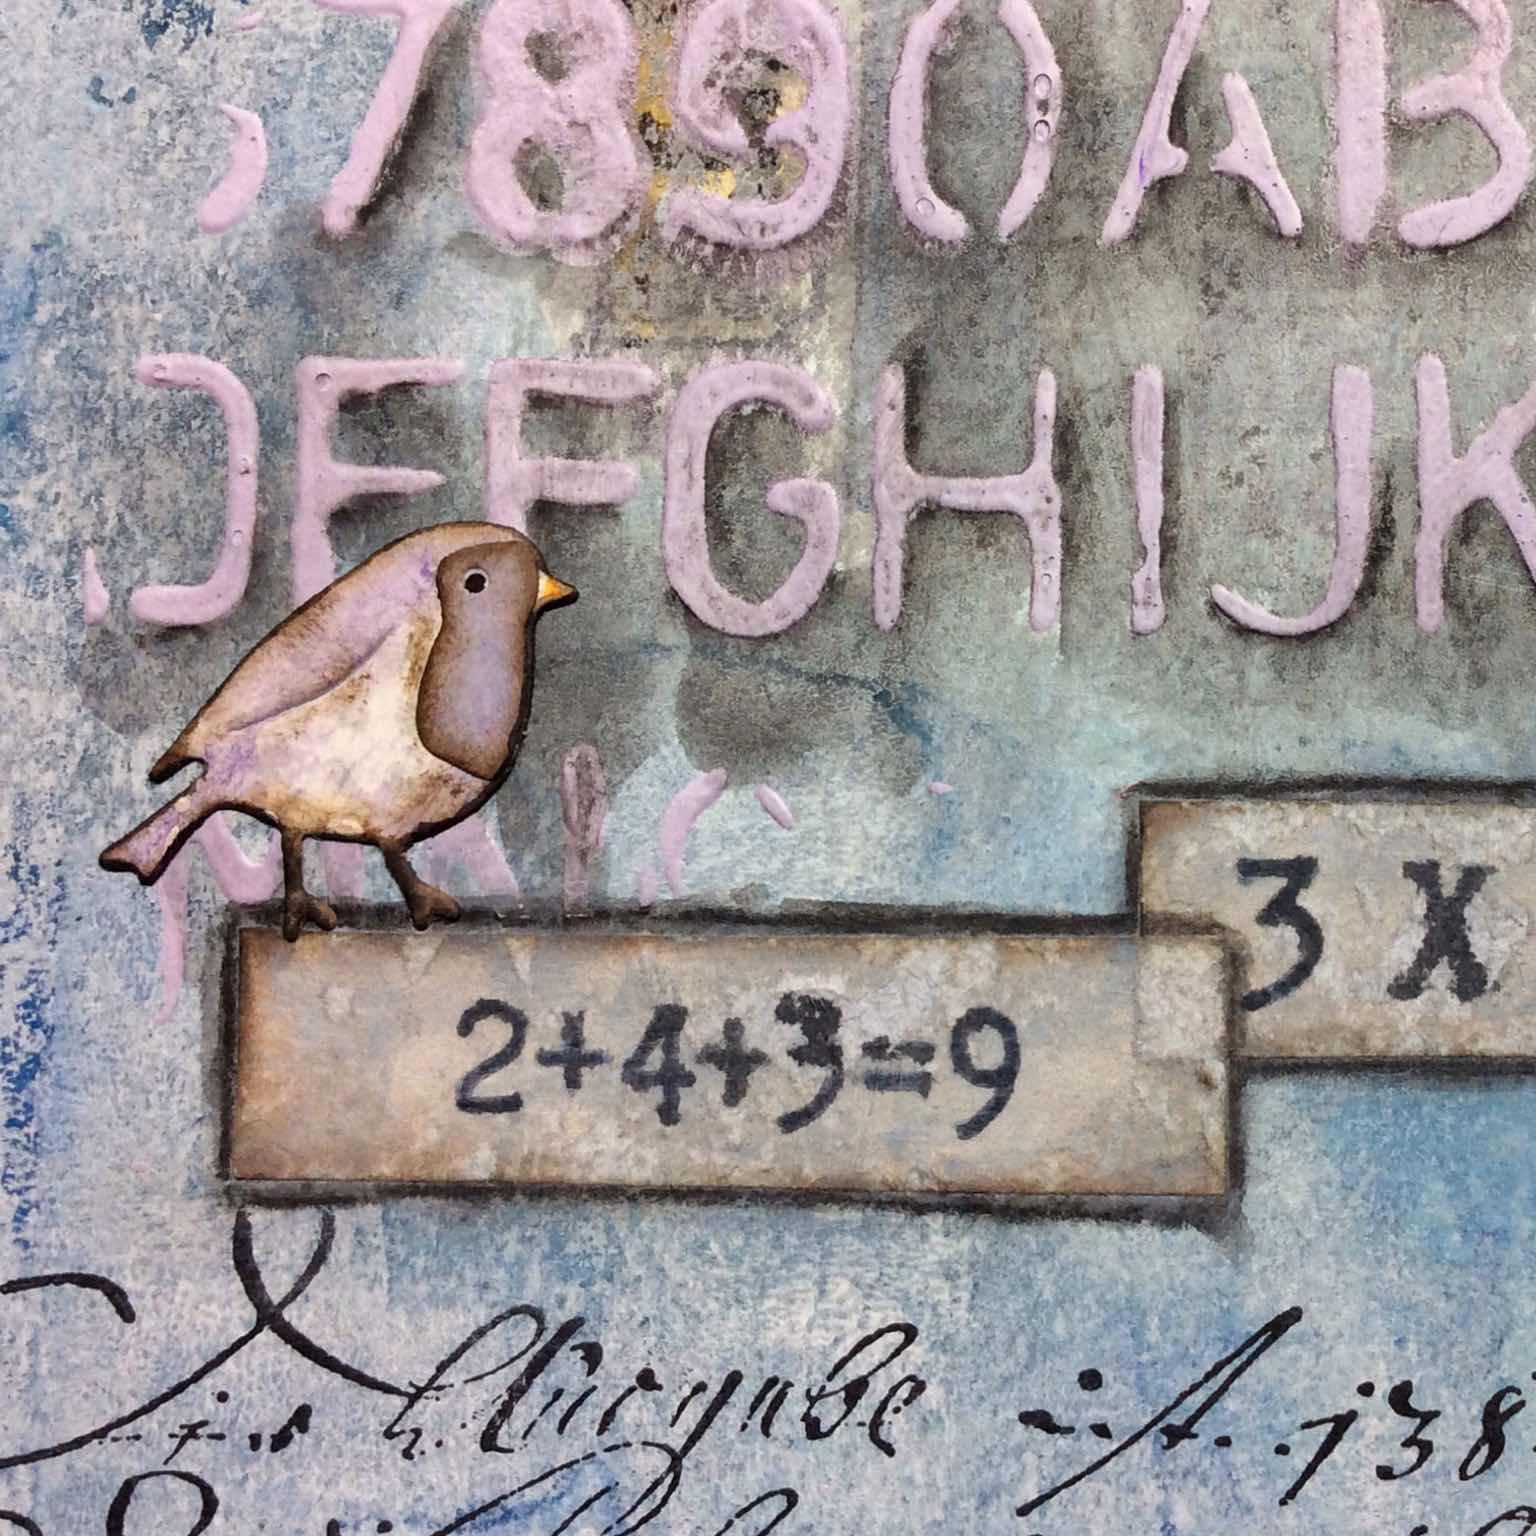
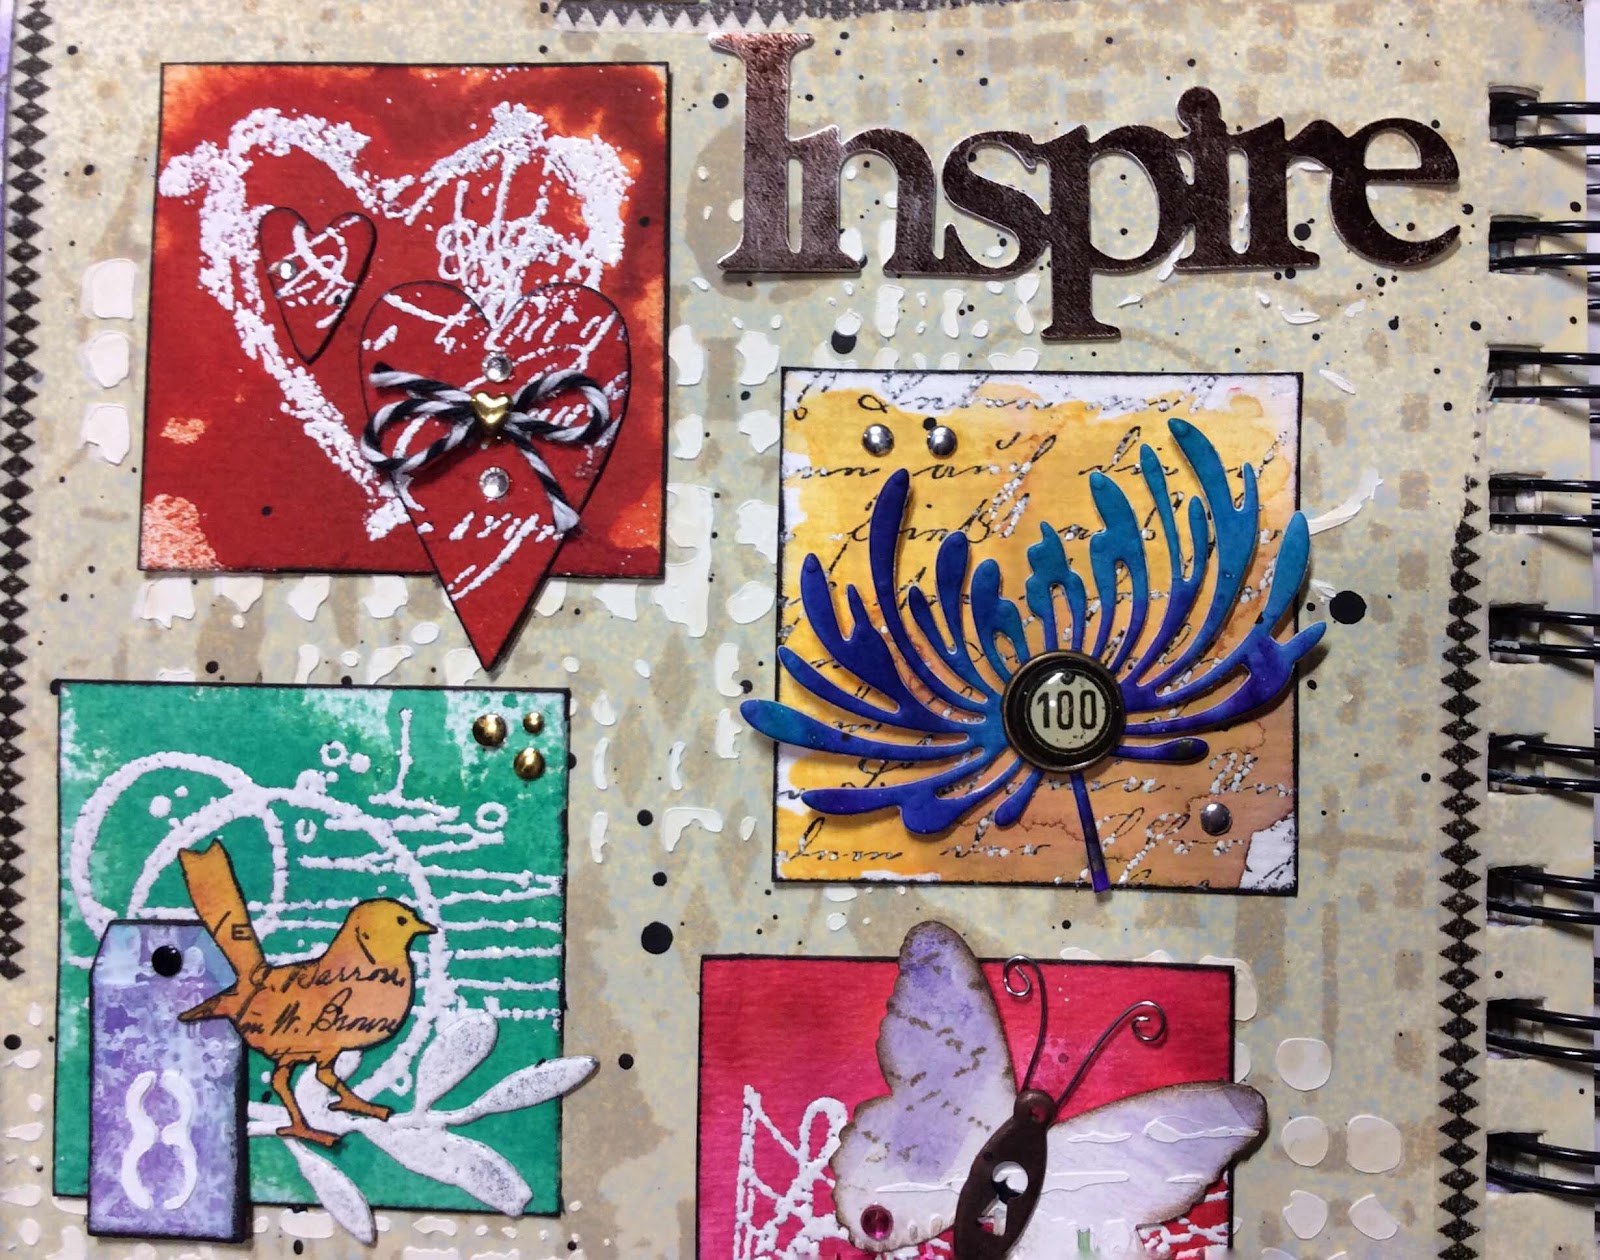
Twinchies are a 2” piece of art.


Strange as it may sound, for this art journal page I was inspired by my own long ago art.  As well as being inspired by Sheila of Orange esmeralda convincing me to give art journaling a try through Art Journal Journey  monthly challenges.

The story behind this page is...
A flickr group had a Twinchie swap.  I’d never made twinchies before but they sounded fun.  And they were.  We were given a partner and were to make 4 twinchies to send to our partner.  I made these Twinchies.


There are times when my art surprises the heck out of me!  These were like that.  I couldn’t believe I made them.  I loved them.  I proudly mailed them off to my partner.  We’ll skip a description of what I received in return.  But I wanted my twinchies back.

I always wanted to make more.  But, what would I do with them anyway.  So I never did.  Now that I understand art journaling as the desire to simply make art, I wanted to recreate the twinchies.

I pulled out my stash of previously watercolored papers to choose the 2” backgrounds.


Got out my box of rejected doodads.


Will need some bling.


Made some new doodads.


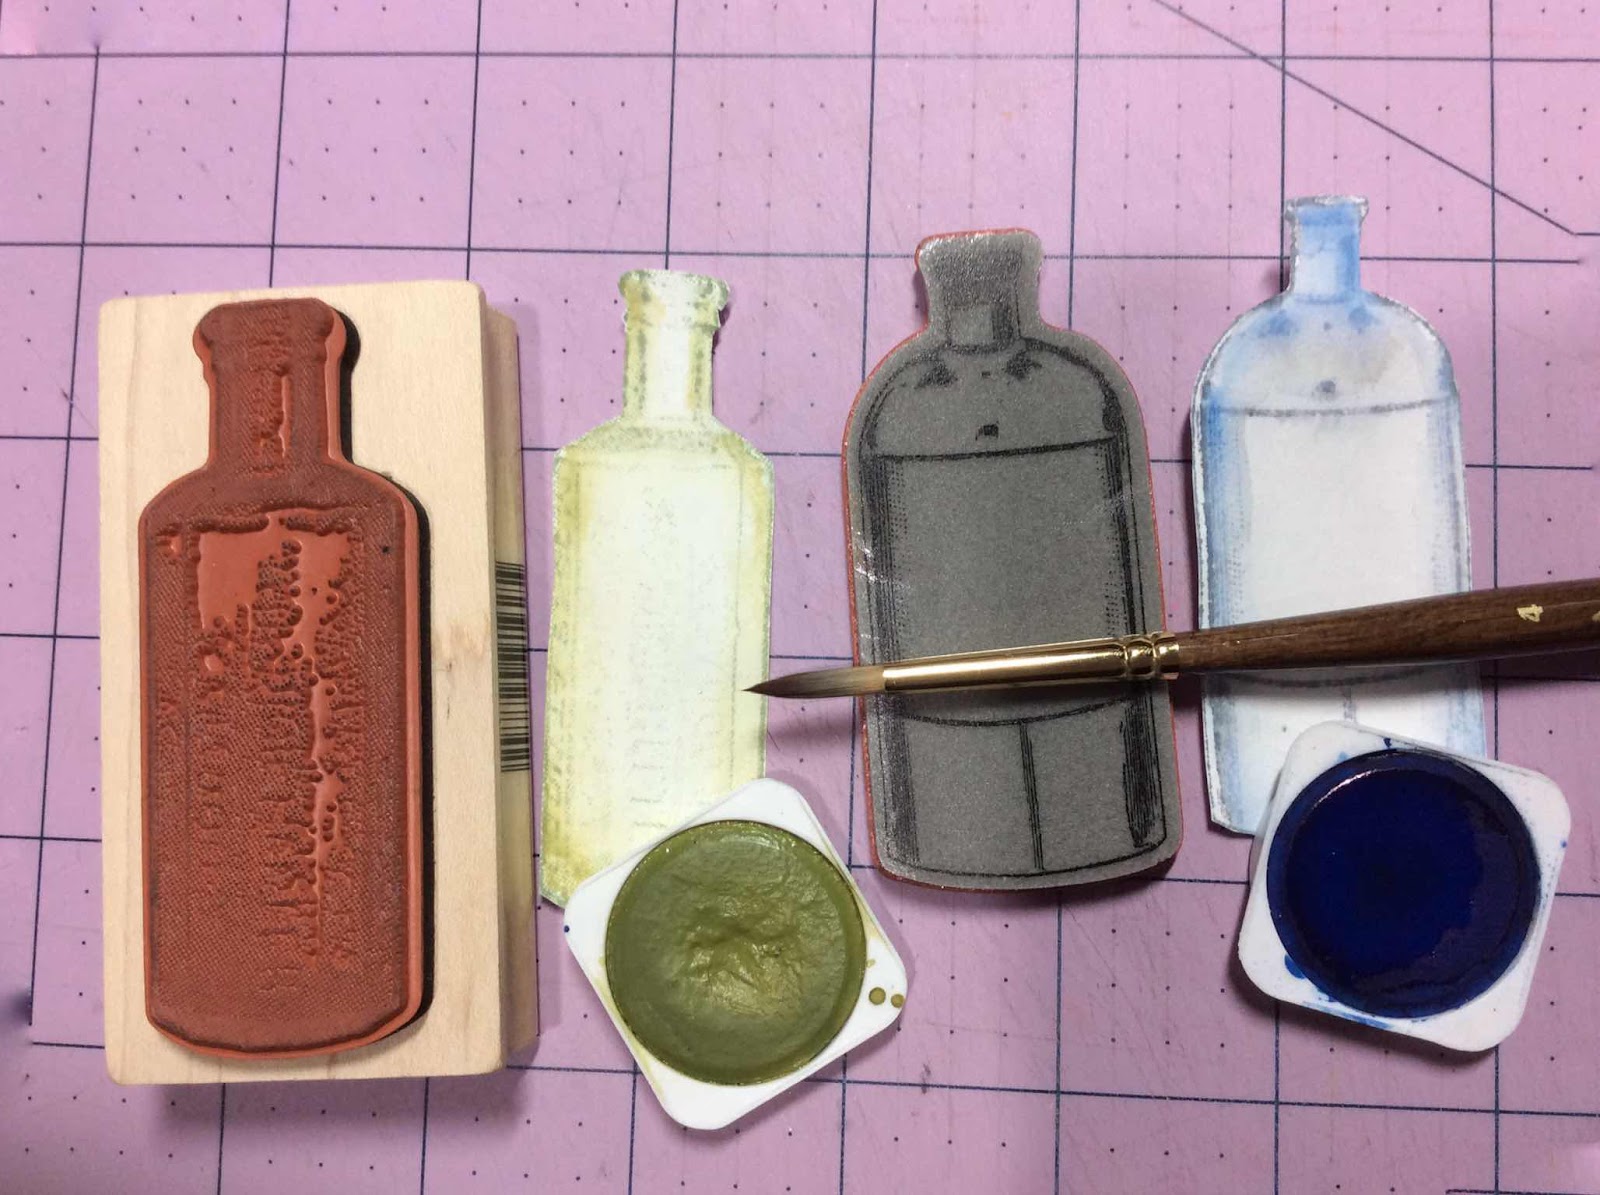
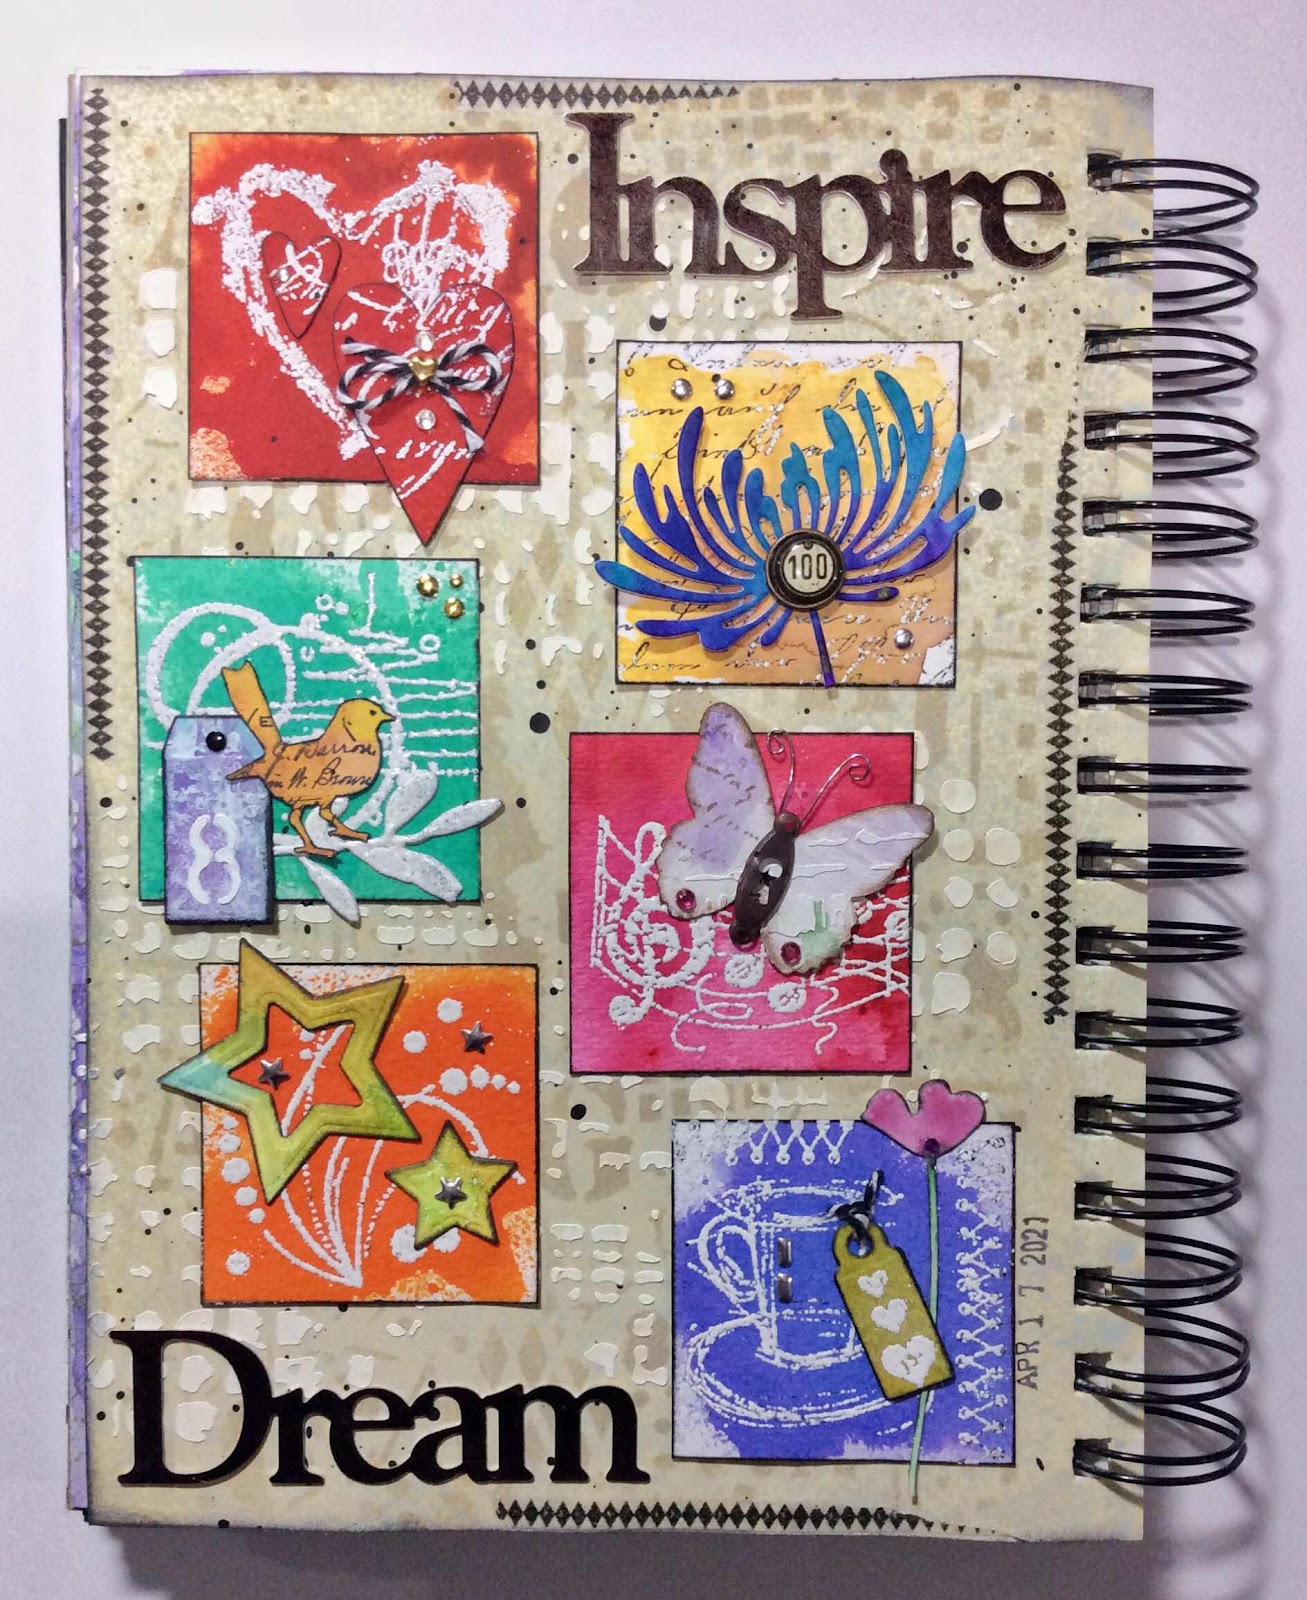
And began embossing base images with white embossing powder and then adding bits from there to create six twinchies.  Four were recreated  similar to the original four and two new ones.


I’m so glad I did this.  I loved making them again.

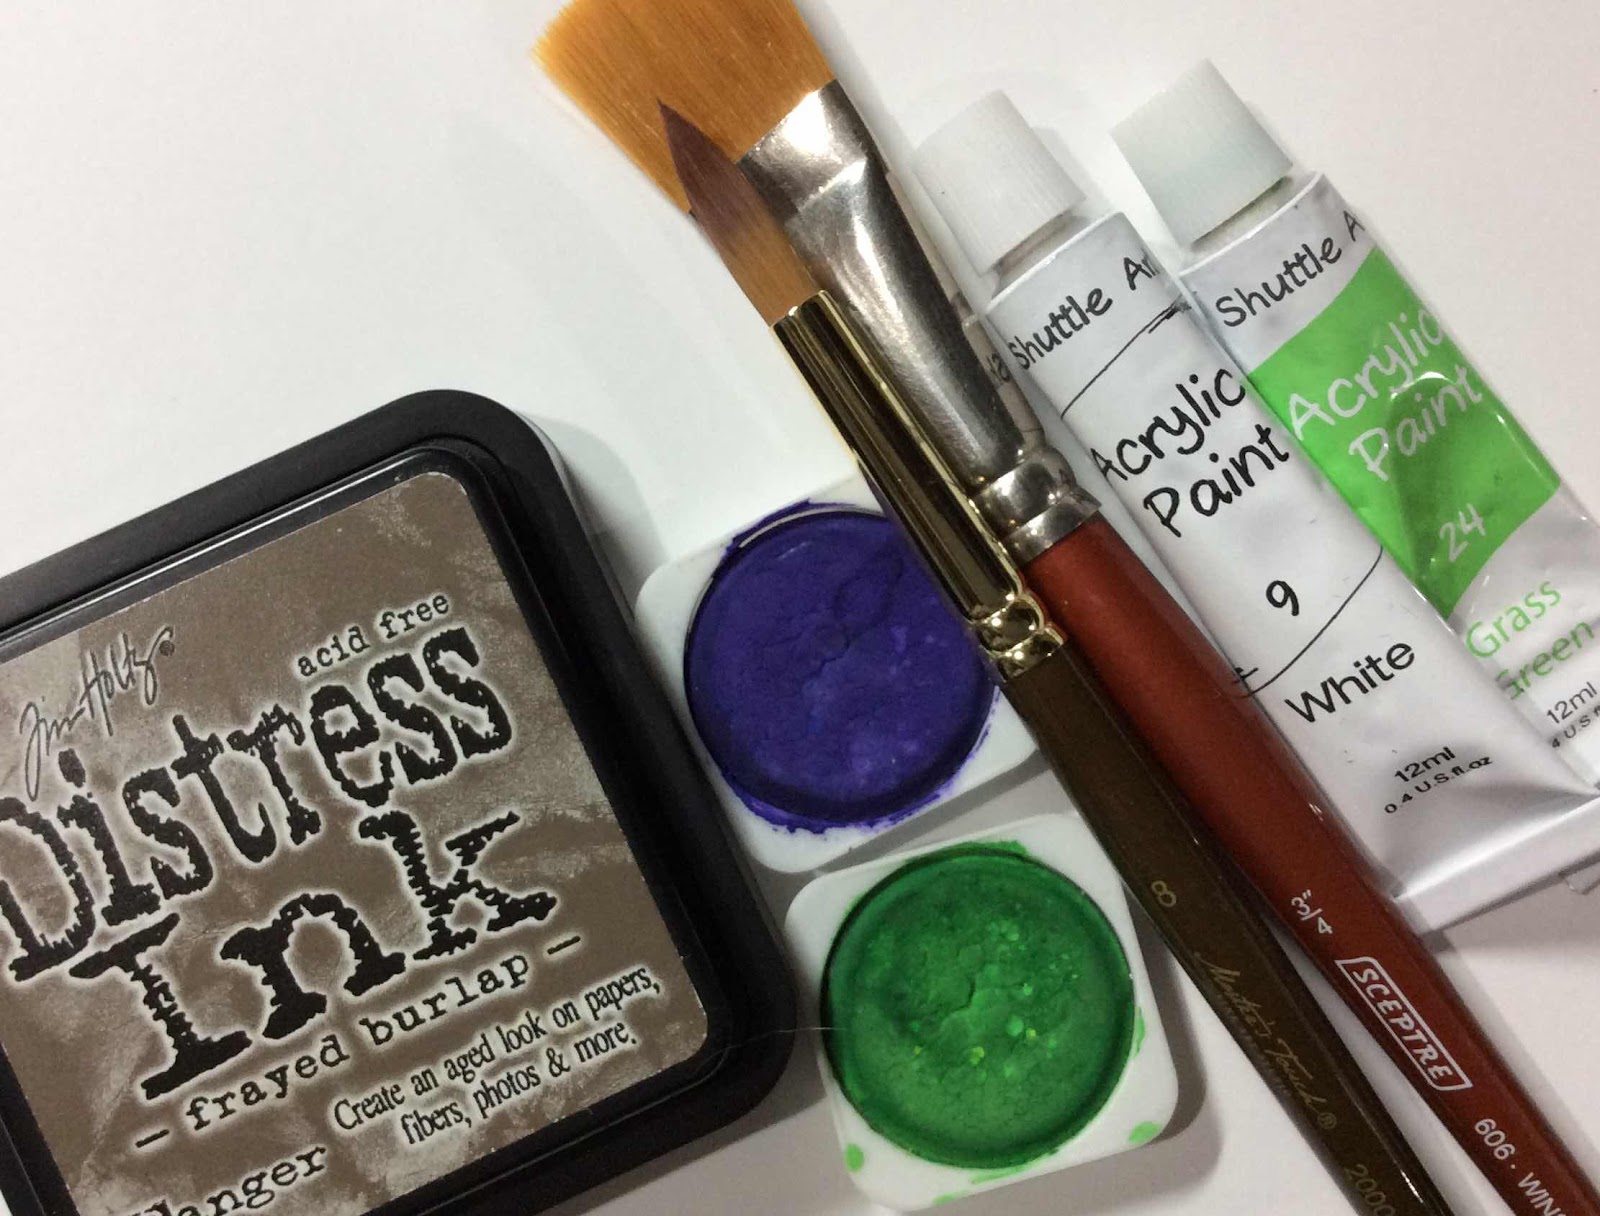
The page is sprayed with Old Paper Oxide Spray.  Then Brushed Cordoroy Oxide ink dabbed through a stencil.


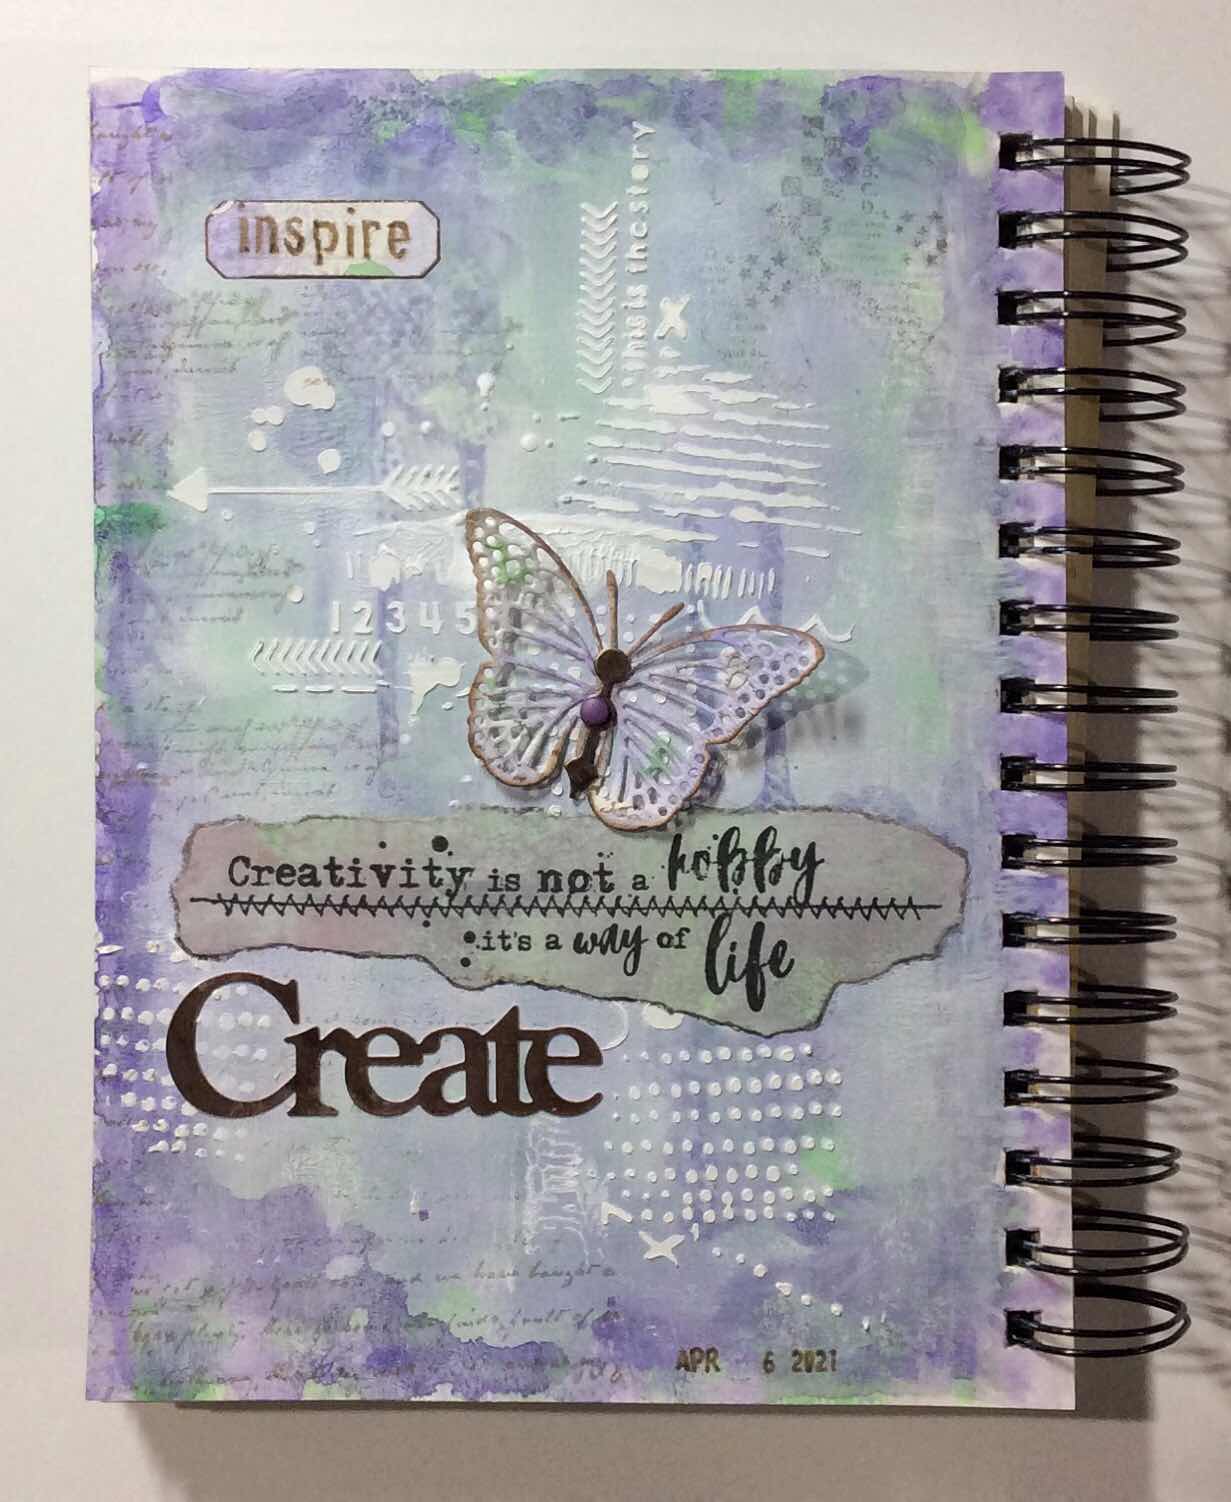
Then some modeling paste scraped over another stencil.  The modeling paste goes on white.  As it dries, it will absorb the colors of water based inks.


I forced myself to be patient allowing each application of the paste to dry before adding more to each area.  It’s a nice payoff for sure.  I’m usually trying to get it all done at once and always end up smearing the previously applied wet paste.


I arranged the twinchies on the page.


Added some Washi Tape pieces to the page edges.


Finally I added the words after darkening them with StazOn ink.


Now I feel like I’ve got my twinchies back to enjoy whenever I want.


Have a fun filled artful day!

Wednesday, April 21, 2021

Cookie Tray Mats


Thanks to Carla for all her hard work for this In the Kitchen blog hop!


Cookie jars are not my thing.  Out of sight, out of everyone’s mind and the cookies go stale and look unappetizing in other ways too.  I have this glass domed tray for treats.  The tray is not food safe so the treats always sit on a plate. My salad plates fit perfectly.


I’ve searched for fun plates to use in it, but they are either too small or too large or I just don’t like them.  But the tray is always on the bistro table in my kitchen and it looks blah when there are no treats inside.

It finally dawned on me that I could sew round mats to set inside.  I thought this was an excellent time to try a paper pieced New York Beauty block.  I shrunk the block pattern to a size I hoped would fit.  At the time, St. Patrick’s Day was approaching so I chose some green fabrics to use.


I’m still trying to use up this near white glow-in-the-dark piece I’ve had.


I stitched up the first quarter block.  The whole circle needs to be about 9”.  That makes those center circles pretty small.  After sewing these first small quarter circles, I knew I did NOT want to sew those 3 more times!  So I took the circles off.


And cheated by cutting full circles with my circle rulers.


Loads less stressing!


I kept the papers on to keep the edges from stretching out of shape.


I did the same with the center circle.  


I pinned the binding on from the paper side and stitched it from the paper side also.  That way I would know exactly where the points were and not chop them off with the binding.  It worked out nicely.
I never do a bias binding.  Even on circles.  I always do a straight grain binding.


After stitching the binding on, I pulled the papers off and did the quilting.
Then trimmed around the mat and hand stitched the binding to the back.


It all worked out really well.  AND, it fit in the tray perfectly!  Color me happy!


I had such fun with this one, I wanted to do it again.
This time for the patriotic holidays.
The only thing I changed was that I stitched the centers as raw edge appliqué rather then turning the edges under.  I really like the look of raw edge applique’.


Then Easter was coming too...
These circles were all cut with my circle rulers.


Then when there isn’t a holiday, I wanted an everyday mat to see.
Striped bindings is specifically why I don’t do bias bindings.  I don’t care for the stripes being at an angel on a round mat.


There might be Fall and Christmas mats to come.
It all depends on what shiny project draws my attention most at the time.  


My tray doesn’t seem so empty and lacking even without something edible inside.


You know I had to try the NYB as a postcard!
And, yes, I will mail it to one of my followers.  Just add mention in your comment that you’d like to find it in your mailbox.  I will contact the winner for mailing info.


Check out the other blog hop participant’s projects on this final day of the hop.

Wednesday, April 14, 2021

ABC-123 Journal Page

This art journal page is “Inspired By” Spring and the neighborhood kids once again walking to and from school.


The page started out like this.  It was way too bold to work with.


I already decided to pull the page out and toss it.  So what the heck, let’s try some white acrylic paint to tone it down.  It’s always a good time to try something when the page is headed to the trash.


I decided I was back in business with this page!  Now I’ll see how some stamping will look.


Then I’ll see about some white heavy body acrylic paint tinted with a purple acrylic paint scraped over a stencil.


I didn’t get the next photo, but the textured stencil design was too light.  Since the page was again headed to the trash, I tried using a graphite pencil around the stenciled design then smeared with a water brush so that it would stand out better.


It kind of went into a muddy mess. I thought while it was still basically wet I would see if I could wipe off some of the graphite over the letters and numbers toning down the pencil effect.  It again seemed saved.


Another punched butterfly from a reject page got a body with a keyhole brad.  It’s so fun giving my butterfly’s odd bodies.


The die cut bird is also cut from the reject page.  The math strips are from a paper purchased through Etsy outlined with the graphite pencil then wet and slightly smeared with a water brush.  The paper looked to clean and new so I put a little paint on them.  That was worse so I tried sanding the paint down which happily grunged everything.  The numbers began to disappear so I just traced over them with a marker and sanded them a bit more.


It’s almost easier to make an art journal page when I’ve already decided to trash it!


I definitely learned a lot while making this page.
The whole process was one happy accident after another.  This page appeals to my love of grunge.

The “Inspired By” theme at Art Journal Journey runs throughout the month of April.
All mediums are welcome.  Come join in!

Saturday, April 10, 2021

Daisy Art Journal page

An art journal page created for the theme “Inspired By” at Art Journal Journey


This page is inspired by the painted flower die cuts that I see on Pinterest.

To begin I sprayed my page with Distress Oxide Spray, Hickory Smoke.  I cut the circles die twice and glued them to the page.  I then splattered white acrylic paint onto it.  


It was too...something, so I rubbed Distress Ink, Walnut Stain over the page and on the edges.
I stamped and painted the bottles with watercolors.  Then cut the bottles out.


The flowers are die cut.  I cut again the stems to trim leaves and make them long enough to sit inside the bottles.


I added Washi Tape to ground the bottles.  Glued the bottles and flowers to the page.  With a graphite pencil I added some shading for depth.  


The top left of the page was a previously cut die that I added for more interest.


I need lots of practice in this art journaling business but I’m having a lot of fun learning all kinds of stuff.  That I love doing these pages is as much a surprise to me as anyone!  It took my friend a long time to get me to even try this.  Now I’m hooked!


This gives me the opportunity to use a lot of the supplies that I have.  Cardmaking alone is just not enough.  The journal gives me the freedom to create that I don’t have making cards.

Wednesday, April 7, 2021

INSPIRE Art Journal Page

The theme this month at Art Journal Journey is - Inspired By


I am inspired to make art by practically everything I see on many social media platforms.  Recently on Pinterest, I was inspired by a dragonfly that had a clock hand for the body.


I won’t even bother describing the troubles I had.  BUT, I have to say I’ve had the most frustrating best time getting an art journal page finished.  


I see loads of painted backgrounds that I love but I find it difficult to get an acceptable result.  There is so much acrylic paint, and watercolor paint on this page!  By the time I get an acceptable result, I cannot seem to remember to stamp my images BEFORE using modeling paste!  


I trashed one page, I wasn’t going to trash ANOTHER!  I stamped the words on a separate piece of paper, tore it around the edges and glued it on.  Not exactly the desired look, but that leaves room for improvement, right?


I’ve had some silver metal words in my stash forever.  I darkened the metal with Timber Brown StazOn ink.    

The butterfly is a die cut from the first ruined page.  Until I ruined the first page attempt, I really liked it and managed to salvage most of the page to use in other ways.


I love the clock hand and a brad idea for the butterfly body.  I’m pleased enough with the page not to rip it from the journal.  Always an accomplishment for me still.

Saturday, April 3, 2021

Easter Postcard

HAPPY EASTER!

The theme this week at Sunday Postcard Art is Easter.
Which reminded me that I needed an Easter card to mail out.


I started with spraying a piece of heavy sketch paper with Shabby Shutters Distress Oxide Spray.  I layered it with a piece of design paper purchased on Etsy.  I cut a scrapbook paper shape with a die.


I mixed some of the Shabby Shutters Distress Oxide Spray into white modeling paste to tint the paste and pressed it through some stencil designs.


(I changed my mind for the die cut paper)... I glued everything down, stamped and embossed the bunny and greeting, inked the edges of the postcard with Peeled Paint Distress Ink with a final darker edge using Walnut Stain Distress Ink.


When my postcard was finished, I glued it to a heavier 98lb mix media paper.

A mysterious dark blotch appeared that I tried to fix but did not work well.  The 93 year old eyes of my recipient are not even going to see that.  That’s what I’m telling myself.


Normally our Easter weather is snow or rain or howling wind.  But this year here in Wisconsin in the USA, we are being promised gloriously nice weather for the Easter weekend.  What a wonderful Easter gift.

March 2021 Calendar Journal


That was a whole month of fun!