Tuesday, August 10, 2021

Little Things Art Journal Page

It’s the little things that make life big.


The theme this month at Art Journal Journey is TYPE.
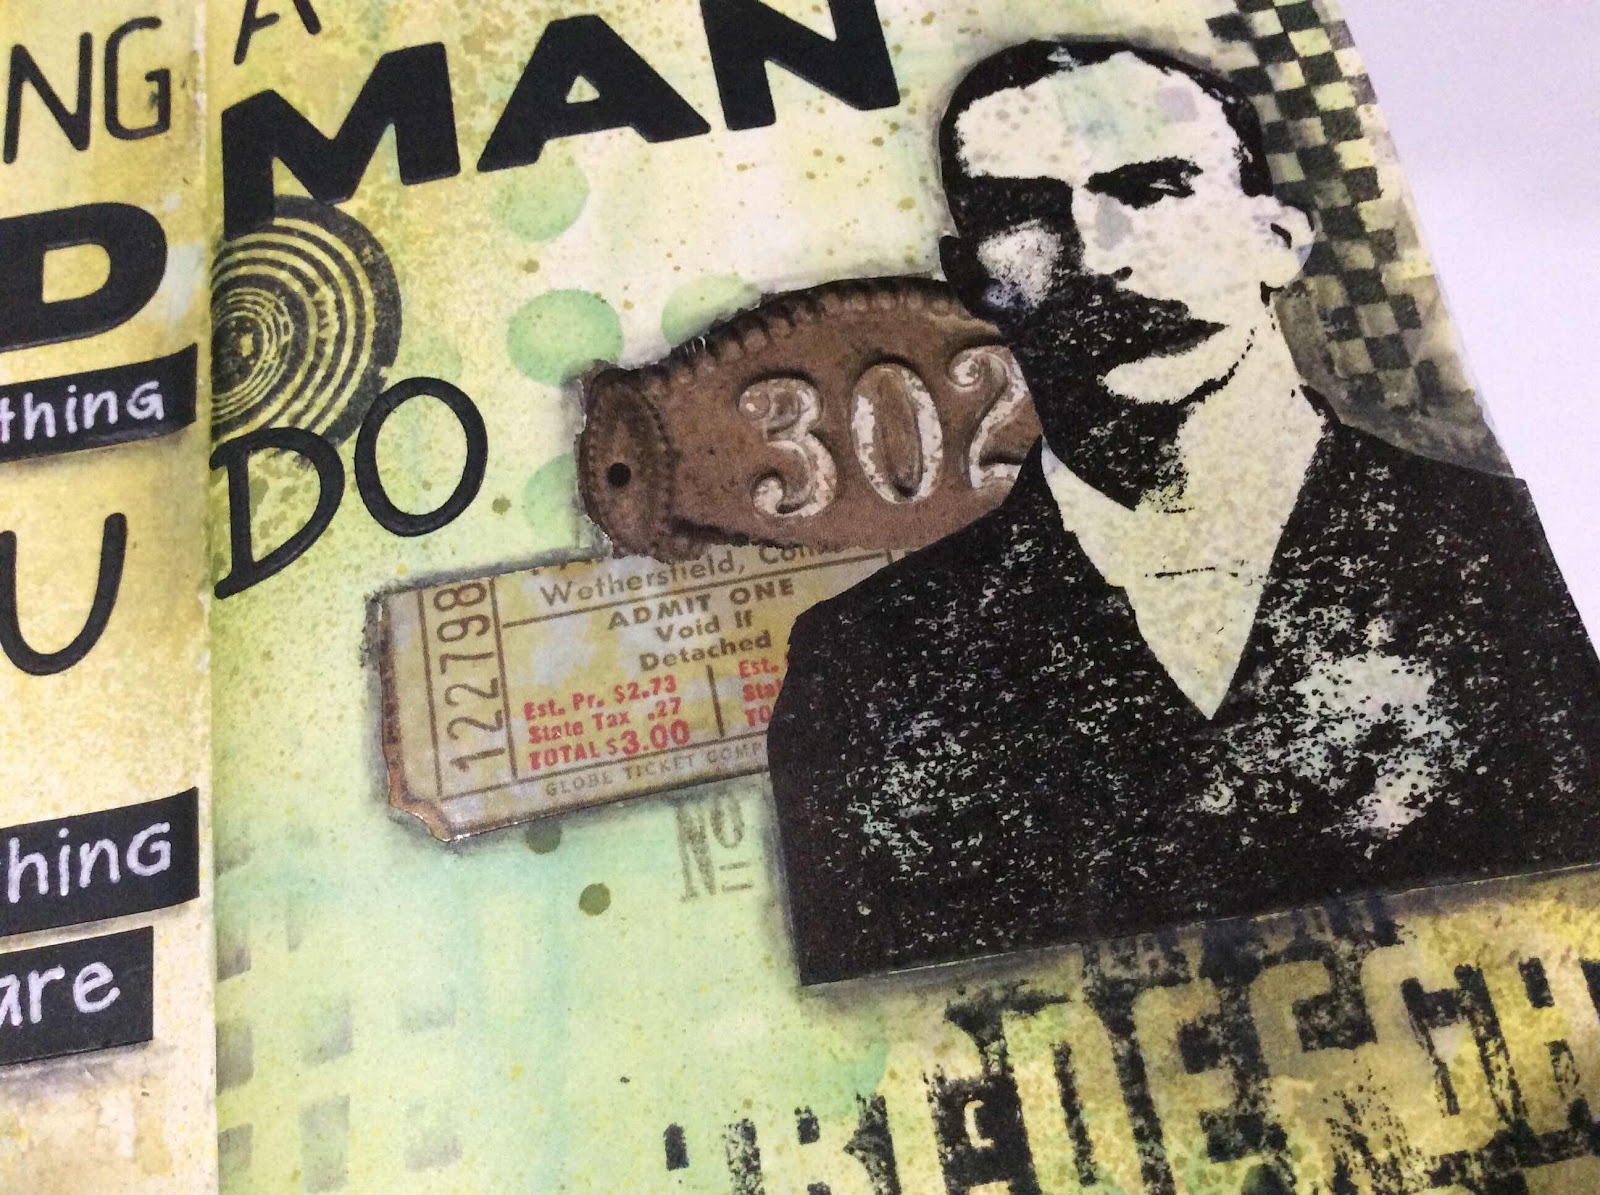
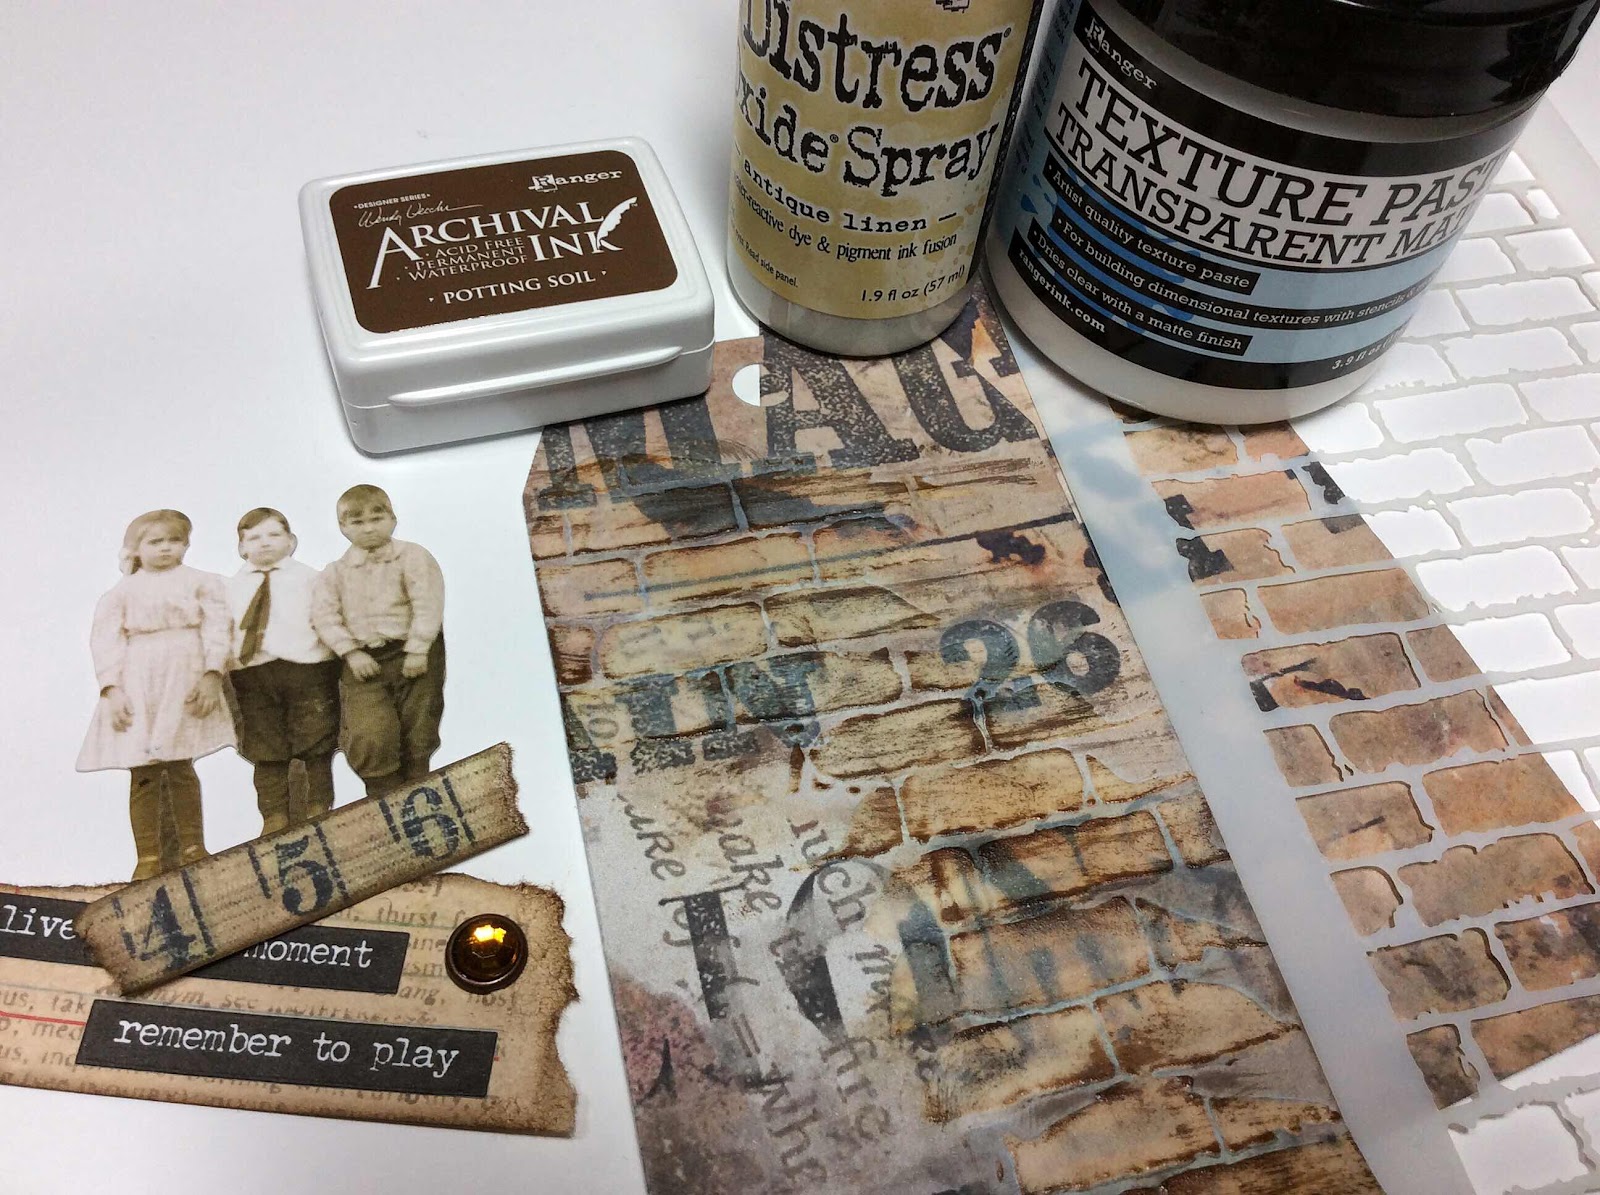
The 3D embossing folder I used to emboss the cardstock is type letters from the good ole days.
A 3D embossing folder works very similar to regular folders but it makes a deeper impression.  Very cool.  
(See Tera, I paid attention when you explained.)


I then began to add color to the paper.  First by inking one side of the inside of the folder with Distress Ink Tumbled Glass.  I spritzed the paper lightly with water then inserted it into the folder and ran it through the BigShot.  The ink transferred to the paper.  I repeated that process to get more ink on the paper.  With a blending tool I rubbed on Distress Antique Linen over the letters and some on the background.  I also blended some Distress Oxide Cracked Pistachio on the background.  I highlighted the letters again with Distress Ink black soot.


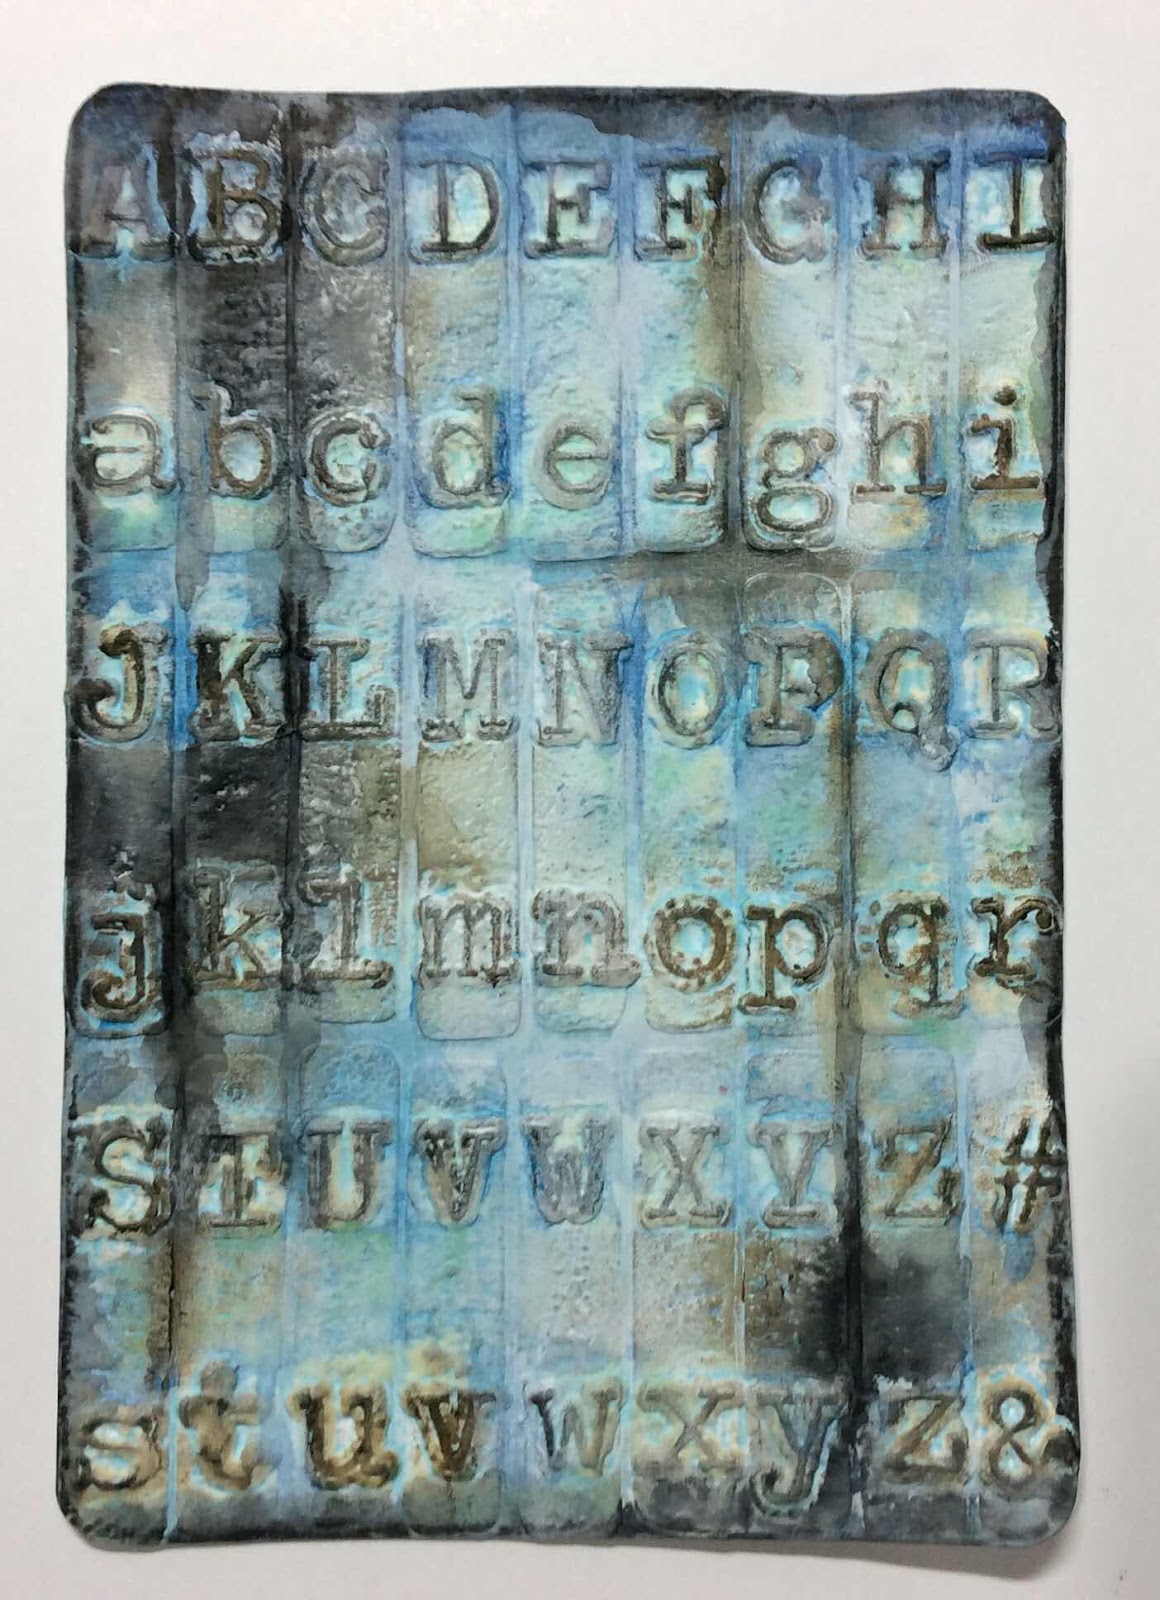
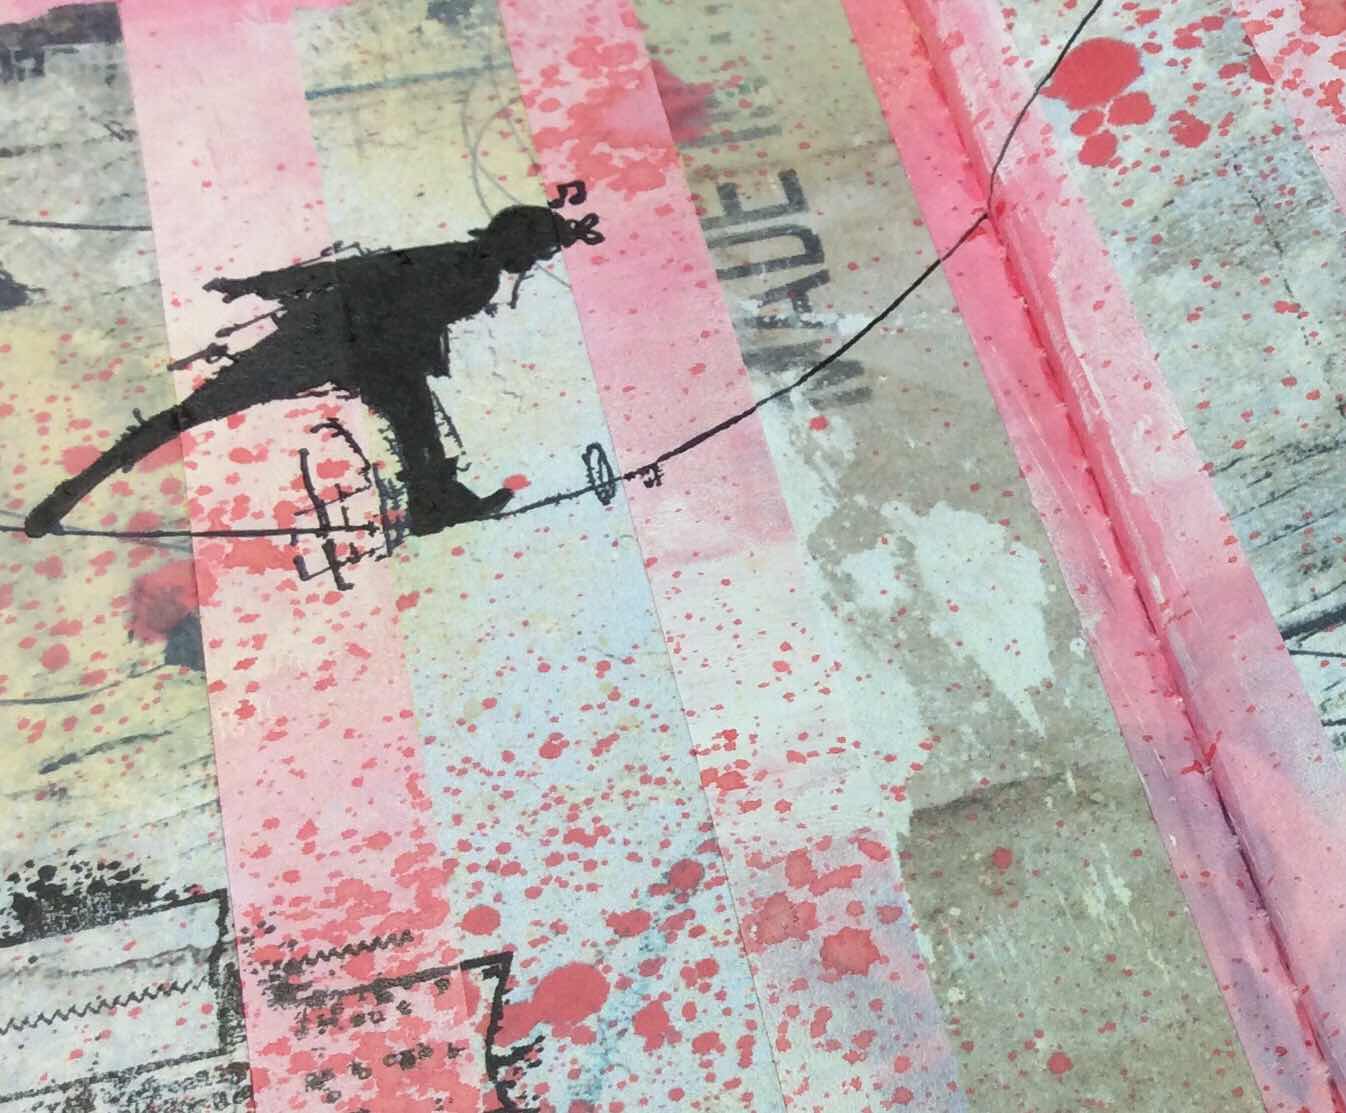
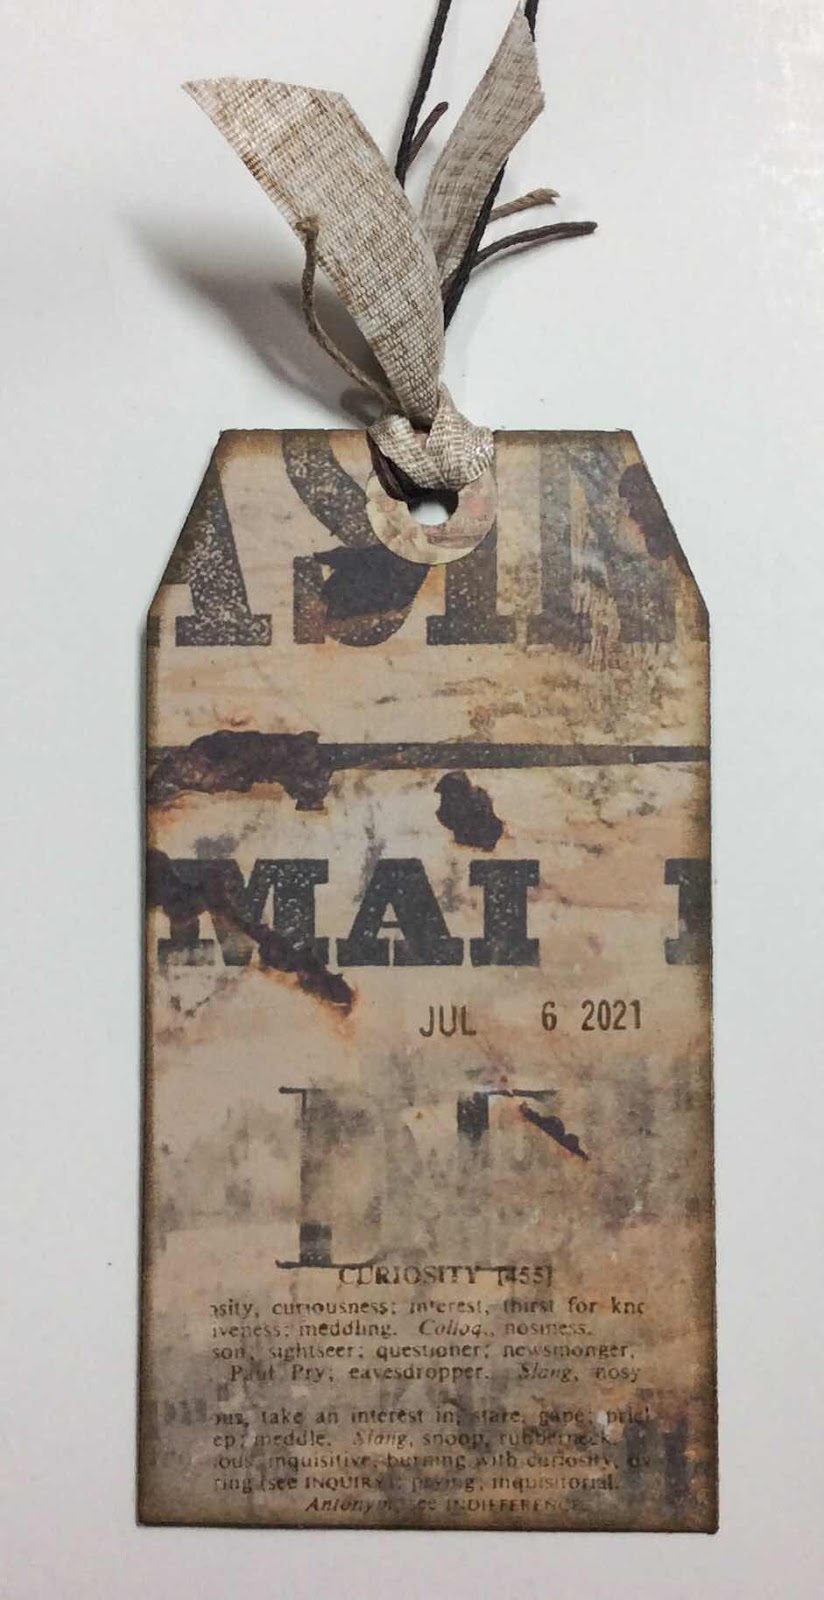
I then used an Stabillo All pencil and a water brush and my finger to add the blacker spots and make drips and darken the outside edges.  When I was ready to add this to a page in my journal, I thought I wanted a checkered border around the page.  That looked waaayy too busy.  So I painted over the checks with heavy body white acrylic paint a couple of coats or so.

I used Washi tapes on the outside of the book page.  That added to making the checkered board more subtle in the background.


Then I glued the embossed paper to the page.


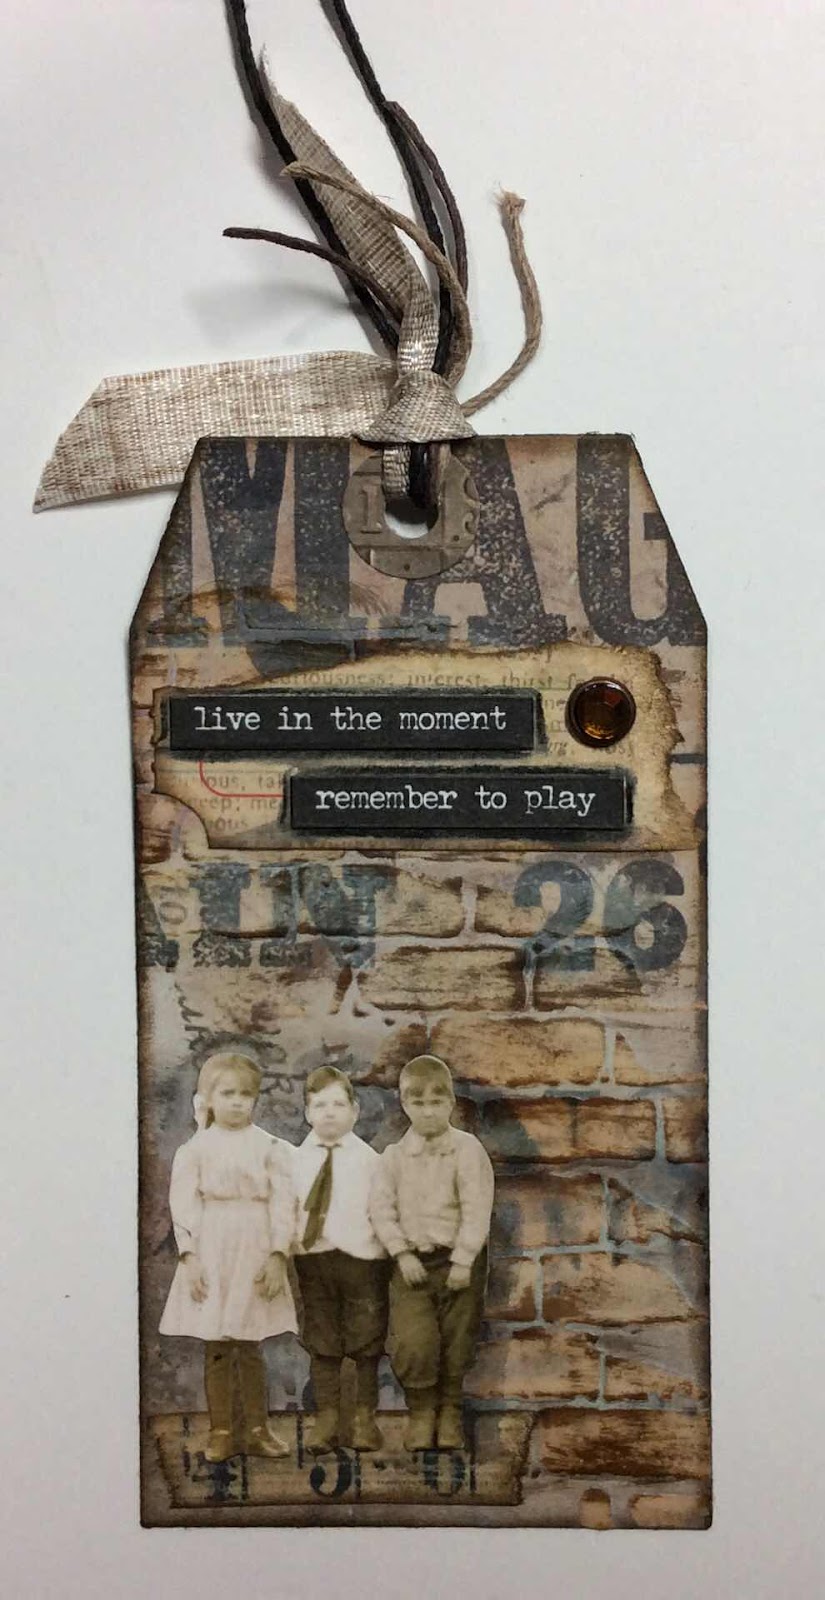
And added the Tim Holtz paper doll girls, shading around them with a graphite pencil.


  At the top of the page I added the typed small talk sticker sentiment.


Definitely got my grunge on for this page.

Linking to Creative Artiste Mixed Media Challenge Anything Goes
Linking to More Mixed Media Challenge Anything Goes

Friday, August 6, 2021

Awful Art Rescue

Another awful art rescue.


It began as an art journal page.  But I got ‘ART’ crooked on the page.  I couldn’t live with it.  It was the only part of the page where modeling paste was used so it really stuck out.  I literally tore the page out of the book and put it in the trash.  Of course the next day I pulled it out thinking I could save part of the page to make a postcard.


I cut the page in half.  I added modeling paste through a numbers/alpha stencil.  I really liked how it looked.  So much so that I knew I would never mail it.  That bit of success encouraged me to try and fix the other half into a postcard.  


‘ART’ is still crooked, but not quite so much as it was and I can live with it.  Had I straightened it more, then the other parts of the card would be crooked.  I needed a happy medium for all elements.  I did a bit more fine tuning on both postcards.  They were then decreed keepable together.


Since I was not going to mail these postcards, I decided they needed to turn back into an art journal page.  My new struggle was to create a background for the postcards.  There’s quite a bit of paint adjusting on that page...too light...too dark...not light enough...then finally just right.


For this journal page I used acrylic paints, Gesso, modeling paste, stencils, Distress Spray Stain, rubber stamping, Distress Ink, Distress Oxide Ink and Distress Crayons.

I’m linking my journal page to the following challenges:
Art Journal Journey for this month’s theme TYPE.
Creative Artiste Mixed Media where the challenge is always ANYTHING GOES.
More Mixed Media Challenge ANYTHING GOES with BRIGHTS

July 2021 Calendar Journal


Monday, August 2, 2021

Adventure Art Journal Page


I’ve managed another keepable art page spread in the stitched journal.
2 spreads down, 23 to go.


The pages in this journal are pre designed.


I’ve brayered on some heavy body white acrylic paint to disguise the web design.  Then glued down some left over strips of printed papers from another project.  I then sprayed Scattered Straw Oxide, then at very close range I sprayed Worn Lipstick Spray Stain.


Stamping on the mixed mediums for the solid black figure left light and dark sections of the image.  I’ve tried to disguise that fact as best I could.  I used archival ink so I’m not sure why that happened.


I’ve stamped the alphabet on the rough side of tracing paper with Distress Ink Black Soot.  Then tore around the edges.


I glued that to the page.


I added some number stenciling and stamping.  Lastly I added the small talk sentiment.  Oh, and a torn strip of text at the bottom to cover up a slop mess that didn’t turn out well.


I’ve also made a mixed media adventure postcard


Although tight rope walking will not be my great adventure, I’m up for closer to the ground adventures.

I’m linking to Art Journal Journey where the challenge this month is TYPE.  As text is a favorite part of journaling for me, I expect to participate with more than a single entry this month.

Thursday, July 15, 2021

Challenging Art Journal

I used this particular Dylusions journal for 2 years of calendar journaling.  I thought I would use it again so I ordered another.  Then I changed my system ... again.  So I have the journal.


I’m going to try it as an art journal (it’s original intended use).  The challenge with it is that I can’t just tear out bad pages.  The pages are stitched.  This is why I like a spiral bound journal.  I can discard bad art pages.  
So I began altering the cover.  I found some text gift wrap tissue to glue over the existing cover.  (Sorry Dyan Revealey)


Then I stopped.  I realized I didn’t want to put the time in to put art on the cover if the inside pages might not work out.  My personal challenge with this is all double page art spreads.  There will be 24 page spreads.  They all have to be keepers.  That’s the scary part for me.  My art pages are not always keepers.  They don’t need to be perfect, just keepable.

One down, 23 to go!


The inside covers need to be used and they are not designed.  They are an off-white color.  First challenge was to figure out how to blend it with the existing color and design.  I used Distress Spray Stains.  Good enough (keepable).  So I did some stamping and stenciling.

Next I wanted to use this guy.  I stamped him on the rough side of tracing paper.  Then cut him out.  I like the transparency of the tracing paper when it is glued down.  I used spray glue.


I then added some ephemera.  These pieces are all from a Tim Holtz spiral bound stickers booklet.  The stickers are quite thick.  I wanted them quite thin so I peeled the design layer away from the sticker layer.


And a little more ephemera.


I wanted some words but didn’t know what.  I searched the internet for man quotes or sayings.
I finally came upon this quote by Luvvie Ajayi and knew right away it was the one.  It has meaning for me.  The words in black are die cut and in white they are handwritten.


I now have my first keepable page spread!  I’m so happy.  But will I be able to do this 23 more times???  I will certainly try!


I’m linking this mixed media art page to Creative Artiste Mixed Media Challenge Blog

Tuesday, July 13, 2021

Altered Junk Mail and Craft Bags

I’ve had a bit of play with these junk mail return envelopes.


I watched a couple of YouTube videos then dove right in.

I was about to write a letter to my pen pal so I decided to present it a bit unusually.  

You seal the envelope, cut it to the size,  then trim the open corners.  Fold down one of the top flaps.  You then have a pocket.


Cover the various parts that show with decorative papers and embellish as desired.  I tucked my letter inside the pocket then put it all in a regular envelope for mailing.


I next made tags for birthday gifts.  They are made the same way as the letter pocket.


These were fun to make.  They are kind of tedious to make but it’s so surprising to see a big transformation from a junk mail envelope.


I had some fun altering boring craft gift bags.  First I slapped some Gesso on the bag fronts.


Next I chose some ephemera pieces to glue on collage style.  These are stamped and/or photo copied onto tracing paper.  I like the transparent look that tracing paper provides.  I glued all the pieces onto the bag, added some stamping and finished the bag with a die cut greeting. 


The second bag is made similar.  I began by gluing a piece of decorative paper over the Gesso.  Then added a bit more Gesso over the paper design to mute it somewhat.  This bag includes some washi tapes and a small talk sticker.


The backside of the bags looked so plain.  I made tiny tags to hang there.  


The tags are decorated on both sides so if they get flipped, they are still fun looking.


These are not very large bags.  About 8” tall and 5.5” wide.  I have a lot of them to use up.


I don’t really have many occasions when I actually give a gift (other than these two people).  So I don’t know how many bags I will get to alter.  These bags were returned so that I’d fill them again next year.  Ha!  Maybe I’ll try some Christmas bags next.  I hope to improve on my altering designs.

Thursday, July 8, 2021

Vintage Art Tag

The theme for the Tag Tuesday challenge blog is VINTAGE.


Vintage is easy when any of the Tim Holtz paper dolls are involved.

I started this tag by die cutting the tag shape from digital printable paper I purchased from Etsy.  I stenciled a brick wall with Transparent Texture paste tinted with Distress Oxide Spray Antique Linen.  It didn’t show as well as I hoped it would so I lightly blended over the bricks with Archival ink Potting Soil.  That was more the look I was after.


I then die cut another tag shape from a sturdier paper, 98lb Canson Mix Media to sandwich the printed papers onto.  I then added my ephemera pieces and inked around the outside edges.


I didn’t need to do much on the back as the paper was doing all the work for me.  I just added some text  with a favorite ‘Curiosity’ stamp and the date.  I also stamped the same text on the seam binding.


Vintage and grunge are a favorite style of tag for me.
This tag challenge runs through Monday the 12th of July.  Come join in the fun.