Friday, February 13, 2015

One More Valentine

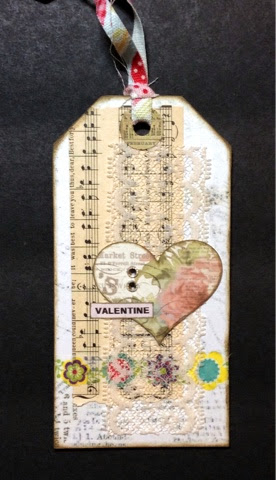
A tag.  Because I seem to be making a collection of them now.
This Valentine tag is inspired by the similar postcard in my previous post.  


Front

Back

I've had a great time with Valentine art this year.  I don't normally have much success with ideas for Valentine's Day, so this was fun.

HAPPY VALENTINE'S DAY
xoxo
Annie

Tuesday, February 10, 2015

ThIs Love-ing Time of Year

The Sunday Postcard Art theme this week is Thoughts of Love.  And I've had lots of loving thoughts for my friends and family. 


This first postcard is my "pretty" favorite. 

These next two are my "fun" favorites.  They've been mailed but I haven't heard yet if they've been received. There was a little Valentine note inside the zip pocket. I'm anxious to know if the notes were there when they received the postcard. 


This next little hearts postcard was fun to make but I don't know who to send it to. If you'd like to receive it, speak up. 


This next is just here with me because of the fluttering butterfly. 


I also made an ATC. But I don't make ATCs.  So I plan on punching a hole in it so it turns into a tag. 


I have another tag in mind, so I hope the DragonsDream blog has a Valentine theme this week. 

Love to all my blogging friends, 
Annie

Friday, February 6, 2015

The Collector

The current challenge theme at DragonsDream blog, Tag It On is to use the color orange and a letter(s)


I finally stopped resisting the purchase of these fun letter punches.  After punching enough letters for my words, there are extra letters not used.  I saw on Pinterest where someone had used extra sticker letters on a background and then painted over them.  Yes, I glued each individual letter down on this background.  The patience I possess to do some tedious things even shocks me.


I used the piece I punched the letters from for the backside of my tag.  


I love tags!  

xxx
Annie

Wednesday, February 4, 2015

Snowball Quilt

I've seen lots of snowball quilts.  But when I saw one with green and white corners, I immediately saw those corners in my mind as black and white.  And I had to get started making that quilt.  


My granddaughter has an important birthday this year and I thought with the black and white it might make into a fun teenage quilt.  (I think I was right about that).  


I didn't like the fact that her favorite color is blue because my least favorite color is blue.  When I found the Horizon Layer Cake bundle, I thought, that's blue enough for her and I think I could work with that myself.  Then the bundles arrived in the mail, and I thought what old lady prints they are.  But I still liked the colors.  So the quilt began.  And now it's finished and I'm quite happy with the way it turned out.  


I kind of think the fun-ness of the black and white corners and check make the old-lady-ness of the prints disappear.  This finished quilt measures 60" x 80.5"  

xxx
Annie

Saturday, January 10, 2015

Recipe Cards

I've gotten back to working on my recipe cards.  I began making these with fabric, but after the first two, I realized they were going to be a chore.  I know this because the third card was started and has been in pieces ever since.  But now that I'm back paper crafting, I'm actually getting some new cards made.

 
I appear to be stuck on a paper theme here.  I need to use up some (lots) of this paper collection pad.  I like these, but I want the recipe cards to have a mixed collage look throughout the box.

 
I want to avoid category tabs.  I hate looking through all the cards in a category to find the one I'm looking for.  And sometimes I've no clue which category it fits. 

 
Once there are several or lots of these, I'm not sure it's going to be any easier to find the recipe I'm looking for, but I think I will enjoy the search.  LoL

xxx
 Annie
Chief Cook and Bottle Washer

Sunday, January 4, 2015

New Man in Town

The inspiration word this week on the Sunday Postcard Art is NEW.

And there's nothing like a new man in town to bring the three spinster sisters out on a mission to be the one that makes him hers.  Poor guy.


I've no clue at all what brought this to mind, but it was fun to play around with a little humor.  Yay I got to play the challenge two weeks in a row!

Keep an eye on your man ladies.
xxx
Annie

Monday, December 29, 2014

Girls Wanna

I've been watching the Sunday Postcard Art themes for a couple of months, hoping to squeeze out some arty time if a theme struck my fancy.  Mostly it's been lack of time keeping me away from my play space.

But this week, the Anything Goes theme had me pulling out all my unfinished postcards to see which one I could finish.


 These girls were already stamped on the blank postcard.  


I colored them in, drew them a tall bench to sit on, inked the background and stamped the checked edges.  "GIRLS" is from a roll of alphabet Washi Tape.  I cut apart the letters to spell the word.   "just wanna have fun" is typed with a label maker and inked, then trimed for size.  "Girls just wanna have fun" is an old motto of mine that I just wanna get back to.

Thank you for visiting.  Now go have some fun!
xxx
Annie

Sunday, November 30, 2014

Merry Christmas Tags...

...Instead of cards
 
I've had the idea to send out a select few Christmas greeting "tags" instead of "cards" this year.  These are styled traditionally for my recipients. 

 
I used 3-D stickers, punched shapes, and wooden birds.
 
This flying geese tree was made from the corners I cut from the tops of the tags.


This one I found on Pinterest here
 
 
The backs.  
 

The fun will be that they can be hung on the tree, a cupboard knob, chair finial, other decorative hook...  Saved as a decoration is so better than tucking cards into a drawer (never to be seen again).


And finally, of course, one for me in a style I currently enjoy. 


Merry and bright to all.


xxx
Annie

Sunday, November 9, 2014

BE - Envelope Mail Art

BE ..... 

Sometimes it takes several people and personalities to get todays mail delivered.

I've no clue why I described this envelope that way.  There was no story or hidden meaning behind the design.  I just wanted to take all of my smaller face stamps (that I had at the time) and stamp them on one envelope.  On my blotter pad I noticed that I had blobs of color mixed with stamping and that provided the inspiration to blot on various colors around each image.  When that was done, postage stamps with faces came to mind, so I added them to the crowd.  After that I came across a rubber stamp of all those words, stamped them on tracing paper, cut them apart and spay glued them to the envelope.

Happy Mail Day
xxx
Annie

Sunday, November 2, 2014

Fall Leaf Tutorial

It's only been a year since I was asked for a tutorial for my Fall Leaf.
 
 
Not bad, eh?  Except that I forgot and was inadvertently reminded that I wanted to do this for Fall. 
(Thank you, Joelle, for the nudge)
The photos are not great, but they are clearly instructional.
 
First off, draw, trace, or photocopy a leaf to the actual finish size you will want.  Be sure your leaf can be divided nicely.  Then trace the outline to the paper side of Wonder Under.  (Or any fusible you choose).
 
 
Next, mark the dividing lines on the fusible and slice/cut the pieces apart. 
 
 
Trim around the outer leaf area.  Also separate one lower leaf section from the stem as shown below.
 

Fuse each leaf section to your fabric selections.
These leaves can be any coloring you choose ... orange, red, yellow, green, brown ...


Next, trim each section right on your traced lines.  Lay the pieces together as close as possible on your background fabric.


Fuse them in place.


First stitch closely around the outside edge of the leaf design with a short-ish straight stitch.
 
When you begin to sew the sections, with bating, they will want to separate slightly.  I filled this space first with a row of straight stitch. 

 
I then go back along that row stitching next to the first stitching and add the leaf veins by stitching out several stitches then coming back along side the first stitches.
 
Once the veins are sewn, I shorten the stitch length and I stitch the leaf sections together with a narrow zig zag stitch just wide enough to catch both fabric pieces of the leaf sections and give them that heavier looking main vein.
 
 
Now, if that isn't as clear as mud, I am more than happy to clarify anything that might be confusing.


 Happy Fall
 
xxx
Annie