Saturday, March 4, 2017

February is gone already.  

I'm still finding my way with this new style of calendar journal.  I really struggle with getting out of the holiday event themed month.


I'm going to try being more concious of that as I go along.   That seems to be something that is so ingrained into this old mind.


March is not going to be all green or have anything to do with leprechauns.

May March bring us many Spring weather days!

Monday, February 27, 2017

Steampunk Cards

I bought a new stamp.  Thinking the bird would work well cut out and placed on any variety of backgrounds.  I didn't like him cut out.  **sad face**.  I was immediately sorry I bought the stamp.  I have too many stamps that stare back at me with the look of 'why did you buy me?' 

But I have been admiring lots of art made with blotches of watercolor with a stamp image over the top of the color.  I love the ones I see.  I don't yet understand watercolor and always end up with a brown mess.  I decided to try the style/technique with Distress Inks.  


There aren't process photos because I never think anything will get past the rubbish bin.  What I did was use an orange Distress ink pounced in the center of the card where I thought the bird would land using a little dauber thingy.  Then went around the orange with the lime color.  Then I spritzed it with water. Dried it a bit with paper towel.  That took off too much color so I just lightly daubered it again.  No more water.


Then I stamped the image with Archival black ink.  After that I added some touches of teal in small areas with a foam make up tool.  I then used more foam make up tools to add deeper color to the bird.  Splattering my art uncontrollably scares me, so I "dotted" the piece with a black maker and a white gel pen.  In the end I added some wood and metal gears here and there.


The envelope was next.  That chevron stamp is another one I love and can never figure out what to do with it.  I think this worked pretty good.


Here's how I colored in the chevron with daubers. 


I love this lettering guide.  It requires the use of very fine pens. I use my Juice .38 gel pens.  I love the very fine lettering I get.


Ready to mail.


I love how this Thank You card turned out.  So much so that I couldn't part with it until I tried to reproduce it as an art postcard that I could use for my postcard swaps.  No one could be more surprised then myself that I managed to be successful with this reproduction.


I'll definitely be trying this style again.

Happy Mail Day!

Thursday, February 23, 2017

Birthday Wishes Card

My very far away yet very dear blogging friend had a birthday recently.


Our art brought us together while our style and techniques are worlds apart.  It is the most wonderful thing to find an artistic friend then learn you have real life in common too.


Inspiration from Pinterest, scrapbook paper, die cutting, rubber stamping, fussy cutting.

Happy Mail Day!
xxx
Annie

Monday, February 13, 2017

Valentine Mail Art

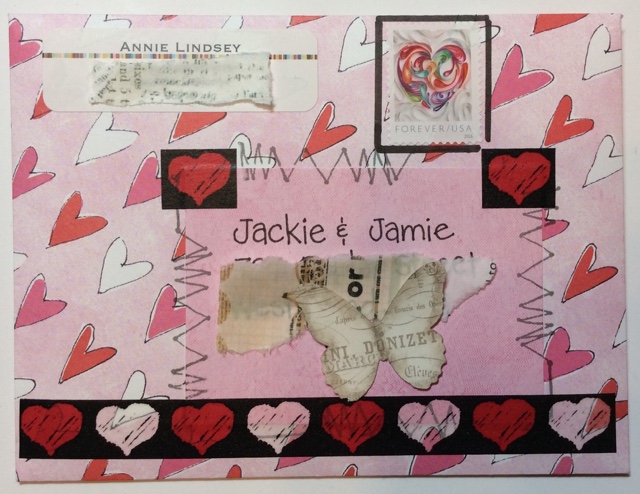
For me, it is such a joy to collect the day's mail and find some mail art from a dear one to wipe away the disappointment of junk mail and bills.  So I love making that happen for others.  Not to mention that it's the best excuse to keep playing!


This card is my favorite.  The photo doesn't really show its 3-D appearance using pop dots and beads.  I made an envelope from old paper I never seem to choose for anything.


This postcard was fun to create off-the-cuff.  Why can't I remember to take a photo BEFORE I address the mail??? 


This art postcard got made because I wanted to try that idea of adding an h and an e to the "follow your art" rubber stamp.  I found a piece of cardstock that I had played with awhile back for  a water coloring technique.  


I've decided I love creating Valentines as much as I love creating Halloween art.  Well, at least this year anyway.  

Happy Valentine's Day!
xxx
Annie

Saturday, February 11, 2017

Vintage Romance

This week at the Sunday Postcard Art challenge, we are challenged to create a VINTAGE ROMANCE themed postcard.


I hadn't intended to play as the notice came up a bit late for me.  But I was working on a birthday card and thought the background I made would work well for an art card.

I don't normally take process photos as I never know whether it will be a waste of my time.  I took some this time since it was my second try at this background.


I started with these two scrapbook papers.


Then I die cut these two background pieces.


Then a tiny bit of stenciling and little bit of rubber stamping and gluing and ink tinting and I suddenly realized I had a vintage romance postcard.


I had to stamp the correspondence side with my vintage Private Mailing Card rubber stamp.


Happy Mail Day!
xxx
Annie  

Thursday, February 2, 2017

January 2017 Calendar Journal


January already has come and gone!  But never will be forgotten.  No matter how boring.


I still miss the very first calendar journaling format when I look back at those months.  But this style is so much more workable for me.


Have a great February!
xxx
Annie

Sunday, January 29, 2017

Sepia Garden

The Sunday Postcard Art theme this week is SEPIA.

Time to jump in and play.  I pulled several Sepia bits of paper out, cut them up then stitched them together.  After that a splash of color was needed.


And the back is ready for finishing when the recipient is known.


Happy Mail Day!
xxx
Annie


Tuesday, January 24, 2017

Just Because Card

I so seldom take the time to make a "just because" card these days.  So it felt quite refreshing to do exactly that.  My daughter will be so surprised.

I bought a hearts set of rubber stamps that I have been resisting for almost 2 years.  But now I had to have them.  My Valentine card for my daughter is already done, but I so wanted to play with these heart stamps.  So a "Just Because" card was just the ticket.

I begin with an A2 (4.25" X 5.5") card made from 140# smooth white cardstock.  

When I only have one sheet of a scrapbook paper design I love, I photocopy it then cut the photocopy to the size of my card front and spray glue it on.


  Next comes all the fun stamping and inking.


And then when I love how the card turns out, I have a terrible time letting it go.  This one I thought would make a fun art postcard (that I could keep). You'd think that would be simple but it took 3 tries. And the postcard is a bit longer, so the larger heart worked better here.


I think this design has room for another play day.  I can see adding a small stamped "h e" in front of "art" to change the sentiment to "Follow your heart". Do you see it?  :-)

Happy "Just Because" mail day!
xxx
Annie

Saturday, January 7, 2017

January Cards

My January cards are inspired by some scrapbook borders I saw on Pinterest.  I thought I'd try the idea on my scrapbook pages (but who knows when that will happen).  So I took the inspiration to my cardmaking (which is my current passion for creativity at the moment).


They don't look anything like the Pinterest borders, but that's why we call it inspiration.


I've been having some fun with foil and glitter cardstock.

This thank you card is for a guy.  I was going for an industrial look.  That was pretty fun to work on.

The foil is reflecting and looks yellow, but it's really silver.

This little Tim Holtz punch birdie is turning into quite the family and showing up in many of my cards.  


All the teeny tiny rhinestone gems and metals are for nail art. But I have trouble getting them to stick well and stay on my nails.  Now they are a favorite paper crafting supply.

If I could keep my nose out of books, I could have half a year of cards made already.  But the stories keep calling to me and I must answer.  I love to read.

Greetings!
xxx
Annie

Tuesday, January 3, 2017

Calendar Journal - Year Five

I'm beginning year FIVE with my calendar journal project.

Obviously I love documenting a bit of each day.  My struggle has been the format.  Yep, I have another new format going.  This might be the one...***have I said that before?...snicker***. 

Three months of 2017 are ready for the day's happenings.


It's pretty simple.  I just need this one template.


I photocopy my template and cut away the blocks I don't need for that month.  Then I number the days.  These templates will work for whatever month starts on these days.  From here I just choose a fun piece of scrapbook paper and photocopy the template to the scrapbook paper.  From there just a little bit of artsy/craftsy page deco is needed.  This is working for me nicely.


Depending how the days fall for the month, some months will allow for more deco fun than others.

I couldn't really wait for January to give it a try, so I began with December 2016.


Here's to the bits and bobs of the 365 days of 2017.
xxx
Annie