Friday, May 5, 2017

April 2017 Calendar Journal

Here is how April went along for me.  It's my birthday month...a day way at the end.  Which makes it more fun to celebrate starting at the beginning.  Starting with turning the plain calendar page itself into a birthday party.


I wonder what May has in store for me.  Fun I hope...
"Girls Just Wanna Have Fun"!

Tuesday, April 4, 2017

The Jell-O Box Project

My Jell-O box project is now my Distress Ink pads storage! 


It's on the crude side, but it's light-weight, and it serves the purpose.  Wood and plastic ones I viewed took up a lot of space, are thick and are quite expensive.  And maybe when I might want to add on, the same design might not be available.

I made these storage towers like this:  Collect jell-o boxes.  I did not mind eating all this jell-o.  Brand name JELL-O and Walmart brand gelatin boxes are not quite the same exact size, but they are pretty close.  I really needed to eat a variety of jell-o not just two flavors.


Open the boxes at the glued side.


Cut off the flaps on one side.


Then glue the ends back together.  Clamp them til the glue dries or at least sets.


Then glue them together.  I glued them as sets of two, then four, etc.


Clamping them until the glue dries or sets.


I use some Washi style tape to clamp the back ends.  I have several rolls of "why did I buy this tape". 


My towers are 10 boxes high.  I don't bother removing the tape as it won't interrupt anything.


I then cut pieces of mat board to make each tower sturdy.  It really is quite sturdy.


My ultimate plan is to set them all together side by side and cover them with some fun scrapbook papers.  However, me and them are not in our permanent space at this time, so I'll use them for now in a configuration that space allows for.  I'm just thrilled my ink pads are separated and easily pulled out for use.  And the great jell-o box size allows me to keep each make-up foam with the pad color.


I'm happy.  Imperfections and all.
Happy stamping and inking!

Sunday, April 2, 2017

March 2017 Calendar Journal

March was a fun month to document even though much of it wasn't really much fun at all.


I'm happy, as I feel I'm beginning to settle into a bit of fun in finding more artsy ways to make the month look.


It just isn't easy for me to be artsy in such small and many times odd sized spaces.  It's really giving this old brain a work out.  A 12"X12" layout would be easier, but I'm sticking with this 8.5"X11" size.  I'm kind of bull-headed like that.


Happy Day!

Saturday, March 18, 2017

Vintage Gentlemen Postcard

This week at the Sunday Postcard Art challenge blog, the theme is VINTAGE GENTLEMEN.  They are some of my favorite people for art.


I didn't take process photos as there wasn't much plan for this postcard.  These were most of the supplies I used.  He just surprisingly came together.  I kept thinking this card was going to go to the trash along the way, then suddenly it just felt right.  

I used the die to cut the upper left corner of the card then glued it over a dark paper to peek through the holes.  I then stamped my vintage gentlemen.  I put a mask over him and stamped the unreadable words behind him.  I then added washi tapes, trimming them around him.  Finally adding some shading around the image. 


The correspondence side.


Happy Mail Day! 

Monday, March 6, 2017

Chevron Challenge Mail Art

This envelope is the result of a mutual challenge between myself and Tera of The Crafty Sugar Addict to find new ways to use the large chevron stamp.


The quilter in me saw this possibility when I set the stamp across the room to stare at it.  The stitched address block fell right into place.  That large bird is another new stamp.  He wants to show up in everything these days.


Coloring in the quilt star.


Then coloring around the star. Then some stencil background design.  And drawing stitches around the star outside. 


I color in my bird with foam makeup tools.


I used an alphabet Washi Tape for Tera's name.


You can see Tera's Chevron challenge mail art Here.

Thanks Tera, I'm feeling a lot happier with my chevron stamp now.

Happy Mail Day!

Saturday, March 4, 2017

February is gone already.  

I'm still finding my way with this new style of calendar journal.  I really struggle with getting out of the holiday event themed month.


I'm going to try being more concious of that as I go along.   That seems to be something that is so ingrained into this old mind.


March is not going to be all green or have anything to do with leprechauns.

May March bring us many Spring weather days!

Monday, February 27, 2017

Steampunk Cards

I bought a new stamp.  Thinking the bird would work well cut out and placed on any variety of backgrounds.  I didn't like him cut out.  **sad face**.  I was immediately sorry I bought the stamp.  I have too many stamps that stare back at me with the look of 'why did you buy me?' 

But I have been admiring lots of art made with blotches of watercolor with a stamp image over the top of the color.  I love the ones I see.  I don't yet understand watercolor and always end up with a brown mess.  I decided to try the style/technique with Distress Inks.  


There aren't process photos because I never think anything will get past the rubbish bin.  What I did was use an orange Distress ink pounced in the center of the card where I thought the bird would land using a little dauber thingy.  Then went around the orange with the lime color.  Then I spritzed it with water. Dried it a bit with paper towel.  That took off too much color so I just lightly daubered it again.  No more water.


Then I stamped the image with Archival black ink.  After that I added some touches of teal in small areas with a foam make up tool.  I then used more foam make up tools to add deeper color to the bird.  Splattering my art uncontrollably scares me, so I "dotted" the piece with a black maker and a white gel pen.  In the end I added some wood and metal gears here and there.


The envelope was next.  That chevron stamp is another one I love and can never figure out what to do with it.  I think this worked pretty good.


Here's how I colored in the chevron with daubers. 


I love this lettering guide.  It requires the use of very fine pens. I use my Juice .38 gel pens.  I love the very fine lettering I get.


Ready to mail.


I love how this Thank You card turned out.  So much so that I couldn't part with it until I tried to reproduce it as an art postcard that I could use for my postcard swaps.  No one could be more surprised then myself that I managed to be successful with this reproduction.


I'll definitely be trying this style again.

Happy Mail Day!

Thursday, February 23, 2017

Birthday Wishes Card

My very far away yet very dear blogging friend had a birthday recently.


Our art brought us together while our style and techniques are worlds apart.  It is the most wonderful thing to find an artistic friend then learn you have real life in common too.


Inspiration from Pinterest, scrapbook paper, die cutting, rubber stamping, fussy cutting.

Happy Mail Day!
xxx
Annie

Monday, February 13, 2017

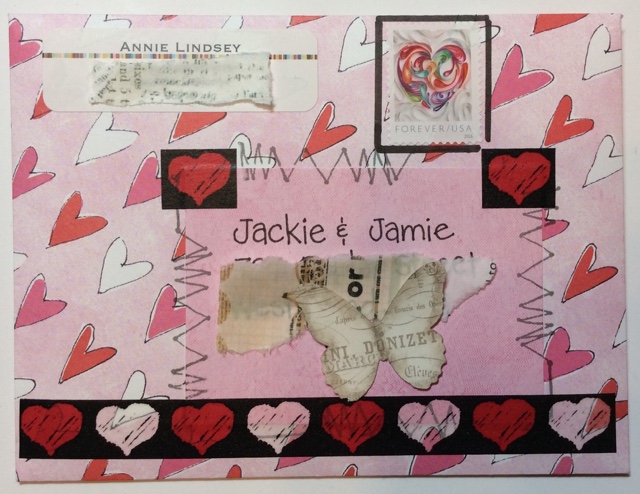
Valentine Mail Art

For me, it is such a joy to collect the day's mail and find some mail art from a dear one to wipe away the disappointment of junk mail and bills.  So I love making that happen for others.  Not to mention that it's the best excuse to keep playing!


This card is my favorite.  The photo doesn't really show its 3-D appearance using pop dots and beads.  I made an envelope from old paper I never seem to choose for anything.


This postcard was fun to create off-the-cuff.  Why can't I remember to take a photo BEFORE I address the mail??? 


This art postcard got made because I wanted to try that idea of adding an h and an e to the "follow your art" rubber stamp.  I found a piece of cardstock that I had played with awhile back for  a water coloring technique.  


I've decided I love creating Valentines as much as I love creating Halloween art.  Well, at least this year anyway.  

Happy Valentine's Day!
xxx
Annie

Saturday, February 11, 2017

Vintage Romance

This week at the Sunday Postcard Art challenge, we are challenged to create a VINTAGE ROMANCE themed postcard.


I hadn't intended to play as the notice came up a bit late for me.  But I was working on a birthday card and thought the background I made would work well for an art card.

I don't normally take process photos as I never know whether it will be a waste of my time.  I took some this time since it was my second try at this background.


I started with these two scrapbook papers.


Then I die cut these two background pieces.


Then a tiny bit of stenciling and little bit of rubber stamping and gluing and ink tinting and I suddenly realized I had a vintage romance postcard.


I had to stamp the correspondence side with my vintage Private Mailing Card rubber stamp.


Happy Mail Day!
xxx
Annie